This website contains affiliate links. Some products are gifted by the brand to test. As an Amazon Associate, I earn from qualifying purchases. The content on this website was created with the help of AI.
You’ll find endless creative possibilities with these simple DIY kids’ crafts using everyday items from around your home. Transform paper rolls into a colorful animal kingdom, create dreamy cloud art with cotton balls, or build a cardboard box dream house. Turn old socks into puppet friends, make foil sculptures shine, or design bug habitats from egg cartons. Get creative with newspaper hats, magical snow globes, and kitchen utensil stamp art. These fun projects develop fine motor skills and imagination while letting kids express their artistic side. Discover how these nine crafts can turn ordinary household items into extraordinary adventures.
Key Takeaways
- Transform empty paper rolls into animal figures using paint, construction paper, and googly eyes for an engaging wildlife-themed craft.
- Create sock puppets from old socks, buttons, and felt, then build a cardboard theatre for storytelling performances.
- Turn newspapers into decorative hats with simple folding techniques and personalize them with paint or stickers.
- Make snow globes using empty jars, glitter, and small toys, sealed with hot glue for a magical display.
- Craft insects from egg cartons using paint, googly eyes, and pipe cleaners to build a colorful bug collection.
Paper Roll Animal Kingdom

Looking to transform ordinary paper rolls into adorable animals? This fun craft project lets you turn empty toilet paper or paper towel rolls into a delightful menagerie of creatures. You’ll need paper rolls, paint, construction paper, googly eyes, glue, and scissors.
Start by deciding which animal you’d like to create. For a lion, paint the roll yellow or orange, then cut strips of construction paper for the mane. Want to make an elephant? Paint the roll gray, and cut out large ears and a trunk from paper. For a giraffe, paint the roll yellow and add brown spots, then attach a long neck made from paper.
Once your base color is dry, glue on the googly eyes. Add specific features like whiskers for cats, beaks for birds, or antlers for deer using construction paper cutouts. Don’t forget to create legs by cutting small slits at the bottom of your roll and folding them outward. You can make tails from pipe cleaners or twisted paper.
Create an entire zoo by making multiple animals and displaying them together. They’re perfect for imaginative play or as decorative pieces for a child’s room.
Cardboard Box Dream House

While paper roll animals make great small-scale projects, a cardboard box dream house takes crafting to the next level. You’ll need a large cardboard box, scissors, markers, glue, decorative paper, and any small items you’d like to use as furniture.
Start by cutting out windows and a door in your box. Make sure you’ve got an adult to help with the cutting. Next, create a roof by folding the top flaps or adding another piece of cardboard cut into a triangle shape. You can add multiple rooms by connecting smaller boxes to your main structure.
Now it’s time to decorate! Cover the walls with decorative paper or paint them in your favorite colors. Draw tiles or shingles on the roof, and add window frames using popsicle sticks. Create furniture using smaller boxes, bottle caps, or craft foam. Don’t forget to add details like a welcome mat, house number, and garden area.
For extra fun, add working features like a door that opens and closes using brass fasteners, or create tiny curtains using fabric scraps. You can even add battery-operated LED lights for a magical touch. Consider keeping your gardening supplies in a designated bag nearby when creating the outdoor landscaping for your dream house.
Cotton Ball Cloud Art

Through the magic of fluffy cotton balls, you can create stunning cloud artwork that brings the sky indoors. This simple yet engaging project requires just a few basic supplies: white cotton balls, blue construction paper, glue, and your imagination.
Start by laying out your blue paper horizontally – this will be your sky canvas. Before gluing, gently pull apart your cotton balls to make them extra fluffy and cloud-like. You’ll want different sizes to create variety in your cloud shapes. Next, arrange your cotton wisps on the paper to plan your cloud formation.
Once you’re happy with the layout, apply white glue to the paper where you’ll place each cloud section. Press the cotton pieces firmly but gently onto the glue. Don’t worry if they overlap – real clouds have lots of layers! You can add more cotton to make your clouds fuller or stretch them thinner for wispy effects.
For extra creativity, try adding a yellow construction paper sun, paper airplanes, or even cotton ball sheep “floating” in your sky. Let your artwork dry completely before displaying it proudly on your wall.
Foil Sculpture Adventures

Aluminum foil sculpture lets you mold and shape shiny masterpieces with nothing more than your hands and imagination. Start by tearing off a piece of foil about 12 inches long and lay it flat on your work surface. You’ll want to fold it in half to make it stronger, then begin forming your creation by gently pressing and molding the foil with your fingers.
Try creating animals, robots, or even abstract shapes – there’s no wrong way to make foil art! If you need more stability, roll several pieces of foil into balls or tubes and connect them together. You can also wrap foil around cardboard shapes to create a sturdy base for larger sculptures.
Here’s why foil sculpting is great for young artists:
- It develops fine motor skills and hand strength
- It teaches spatial awareness and 3D thinking
- It allows for endless do-overs since foil can be flattened and reshaped
Remember to smooth out sharp edges for safety, and don’t forget to display your finished sculptures where light can catch their metallic surfaces – it’ll make them sparkle and shine!
Sock Puppet Theatre
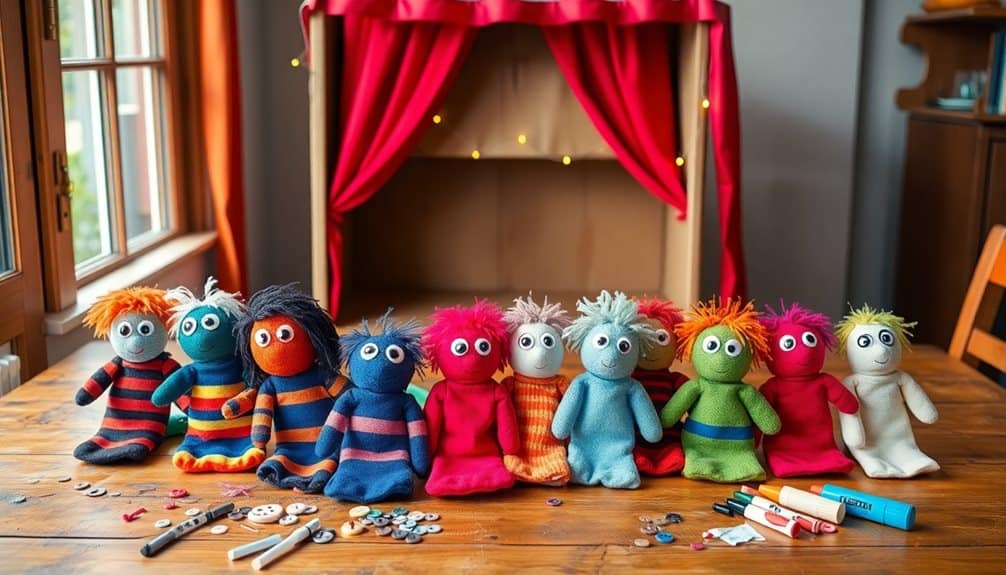
Creating sock puppets is one of the most entertaining ways to spark storytelling and imagination. You’ll need clean socks, buttons, yarn, felt, glue, and markers to bring your characters to life. Start by sliding a sock onto your hand to determine where you’ll place the features.
For the puppet’s eyes, you can glue on buttons or googly eyes. Create a mouth by cutting a piece of red felt into an oval shape and gluing it where your hand naturally opens and closes the puppet’s mouth. Add personality with yarn hair, felt ears, or a tongue – whatever matches your character’s design. Don’t forget to let all the glued pieces dry completely before using your puppet.
To build your theatre, transform a large cardboard box by cutting out the front panel. Paint or cover the box with paper, then add curtains using fabric or crepe paper. You can create a stage name banner and decorate the theatre with stickers or drawings. Set up your theatre on a table, gather your puppet characters, and you’re ready to put on an amazing show! Let your stories unfold as you move your puppets across the stage.
Paper Plate Aquarium
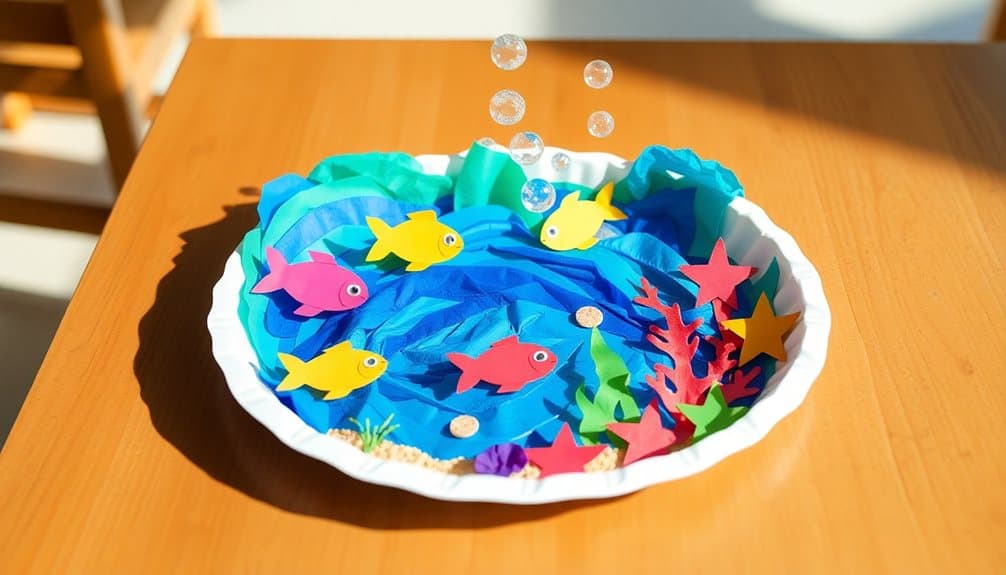
Moving from puppet stages to underwater scenes, a paper plate aquarium brings the ocean’s magic right to your crafting table. You’ll need two paper plates, blue cellophane or tissue paper, scissors, glue, markers, and colorful construction paper. Cut a large circle in the center of one plate – this will be your viewing window. Cover the hole with blue cellophane to create the water effect.
Draw and cut out various sea creatures from construction paper – think tropical fish, starfish, and seahorses. Add details with markers to make them come alive. Glue your ocean friends onto the second plate, arranging them in a playful underwater scene. You can even add seaweed strips and coral shapes for extra depth.
Here’s why this craft is special:
- It teaches children about marine life and ocean ecosystems
- It helps develop fine motor skills through cutting and gluing
- It encourages creative expression through color choices and design
Kitchen Utensil Stamps
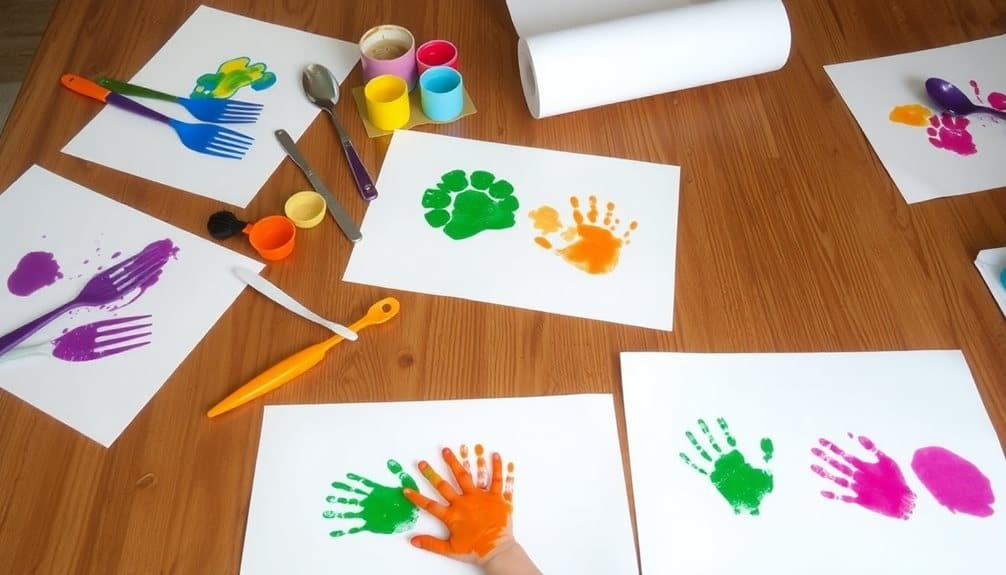
Simple utensils from your kitchen drawer can transform into exciting art tools for unique stamping projects. You’ll need paint, paper, and various kitchen tools like forks, potato mashers, bottle caps, or the ends of wooden spoons. Make sure to protect your workspace with newspaper before starting.
Pour washable tempera paint onto paper plates for easy dipping. Select your first kitchen tool and dip it into the paint, making sure to coat the surface evenly. Press the utensil firmly onto your paper, applying even pressure. Lift straight up to create a clean print. Try different angles and patterns with each tool – forks can make grass or hair, while mashers create interesting geometric designs.
Don’t limit yourself to one color or pattern. Mix colors, overlap prints, and experiment with different pressures. You can create animals by combining various utensil prints – try using a spoon’s handle end for eyes and fork tines for whiskers. When you’re finished stamping, let your artwork dry completely. Clean your kitchen tools thoroughly with soap and water before returning them to the drawer. Just like activated charcoal filters effectively absorb kitchen odors, paper towels can help absorb excess paint from your stamps between impressions.
Newspaper Hat Fashion

The classic newspaper hat stands out as a timeless craft that lets kids turn old newspapers into stylish headwear. You’ll need just a few sheets of newspaper, and in minutes, you can create a fun accessory that’s perfect for pretend play or dress-up time. Start by spreading a full newspaper sheet on a flat surface, then fold it in half lengthwise to create a strong base.
To make your basic hat, fold the bottom edges up on both sides to form a brim, then fold the corners into the center to create a pointed shape. You can secure any loose edges with clear tape if needed. Don’t forget to size the hat by testing it on your head as you fold.
- Decorate your hat with paint, stickers, or markers to create unique designs
- Add ribbons or colorful paper strips around the brim for extra flair
- Make multiple hats in different sizes for a family fashion show
Once you’ve mastered the basic design, try creating variations like a boat-shaped hat, a pirate’s hat, or even a fancy crown by adjusting your folds and adding creative embellishments.
Empty Jar Snow Globes
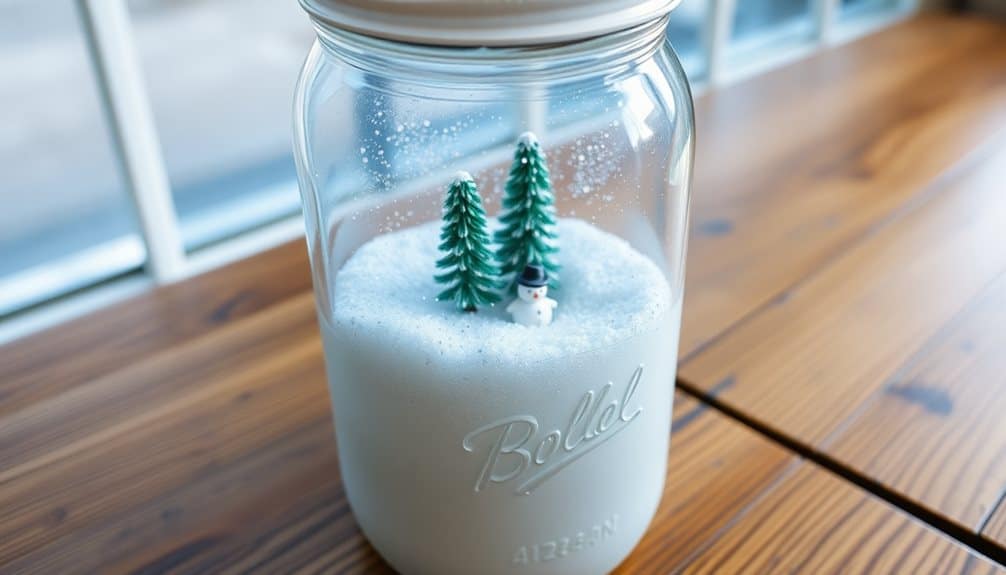
Creating magical snow globes from empty jars lets you transform ordinary household containers into enchanting winter wonderlands. You’ll need a clean jar with a tight-fitting lid, glitter, glycerin, waterproof glue, distilled water, and small plastic figurines or decorations.
Start by thoroughly cleaning and drying your jar. Glue your chosen figurine to the inside of the jar lid using waterproof glue, then let it dry completely. Fill the jar almost to the top with distilled water, leaving about half an inch of space. Add 1-2 teaspoons of glitter and 1-2 drops of glycerin – this helps the glitter fall more slowly, creating that magical snow effect.
Now comes the tricky part: carefully screw the lid on tightly while the jar is upright. You’ll want an adult to help seal the lid with hot glue around the edges to prevent leaks. Once the glue has dried, flip your snow globe upside down and watch your winter scene come to life! Give it a gentle shake to make the glitter swirl around your miniature wonderland.
Egg Carton Bug Collection
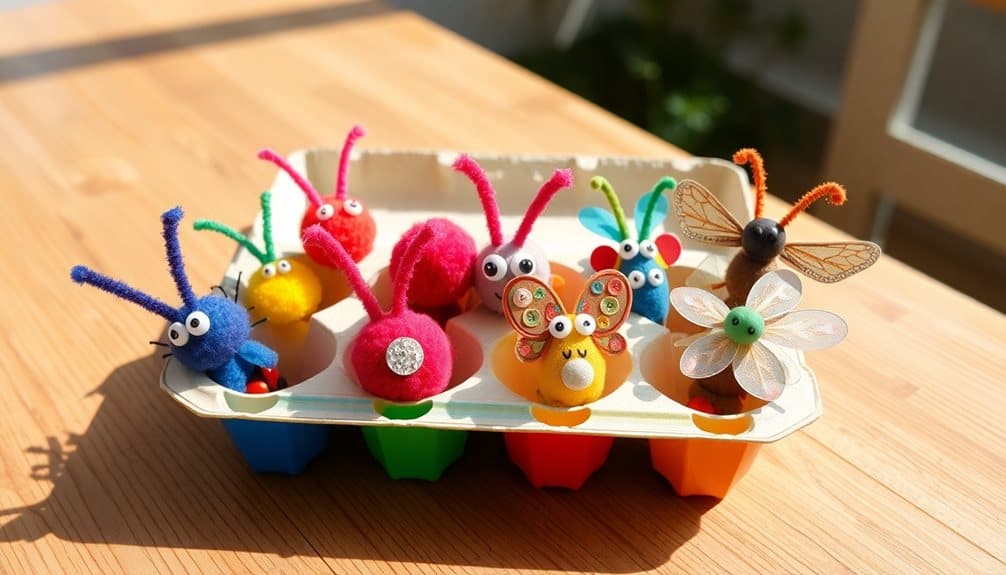
Every bug-loving kid can transform an ordinary egg carton into a colorful collection of creepy-crawly creatures. Start by cutting the lid off your egg carton and cleaning it thoroughly. You’ll need paint, pipe cleaners, googly eyes, glue, and scissors to bring your bugs to life.
Paint each egg cup in different colors – try red for ladybugs, yellow for bees, or green for caterpillars. Once the paint dries, attach googly eyes using craft glue. Create legs, antennae, and wings using pipe cleaners by poking small holes in the sides of each cup. Add spots, stripes, or patterns with different colored paint to make each bug unique.
This craft project isn’t just fun – it teaches important skills:
- Color recognition and creative expression through paint selection
- Fine motor skills development while handling small materials
- Basic insect anatomy learning through crafting body parts
Label each bug with its name using small paper tags or writing directly on the carton. You can even create specific habitats for each bug by decorating the inside of their cups with leaves, flowers, or twigs drawn with markers.
Frequently Asked Questions
What Age Group Are These Craft Projects Most Suitable For?
You’ll find these projects most suitable for children ages 4-10, with adult supervision for the younger ones. Kids under 4 might struggle with fine motor skills and following directions, while those over 10 may want more challenging activities. Remember to adjust the difficulty level – let younger kids handle simple tasks like coloring and gluing, while older ones can tackle cutting and more complex assembly steps.
How Long Does Each Craft Project Typically Take to Complete?
You’ll find most craft projects take between 15-30 minutes to complete, though some might run shorter or longer depending on your child’s pace and skill level. Simple projects like paper crafts usually wrap up in 10-15 minutes, while more detailed activities like painting or building might need 45 minutes. Don’t forget to factor in drying time for glue or paint-based projects.
Should Children Be Supervised During All of These Craft Activities?
Like a watchful eagle protecting its nest, you’ll want to stay close by during children’s craft activities. While older kids (8+) can handle simple projects on their own, you should always supervise younger children. Don’t leave them alone with scissors, glue, or small items they might swallow. You can gradually give more independence as they demonstrate responsibility and understanding of safety rules.
Can These Crafts Be Made by Children With Motor Skill Difficulties?
If you’re working with kids who have motor skill difficulties, you can adapt these activities to make them more accessible. Try using larger materials that are easier to grip, break down steps into smaller tasks, and provide tools like scissors with bigger handles or thick markers. You can also modify activities by pre-cutting materials or using adhesive strips instead of liquid glue.
How Can Craft Supplies Be Safely Stored Between Multiple Craft Sessions?
Time to tame that crafting chaos! You’ll want to start by sorting supplies into clear, labeled containers. Keep scissors, glue, and sharp tools in a separate bin that’s out of kids’ reach. Store paper flat in large folders to prevent creases. Don’t let markers dry out – always cap them tightly. Use plastic zipper bags for small items like beads and buttons. Stack your containers in a cool, dry place.

