This website contains affiliate links. Some products are gifted by the brand to test. As an Amazon Associate, I earn from qualifying purchases. The content on this website was created with the help of AI.
Kitchen makeovers don’t need a fortune. With a weekend, some effort, and fresh paint, you can revive your culinary space. Create a kitchen that feels brand new and inspires great memories.
I’ve done five kitchen paint projects. Each one taught me something new. The changes are always incredible. It’s about making a space that motivates cooking and gathering.
A full kitchen remodel can cost thousands. But a DIY paint makeover? My latest project cost just $95 for supplies. That’s the charm of budget-friendly updates – big impact, small cost.
Cabinet painting is a smart home investment. Two coats of enamel paint and new hardware can transform your kitchen. Valspar Cabinet Enamels from Lowe’s can make a huge difference.
Want to refresh your kitchen? Let’s explore weekend paint projects. You can transform your space without spending too much. It’s time to create a kitchen you’ll love.
Key Takeaways
- A DIY kitchen makeover can cost as little as $95 for paint supplies
- Two coats of enamel paint can dramatically transform kitchen cabinets
- Budget-friendly updates include new hardware and under-cabinet lighting
- Proper preparation, including priming, is crucial for a lasting finish
- Small projects like painting a backsplash can be completed for under $25
- Consider affordable additions like rolling islands or corner pullouts for extra storage
- Weekend paint projects offer significant impact with minimal time investment
Understanding Kitchen Paint Project Essentials
A kitchen paint project can revitalize your home. This budget-friendly renovation option offers many perks. With proper planning, you can finish it in a weekend.
Benefits of Painting Your Kitchen
Painting kitchen cabinets transforms your space dramatically. It allows for personalization and improves aesthetics. High-quality paints like Benjamin Moore’s Advance resist daily wear and tear.
These paints provide a professional finish. Sherwin Williams Emerald is another excellent option for durability.
Cost-Effective Kitchen Transformation
A DIY kitchen makeover through painting is wallet-friendly. You can achieve a fresh look for about $300-$400. This is much less than a full renovation.
Typically, you’ll only need one gallon of paint. This makes it an economical choice for homeowners.
Time Requirements and Planning
A basic paint job can be done in a weekend. However, thorough kitchen makeover planning is crucial. Stay-at-home parents should allocate 4-6 weeks for completion.
The process includes several steps. You’ll need to remove cabinet doors and hardware. Cleaning with a degreaser is essential.
- Removing cabinet doors and hardware
- Cleaning with a degreaser
- Sanding or using liquid deglosser
- Priming and painting
Proper preparation ensures the best results. Gather all necessary supplies before starting. This includes painter’s tape, wood filler, and paint brushes.
Required Tools and Materials for Kitchen Painting
Painting your kitchen needs the right supplies and tools. Let’s look at what you’ll need for a great project.
Essential Paint Supplies
Quality paint is key for a lasting finish. Try HGTV Home by Sherwin Williams’ Infinity line in Satin Finish for cabinets. Zinsser Bulls Eye 1-2-3 works well for priming.
Don’t forget brushes, rollers, and painter’s tape. These tools help apply paint smoothly and neatly.
Preparation Tools
Good prep ensures a smooth finish. Your toolkit should include sandpaper and Jasco Easy Liquid Sander Deglosser. Wood filler helps repair any surface damage.
These items create an ideal surface for paint to stick. Proper prep leads to better results.
Safety Equipment for Painting
Safety is crucial when painting. Use gloves, masks, and protective eyewear to guard yourself. Drop cloths and plastic sheeting protect floors and countertops.
| Category | Essential Items | Recommended Brands |
|---|---|---|
| Paint Supplies | Paint, Primer, Brushes, Rollers | HGTV Home by Sherwin Williams, Zinsser |
| Prep Tools | Sandpaper, Deglosser, Wood Filler | Jasco |
| Safety Gear | Gloves, Masks, Drop Cloths | 3M, Graco |
A paint sprayer like the Graco Magnum Painter Plus can save time. It gives a smoother coat, especially on cabinet surfaces.
https://www.youtube.com/watch?v=6R9HKvGxbR0
These supplies set you up for a great kitchen makeover. Quality materials and safety gear lead to better results. They also make painting safer and more enjoyable.
Choosing the Right Paint and Finish
The perfect kitchen cabinet paint can transform your space. Durability, ease of cleaning, and style preferences guide your choice. Let’s explore the best options for your kitchen makeover.
Best Paint Types for Kitchen Cabinets
For lasting results, choose 100% acrylic or alkyd paints. These formulas offer excellent durability and smooth application. Popular brands include Benjamin Moore Advance and HGTV Home by Sherwin Williams Infinity.
Understanding Paint Sheens
Cabinet paint sheen affects both appearance and functionality. Satin and semi-gloss finishes are ideal for kitchen cabinets. They provide a subtle sheen that’s easy to clean and resists moisture.
Color Selection Guidelines
Consider your existing kitchen elements when choosing colors. White, cream, grey, blue, and green are trending cabinet colors. Use the Light Reflectance Value (LRV) to gauge how a color will look.
LRV helps ensure your chosen hue complements your kitchen’s lighting and design.
| Color | Trend Status | Best For |
|---|---|---|
| White | Classic | Bright, spacious feel |
| Grey | Modern | Neutral, versatile base |
| Blue | Rising | Calm, cool atmosphere |
| Green | Emerging | Natural, refreshing vibe |
Kitchen color trends change over time. Choose a palette you love for lasting satisfaction with your newly painted cabinets.
Cabinet Surface Preparation Techniques
Preparing kitchen cabinets for painting is vital. It ensures a lasting finish and beautiful results. Let’s explore essential prep techniques for your cabinets.
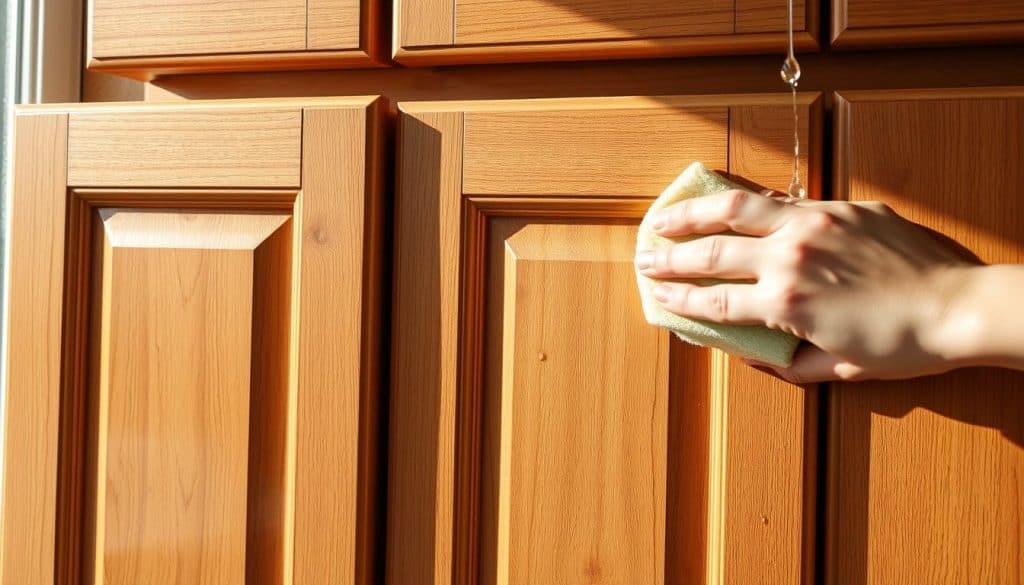
Cleaning and Degreasing
Start by thoroughly cleaning your cabinets. Mix vinegar and water for a natural, effective degreaser. This method saves time and boosts paint adhesion.
For stubborn grime, use TSP cleaner. Remember to wear gloves for protection when using TSP.
Sanding vs. Liquid Deglosser
Sanding creates a smooth surface for paint to stick. Use 120-grit sandpaper with a power sander to scuff the surface.
For a quicker option, try a liquid deglosser. It saves time and reduces mess. After sanding or deglossing, wipe surfaces with a tack cloth.
Dealing with Repairs and Holes
Address any damage before painting. Use wood filler for holes and cracks. Once dry, sand the filled areas smooth.
For glossy surfaces, light sanding improves paint adhesion. These repair techniques ensure a flawless finish.
| Preparation Step | Time Required | Materials Needed |
|---|---|---|
| Cleaning and Degreasing | 2-3 hours | Vinegar, water, TSP cleaner, gloves |
| Sanding | 3-4 hours | 120-grit sandpaper, power sander |
| Repairs | 1-2 hours | Wood filler, sandpaper |
Most painting problems come from poor prep. Take time with these steps for best results. Proper preparation helps your painted cabinets last for years.
Professional Priming Methods
Priming is key for cabinet painting. It ensures paint sticks and lasts long. Let’s look at expert techniques to upgrade your kitchen affordably.
Choose high-quality primers like Glidden Gripping Primer for kitchen cabinets. It sticks well to glossy surfaces, often without sanding. Use a foam roller or sprayer for smooth application. For dark paint colors, get the primer tinted at the store.
Clean surfaces with degreaser and liquid deglosser for better paint adhesion. This removes oils that could affect the finish. Fill old screw holes with polyester wood filler. Sand lightly to create a surface for the primer.
- Apply primer across the grain
- Tip-off in the direction of the grain for smoothness
- Allow primer to dry completely between coats
Good priming prevents yellowing and reduces needed paint coats. This saves time and ensures a lasting, professional-looking finish. Your cabinets will look great for years to come.
Cabinet Painting Techniques and Tips
Cabinet painting can give your kitchen a fresh look. There are methods for every skill level. Let’s explore how to get a smooth paint finish.
Brush and Roller Methods
Use a short-handled brush for edges and a foam roller for flat surfaces. This method costs about $300-$400. Apply 2-3 coats, letting each dry for 2-3 hours.
For best results, mix 4 parts paint with 1 part water and 1 part Floetrol. This will thin the paint slightly.
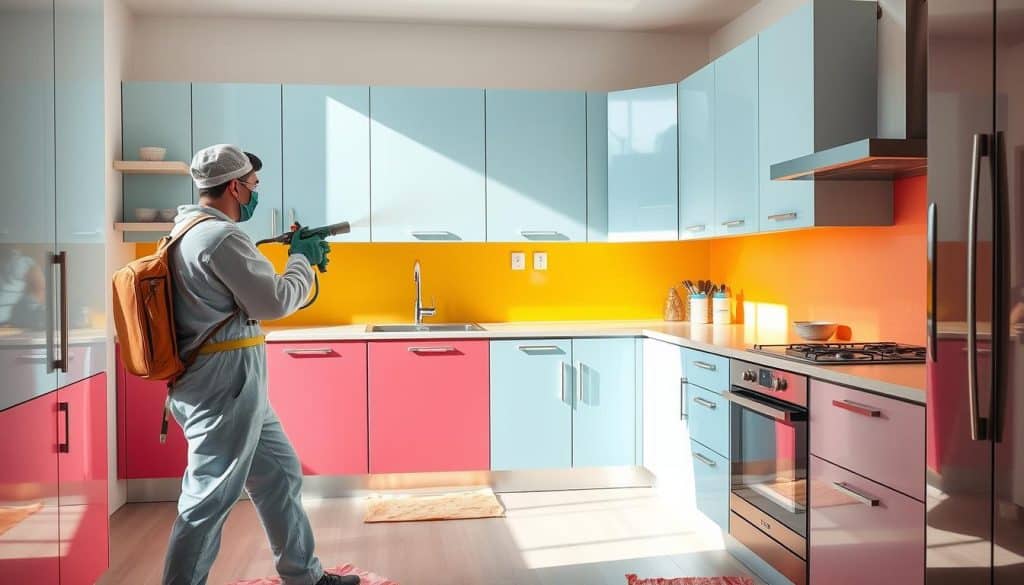
Spray Painting Options
Spray painting gives a professional look but needs a $200 investment for a quality sprayer. The Graco Magnum or Fuji Paint Gun work well. This method is faster and smoother, great for big projects.
Achieving Smooth Finishes
Apply multiple thin coats for a flawless finish. Use acrylic or alkyd paint in satin or semi-gloss. Sherwin Williams Pro Classic and Benjamin Moore Advance are good choices.
Let cabinets cure for at least 24 hours after the final coat. Then you can reinstall them.
| Painting Method | Cost | Time | Finish Quality |
|---|---|---|---|
| Brush and Roller | $300-$400 | 3-4 days | Good |
| Spray Painting | $500-$600 | 2-3 days | Excellent |
Prep your cabinets well. Use wood putty for holes and sand if needed. These tips will help you create a new look on a budget.
Painting Kitchen Walls and Backsplash
Kitchen wall painting can dramatically change your space. Choose colors that match your cabinet color for a unified look. Use painter’s tape to protect cabinets and backsplash during painting.
A backsplash update quickly refreshes your kitchen’s look. You have several options:
- Paint existing tiles with specialized tile paint
- Apply peel-and-stick tiles for a hassle-free update
- Install new ceramic or glass tiles for a complete transformation
Color drenching uses one color family throughout the design. It creates a striking effect. For a pop of color, try a muted gray-green on the kitchen island.
In small kitchens, use a single color for the backsplash. Avoid patterns or textures to keep the space uncluttered. The backsplash often catches the eye first, so choose carefully.
| Project | Time | Impact |
|---|---|---|
| Wall Painting | 1-2 days | High |
| Backsplash Update | Weekend | Significant |
| Color Coordination | Planning stage | Transformative |
Always ensure proper ventilation when painting in enclosed kitchen spaces. These tips will guide you towards a stylish kitchen makeover.
Hardware Updates and Finishing Touches
New kitchen cabinet hardware can transform your space. The right touches improve looks and function. Let’s explore how to pick and install hardware for a polished look.
Selecting New Hardware
Choose hardware that matches your new color scheme. Popular finishes include brushed nickel, matte black, and brass. Brass hardware looks great with light and dark cabinets.
Rattan lighting adds warmth to your kitchen decor. Match your hardware finish to your faucet for a unified look. A Champagne Bronze faucet can create a modern impact.
Installation Tips
Good hardware installation is key for a pro finish. Use a template for consistent knob and pull placement. Fill old holes before drilling new ones if changing the layout.
Here are budget-friendly options for kitchen cabinet hardware:
| Source | Cost per Handle | Total Cost (40 pieces) |
|---|---|---|
| Retail Stores | $10 | $400 |
| Amazon | $1 | $40 |
Check online marketplaces for affordable updates. Some have found quality hardware on Amazon for big savings. A complete set of 40 pieces can cost as little as $3.53.
Small changes like new hardware can greatly impact your kitchen’s look. Choose pieces that match your style and enhance your newly painted cabinets.
Maintenance and Care for Painted Surfaces
Proper care keeps painted cabinets beautiful and long-lasting. Follow these tips to maintain your kitchen’s fresh look. Your cabinets will stay stunning for years.
Cleaning Guidelines
Clean painted cabinets gently. Use a soft, damp cloth with mild soap to remove dirt and grease. Avoid harsh chemicals that can harm the paint finish.
Wait 30 days after painting before cleaning. This allows the paint to fully cure for best results.
Touch-up Procedures
Keep leftover paint for small repairs. Fix chips or scratches quickly to prevent further damage. Use a foam roller for flat surfaces when touching up.
For edges and details, use a brush. These techniques help maintain your cabinets’ appearance.
| Maintenance Task | Frequency | Tools Needed |
|---|---|---|
| Regular cleaning | Weekly | Soft cloth, mild soap solution |
| Deep cleaning | Monthly | Degreaser, microfiber cloth |
| Touch-ups | As needed | Leftover paint, foam roller, brush |
Good maintenance protects your investment and keeps cabinets looking great. Regular care ensures your painted cabinets remain a stunning kitchen feature.
Common Mistakes to Avoid
Cabinet painting can transform your kitchen. However, DIY mistakes are common. Let’s explore some errors and how to avoid them.
Skipping proper preparation is a major mistake. A whopping 94% of painting failures result from poor prep work. Clean thoroughly, sand surfaces, and remove doors and hardware before painting.
Using the wrong paint or finish is another frequent error. About 80% of projects fail due to inappropriate paint choices. Choose durable acrylic-polyurethane in semi-gloss or gloss finish for kitchen cabinets.
- Don’t rush the process – allow proper drying time between coats
- Avoid painting in extreme temperatures or high humidity
- Use the right tools – 67% of DIYers experience uneven coverage due to incorrect applicators
- Don’t stack freshly painted cabinet doors
Patience is crucial for a beautiful kitchen update. Follow each step carefully to achieve professional-looking results. If unsure, consider hiring a pro to ensure optimal outcomes.
Conclusion
A kitchen makeover through painting is a DIY win waiting to happen. You can revive your cooking space in just a weekend. Painted kitchens boost home value and create a unique style.
Fall 2024 brings exciting cabinet color trends like rich navy blue and soft sage green. These hues can dramatically change your kitchen’s vibe. Light colors make small kitchens feel bigger, while darker shades add elegance.
Start your kitchen upgrade with good planning. Gather all supplies and follow a step-by-step guide carefully. Priming is key for lasting results.
Two coats of paint usually give a rich finish. Let the paint cure for up to a week before heavy use. Quality materials and patience lead to pro-looking results.
This budget-friendly update refreshes your space and boosts your home’s value. Your newly painted kitchen will become a welcoming hub for family and friends.

