This website contains affiliate links. Some products are gifted by the brand to test. As an Amazon Associate, I earn from qualifying purchases. The content on this website was created with the help of AI.
You’ll love transforming dollar store finds into beautiful DIY art! Create stunning marble-look plant holders with simple paint swirling, or craft geometric paper wall art that looks professionally made. Try your hand at modern string art signs using just wood, nails, and colorful thread. Make enchanting paper flower light installations or turn plain vases into elegant faux mercury glass décor. These projects don’t require fancy supplies or artistic expertise – just grab some basic materials from your local dollar store and let your creativity flow. There’s an exciting world of affordable crafting possibilities waiting to inspire your next masterpiece!
Key Takeaways
- Dollar store supplies can create elegant marble-effect plant holders using simple materials like acrylic paint and terracotta pots.
- Macramé plant hangers made from basic cord and beads offer an affordable way to display plants with style.
- Paper wall art using construction paper and geometric shapes creates modern decor without expensive materials.
- String art signs require only wooden boards, nails, and embroidery thread for striking wall displays.
- Tissue paper flower light installations combine battery-operated lights with paper crafts for enchanting room ambiance.
Marble-Look Air Plant Holders
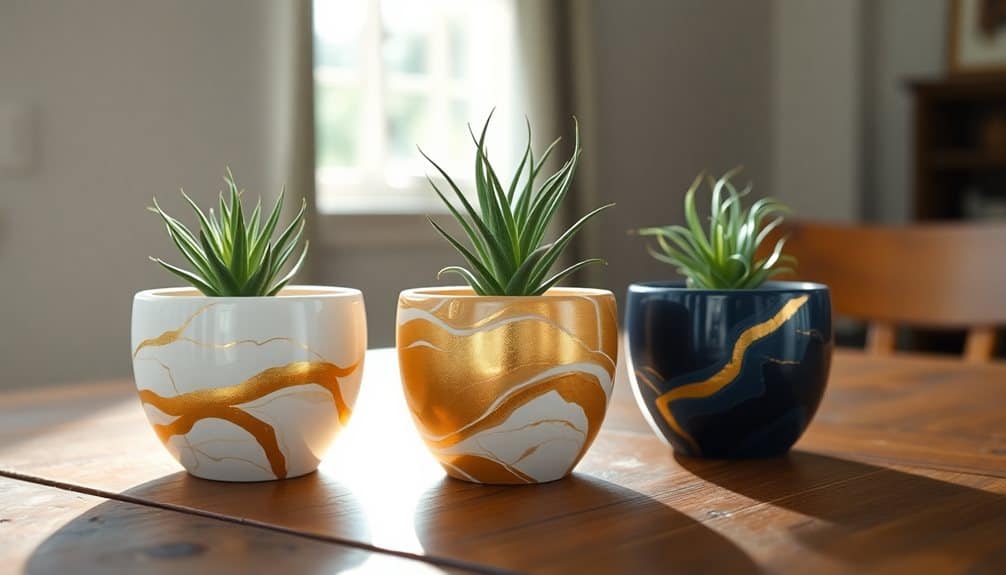
With a few simple supplies and a little creativity, you’ll transform plain clay pots into stunning marble-look holders for your air plants. Head to the dollar store to gather white and black acrylic paint, small terracotta pots, and clear sealant. You’ll also need a large plastic container for dipping and some warm water.
Fill your container with warm water and add drops of both white and black paint. Use a wooden stick to gently swirl the colors together – don’t mix them completely! Quickly dip your pot at an angle, then rotate it to create unique marble patterns. The paint will stick to the pot’s surface instantly. Let each pot dry completely on a protected surface.
Once dry, coat the outside with clear sealant to protect your design. The inside doesn’t need sealing since air plants don’t require soil or water. Place your air plant inside, and you’ve got a trendy, modern planter that looks like expensive marble! Try different color combinations like blue and white, or pink and gold, to create various marble effects. These make perfect gifts or decorative pieces for your room.
For longest-lasting results, apply UV-resistant clear coat after the sealant to prevent color fading in outdoor settings.
Geometric Paper Wall Art
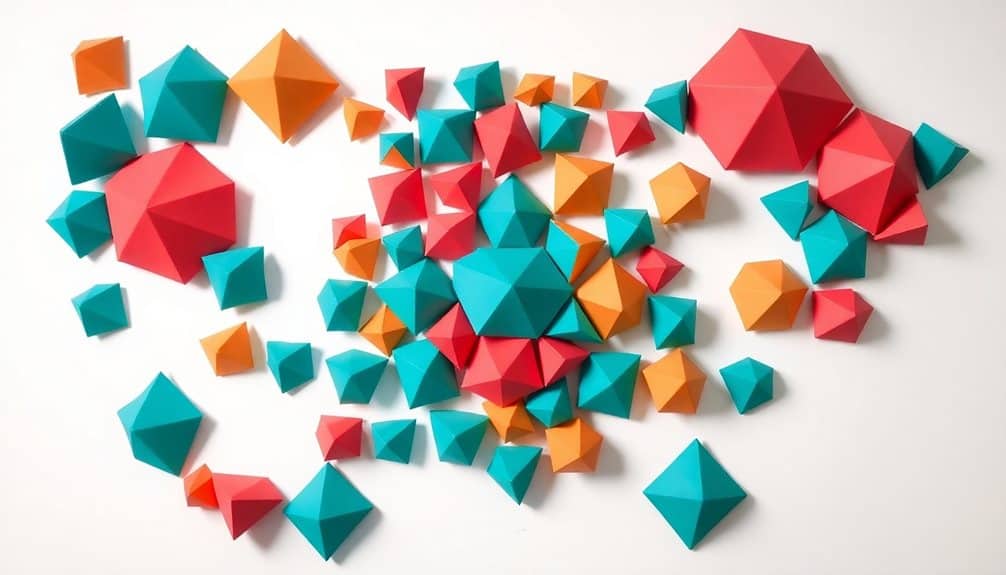
Anyone can create stunning wall art using nothing but colorful paper and basic geometric shapes! All you’ll need is construction paper in your favorite colors, scissors, glue, and a large piece of poster board as your base. Don’t forget a ruler and pencil to help you make precise lines.
Start by cutting out various geometric shapes – triangles, squares, hexagons, and diamonds work great. Make them different sizes for visual interest. Try cutting at least 20-30 shapes to create an impactful design. You can make a template from cardboard to help you cut identical shapes if you’d like.
Arrange your shapes on the poster board before gluing. Try creating a pattern that starts from the center and radiates outward, or make rows of alternating shapes and colors. Once you’re happy with the layout, glue each piece down firmly. Press and hold each shape for a few seconds to guarantee it sticks.
For extra pop, try layering smaller shapes on top of larger ones, or mixing metallic paper with solid colors. Your finished piece will look modern and professional – perfect for brightening up any wall in your home!
Faux Mercury Glass Vases

You’ll love creating these stunning faux mercury glass vases that look just like expensive antiques! All you need are clear glass vases from the dollar store, mirror-effect spray paint, and a spray bottle filled with water. This fun project transforms plain glass into beautiful, vintage-looking pieces in under an hour.
Start by cleaning your vases thoroughly with rubbing alcohol to remove any oils or residue. Next, lightly spray the outside of the vase with water droplets – don’t soak it, just create a random pattern. While the water’s still wet, spray a light coat of mirror-effect paint over the entire surface. The water drops will prevent the paint from sticking in those spots, creating that classic mercury glass look.
Let the paint dry for 5 minutes, then gently blot the water drops with a paper towel. For a more authentic aged appearance, repeat the water and paint process one more time. Once completely dry, you can seal your creation with clear acrylic spray. These vases look gorgeous displayed on windowsills where light can catch them, or as centerpieces filled with fresh flowers.
Modern String Art Signs

String art has made an incredible comeback as a modern wall decor trend! You’ll be amazed at how easy it is to create stunning geometric designs using just nails, string, and a wooden board. What’s great about string art is that you can make anything from simple shapes to complex patterns that’ll wow your friends and family.
To get started, grab these dollar store supplies:
- A smooth wooden board or canvas
- Small nails or pushpins
- Colorful embroidery thread or string
First, draw your design on paper and transfer it to your board. Then, tap small nails along the outline about 1/2 inch apart. Once your nail pattern is complete, start wrapping your string around the nails in whatever pattern you choose. You can create straight lines, zigzags, or random crisscrosses – there’s no wrong way to do it!
For extra pizzazz, try using multiple string colors or glow-in-the-dark thread. You can make cool shapes like hearts, stars, letters, or even animals. Remember to keep your string tight and knot it securely when you’re finished. Display your masterpiece proudly on your wall!
Textured Canvas Paintings
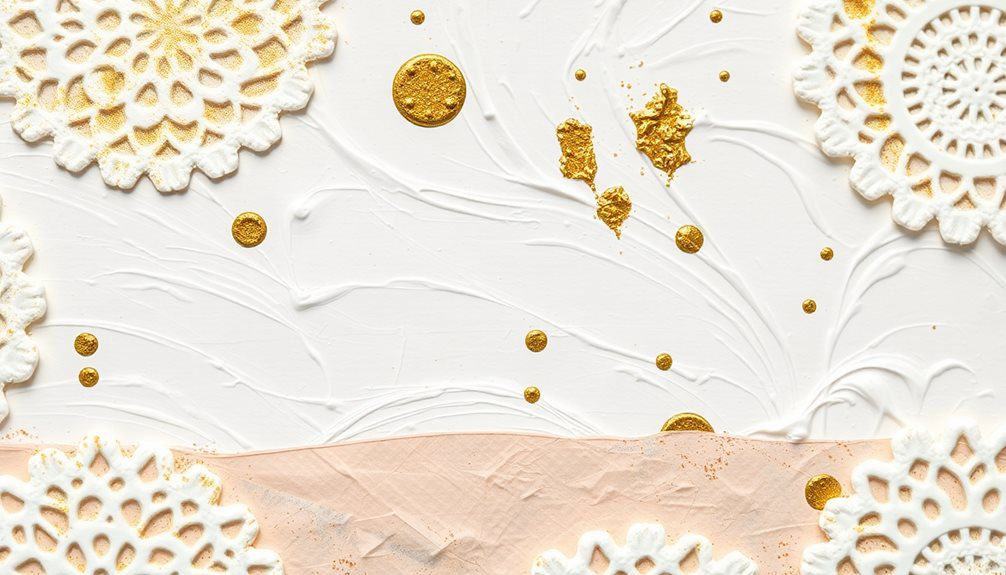
Creating textured canvas paintings lets you transform ordinary art into touchable masterpieces! With just a few dollar store supplies, you’ll be amazed at how many textures you can add to your artwork. Grab some white canvas, acrylic paint, and everyday items like bubble wrap, aluminum foil, string, or even pasta to get started.
First, choose your base color and paint the entire canvas. While it’s still wet, press your textured items onto the surface to create unique patterns. Try crumpling aluminum foil for a rocky effect, or roll bubble wrap across the canvas for perfect dots. You can also mix sand or coffee grounds into your paint for a gritty texture.
Want more dimension? Apply thick globs of paint using a palette knife, or squeeze paint directly from the bottle to make raised lines. Don’t forget to experiment with layering – try adding string, dried beans, or small beads for extra pop! Once everything’s dry, you can paint over your textures with different colors to make them stand out even more. The best part? No two pieces will ever look exactly alike, making your artwork truly one-of-a-kind!
Pressed Flower Frame Gallery
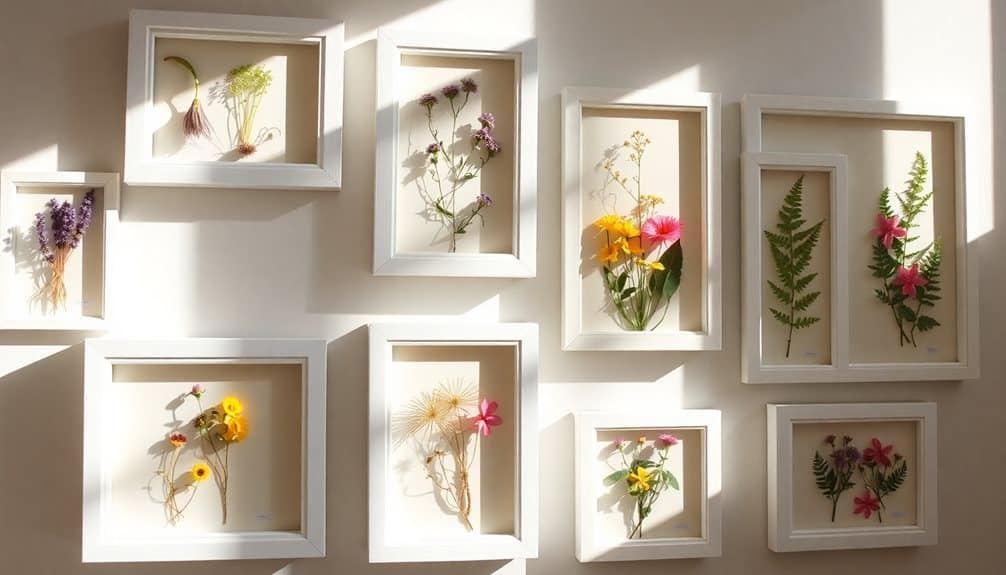
While textured paintings add depth through touch, nature offers its own beautiful dimension through pressed flowers! You can create a stunning gallery wall using dollar store frames and flowers from your garden or local park. This project lets you preserve nature’s beauty while making unique wall art that’ll brighten any room.
First, collect your flowers and press them between heavy books for 2-3 weeks. Once they’re completely dry, grab these supplies from the dollar store:
- Multiple picture frames in different sizes
- White cardstock or thick paper
- Clear adhesive or craft glue
Arrange your pressed flowers on the white paper, creating different compositions for each frame. You might try a single large bloom in one frame and a cluster of tiny flowers in another. Carefully secure the flowers with tiny dots of glue, then place them in your frames. When hanging your gallery, mix up the frame sizes and flower arrangements to create visual interest. Don’t forget to label the back of each frame with the flower type and date collected – it’s like creating your own botanical collection!
Boho Macrame Plant Hangers
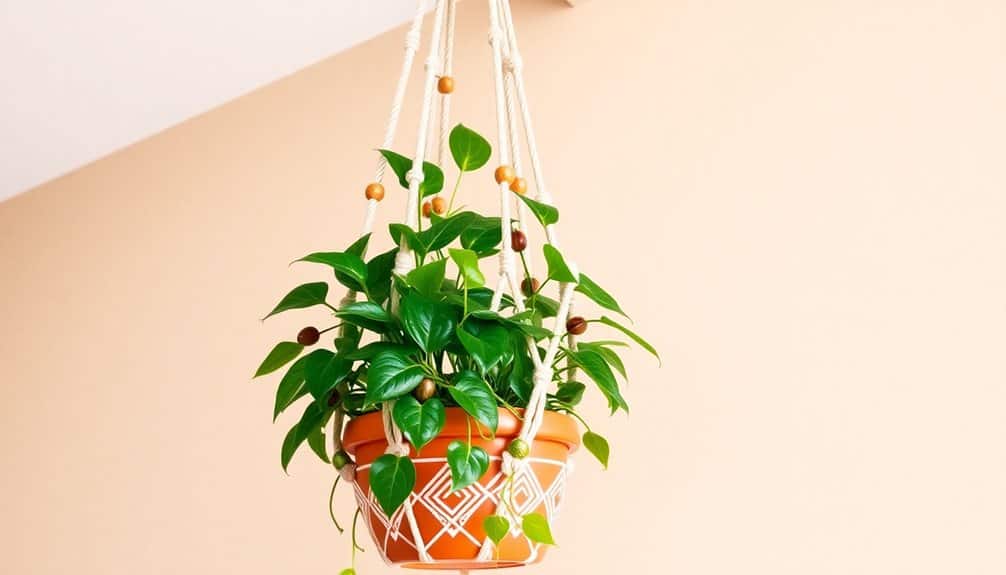
Modern homes look extra cozy with handmade macrame plant hangers! You can create beautiful bohemian-style hangers using simple supplies from the dollar store. All you’ll need is cotton rope, wooden beads, a metal ring, and scissors to get started.
Begin by cutting eight pieces of rope, each measuring 8 feet long. Fold them in half and attach them to your metal ring using larks head knots. Now you’re ready for the fun part – making square knots! Work in rows, alternating between square knots and spacing, creating a diamond pattern as you go down. Add wooden beads between some of the knots for extra style.
Once you’ve knotted about 18 inches down, separate your ropes into four sections and create individual twisted strands. Tie each section with an overhand knot, leaving enough room at the bottom to hold your pot. Trim the ends evenly and unravel them for a trendy fringe effect. Your plant hanger will fit most standard 6-inch pots, and you can adjust the length by making more or fewer knots in your design.
These macrame plant displays can instantly elevate the aesthetic of any room while showcasing your favorite greenery.
Mosaic Mirror Masterpiece
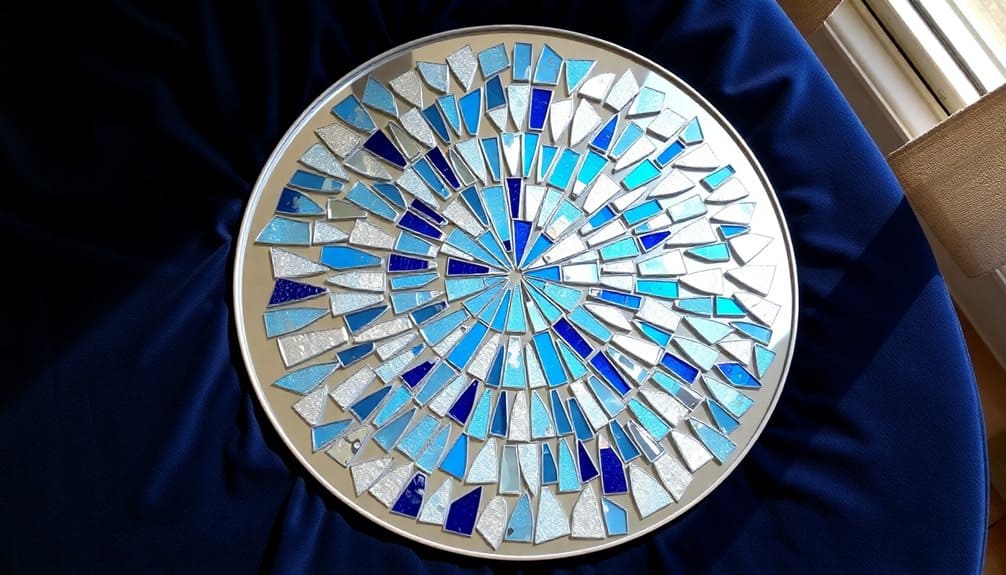
With just a few simple supplies, you can transform a plain mirror into a dazzling mosaic masterpiece! Head to your local dollar store and pick up a basic wall mirror, colorful glass gems, and strong adhesive. This project lets you express your creativity while creating something truly unique for your space.
Before you begin, you’ll want to gather these essential supplies:
- A plain wall mirror (remove any frame if it has one)
- Assorted glass gems, tiles, or broken CD pieces
- Strong adhesive like E6000 or silicone craft glue
Start by laying out your design on the mirror’s border without gluing anything down. Try creating patterns with different colors or arranging the pieces randomly for a more eclectic look. Once you’re happy with the design, glue each piece carefully, leaving small gaps between them. Let the adhesive dry completely overnight.
For extra sparkle, you can fill the gaps with glitter grout or metallic paint. Your finished mosaic mirror won’t just reflect light – it’ll scatter it beautifully across your room, creating a magical atmosphere that’s uniquely yours!
Regular soft cloth cleaning will help maintain your mosaic mirror’s sparkle and prevent dust buildup that can dull its appearance.
Gold-Dipped Ceramic Sculptures
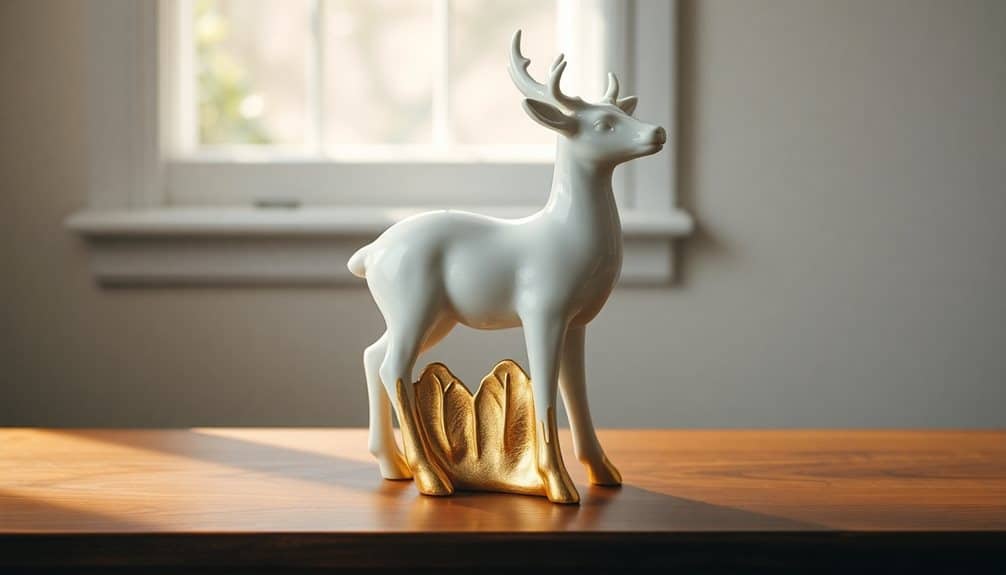
Creating your own gold-dipped ceramic sculptures lets you turn ordinary pottery into elegant works of art! With just a few basic supplies from the dollar store, you’ll transform simple ceramic pieces into stunning metallic masterpieces that look expensive but cost very little to make.
Start by gathering plain ceramic items like vases, bowls, or figurines from the dollar store. You’ll also need gold craft paint, painter’s tape, and a soft brush. Clean your ceramics thoroughly with soap and water, then dry completely. Use the tape to mark off the areas you want to remain unpainted, creating clean lines for that perfect “dipped” look.
Apply two thin coats of gold paint to your marked sections, letting each layer dry for 30 minutes. Don’t forget to paint the inside rim of vases or bowls for a professional finish. Once the paint is completely dry, carefully remove the tape at an angle to prevent peeling. For extra protection, spray a clear sealant over the gold sections.
These gold-dipped ceramics make perfect gifts or decorative pieces for your home. Display them on shelves, use them as fancy pencil holders, or create a stunning centerpiece arrangement!
Washi Tape Wall Design
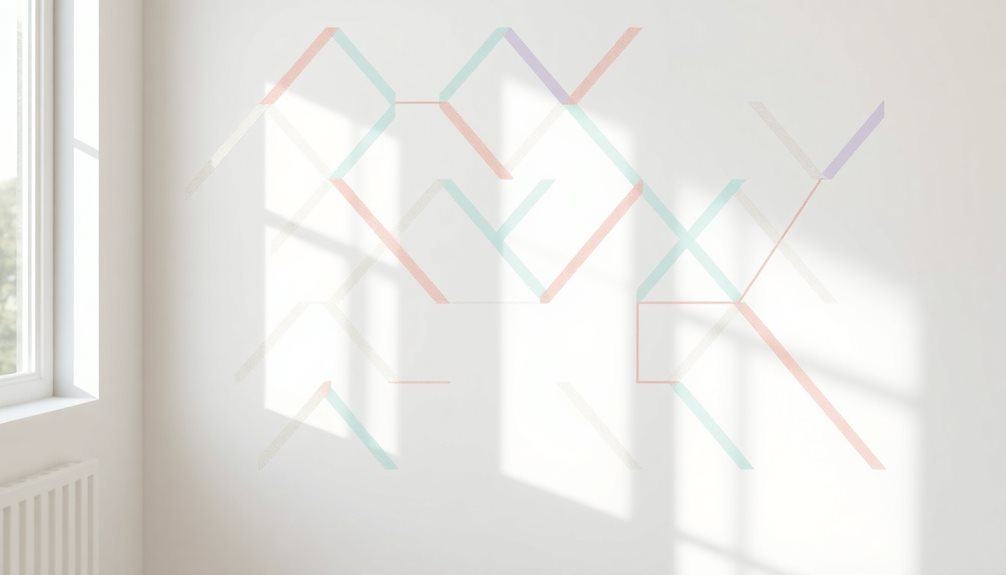
Japanese-inspired washi tape has revolutionized the way you can decorate your walls! This colorful, removable masking tape comes in countless patterns and won’t damage your paint when you peel it off. You’ll find affordable washi tape at most dollar stores, making it perfect for creating stunning geometric designs and patterns on any wall surface.
Start by cleaning your wall with a dry cloth to guarantee the tape sticks properly. Sketch your design lightly with a pencil first – this will help you map out your pattern before committing to the tape. Whether you’re creating a mountain scene, abstract shapes, or a fun cityscape, the possibilities are endless!
Here’s what makes washi tape wall art so amazing:
- You can easily remove and reposition the tape if you make a mistake
- It’s perfect for renters since it won’t damage walls
- One roll goes a long way, so you can create big designs on a budget
For the best results, press down firmly on each tape strip to prevent curling edges. Mix and match different widths and patterns to add visual interest, and don’t forget to step back occasionally to check your progress!
Floating Glass Picture Frames
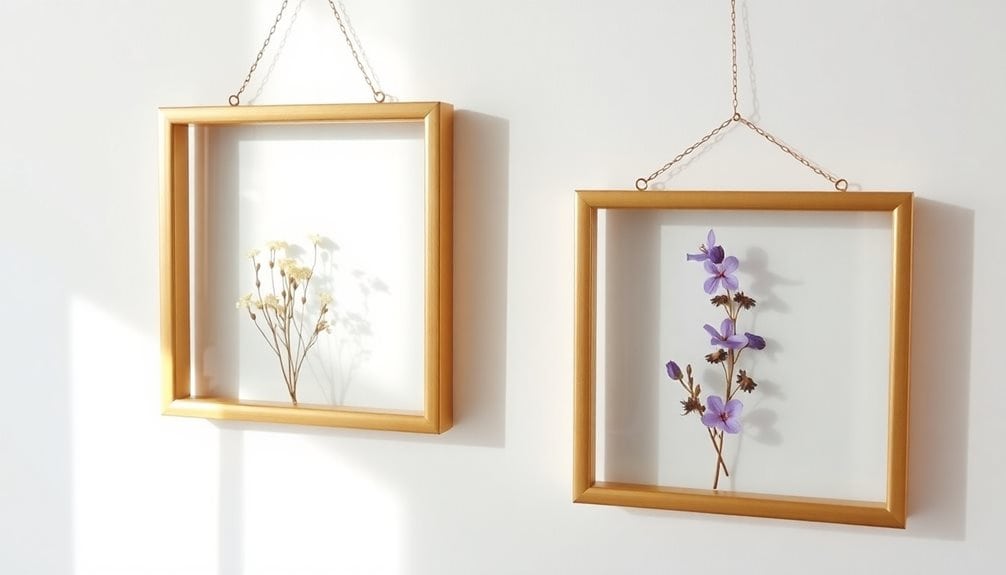
Beauty takes on a new dimension when you sandwich your favorite photos between two clear glass panes! This simple yet elegant craft transforms ordinary pictures into professional-looking floating displays that’ll wow your friends and family.
Head to the dollar store and grab these supplies: two same-sized picture frames with glass, decorative tape or metallic washi tape, and small binder clips. Remove the backing and frame from both units – you’ll only need the glass pieces. Clean both panes thoroughly with glass cleaner to remove fingerprints and dust.
Place your photo on one glass pane, then carefully lay the second pane on top. Align the edges perfectly and secure them temporarily with binder clips. Once you’re happy with the positioning, seal the edges with decorative tape. Choose metallic or patterned tape to add extra flair to your creation!
To display your floating frame, either prop it up using a plate stand or attach a sawtooth hanger to the back using strong adhesive. Don’t forget to experiment with different photos, artwork, or even pressed flowers – the possibilities are endless!
Paper Flower Light Installation
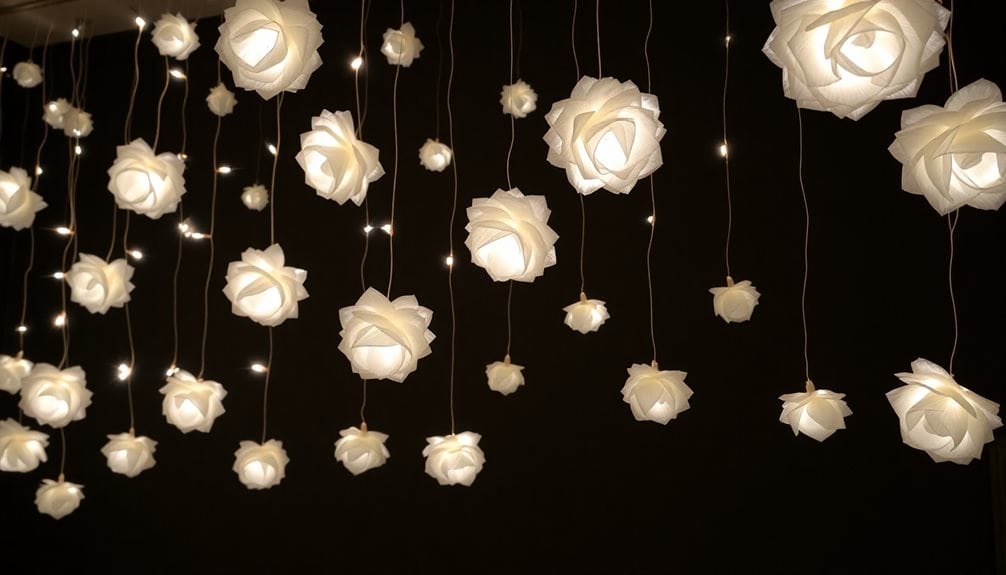
From your ceiling to your walls, illuminated paper flowers can transform any room into a magical garden paradise! This stunning light installation combines delicate tissue paper blooms with string lights to create a dreamy, ethereal effect that’ll make your space feel truly special.
Start by gathering these dollar store essentials:
- White tissue paper (multiple sheets)
- Battery-operated string lights
- Clear tape or mini glue dots
Creating your flowers is super fun! Cut tissue paper into 6-inch squares, stack 4-5 layers, and fold them accordion-style. Secure the middle with tape, then gently pull each layer upward to form petals. Make about 15-20 flowers in different sizes.
Now comes the magical part! Carefully attach each paper flower to your string lights using tape or glue dots. Space them evenly, about 8 inches apart. You can hang them in a straight line, create a cascading effect, or arrange them in a cluster. Just make sure the battery pack stays hidden and accessible. When you turn on the lights, your paper flowers will glow softly, casting beautiful shadows and creating an enchanting atmosphere!
Painted Rock Garden Art
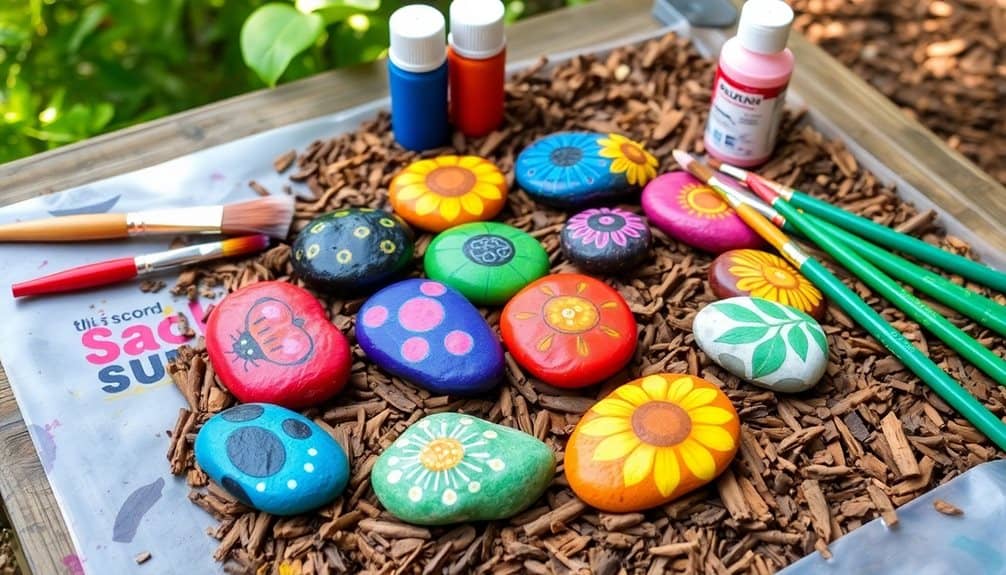
Looking to add whimsical charm to your outdoor space? Transform ordinary rocks into colorful garden art with simple supplies from the dollar store! You’ll need smooth rocks, acrylic paint, paintbrushes, clear sealant, and your imagination.
First, clean your rocks thoroughly with soap and water, letting them dry completely. Apply a base coat of white paint to help your colors pop. Now comes the fun part – paint your designs! Create ladybugs with red and black spots, butterflies with vibrant wings, or friendly caterpillars using multiple rocks. You can also paint flowers, rainbow patterns, or inspirational words.
Once your designs are dry, protect your artwork with two coats of clear sealant. This makes your rocks weather-resistant and keeps the colors bright. Arrange your painted rocks around plants, along pathways, or cluster them together to create a mini rock garden. You can even hide them around your neighborhood for others to find!
For extra sparkle, add googly eyes, stick-on gems, or glow-in-the-dark paint. Let your kids join in – they’ll love creating their own garden creatures and watching their rock collection grow. Display your finished rock art near a book storage rack to create an engaging outdoor reading nook for children.
Stained Glass Window Hangings
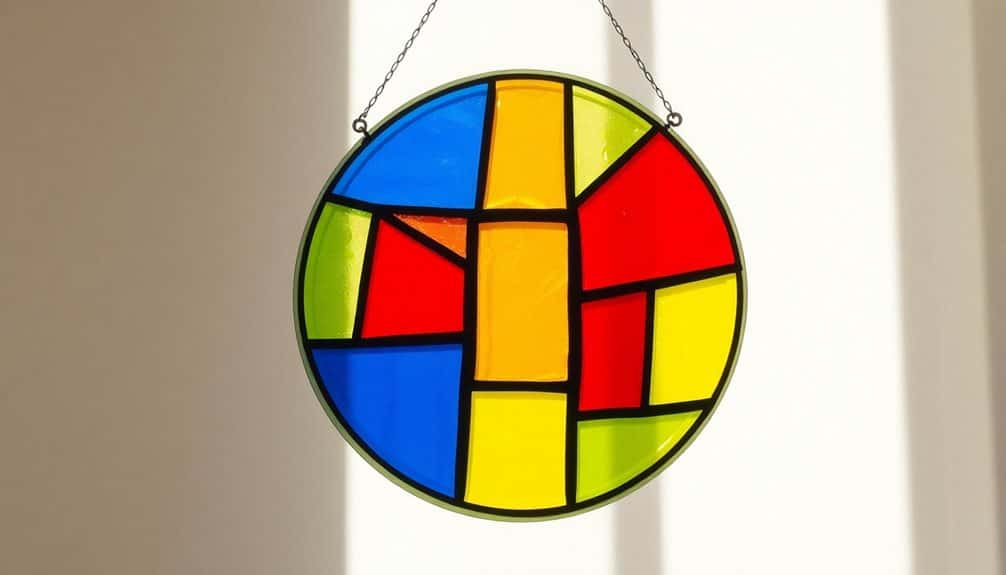
Create stunning window art that sparkles like jewels using simple craft supplies! You’ll be amazed at how easy it is to transform clear plastic sheets and glass paint into beautiful faux stained glass that catches the sunlight. All you need are items from your local dollar store to get started.
For an eco-friendly base material alternative, consider using coco coir sheets which can be painted and provide an interesting natural texture.
- Clear plastic page protectors or transparency sheets
- Glass paint in various colors
- Black puffy paint for outline designs
Start by drawing your design on paper – try simple shapes like flowers, butterflies, or geometric patterns. Place your transparency sheet over the paper and trace the outline with black puffy paint. Let it dry completely for 24 hours. Next, fill in each section with different colored glass paints. Don’t worry about perfect blending – the uneven colors create a beautiful effect!
Once your design is dry, punch a small hole at the top and thread ribbon through it. Hang your creation in a sunny window and watch as the light streams through, creating magical colored shadows on your floor. You can make several in different patterns and colors to create a rainbow effect that’ll brighten any room!
Abstract Yarn Wall Decor
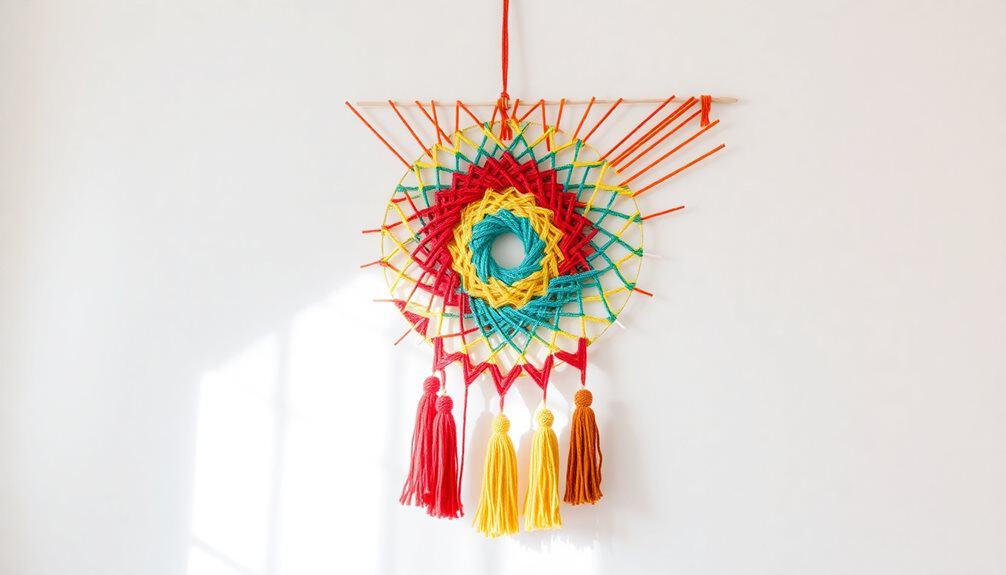
With just a few balls of colorful yarn and a wooden frame, you’ll transform an empty wall into a stunning piece of modern art! This super-easy project lets you create amazing geometric patterns using simple wrapping techniques. You’ll need yarn in 3-4 colors, a wooden frame (or make one with craft sticks), and some small nails or pushpins.
Start by hammering nails around the frame’s edges, spacing them about 1 inch apart. Choose your first yarn color and tie it to any nail. Now comes the fun part – start weaving! Create diagonal lines by wrapping the yarn around different nails. Layer multiple colors, crossing them over each other to form interesting shapes. Try zigzags, triangles, or random patterns – there’s no wrong way to do it!
Keep wrapping until you’re happy with how full it looks. Secure the end by tying it tightly to a nail. For extra pizzazz, add tassels to the bottom of your design or weave in some metallic threads. Your new wall art will instantly brighten up any room, and you’ll feel proud knowing you made it yourself!
Frequently Asked Questions
How Long Do Dollar Store Craft Supplies Typically Last Before Deteriorating?
You’ll find that dollar store craft supplies generally last 6 months to 2 years, depending on how you store them. Keep your glue, markers, and paint in cool, dry places to extend their life. Your paper products can last indefinitely if protected from moisture and sunlight. Don’t worry if some items break down faster – that’s normal with budget supplies, but you can still create amazing projects while they’re fresh!
Can Children Safely Participate in These DIY Art Projects?
Want to get your kids involved in some creative fun? You can absolutely include children in these projects, but you’ll need to supervise them based on their age. Keep scissors, glue guns, and small items away from very young children. For kids 5+, let them help with painting, sticking, and arranging. You’ll find they love picking colors and materials while learning valuable creative skills. Just remember to cover your workspace!
What Tools Should I Have on Hand Before Starting?
You’ll want to gather some basic tools before you start creating! Keep scissors, glue (both white and hot glue), paintbrushes, markers, pencils, and ruler ready. Don’t forget paper plates for mixing paint, paper towels for cleanup, and newspaper to protect your work surface. It’s smart to have containers for organizing small items and a smock or old shirt to protect your clothes while you’re getting creative!
Are These Projects Suitable for Selling at Craft Fairs?
Yes, you can definitely sell craft fair items, but you’ll want to put your own creative spin on them! Make sure you’re pricing them right – factor in your supplies, time, and effort. While shoppers love bargains, they also value unique, well-made pieces. Try combining different dollar store materials in unexpected ways, add special touches, and create eye-catching displays. Don’t forget to check local regulations about selling handmade items!
How Do I Protect Finished Dollar Store Art Pieces From Sunlight Damage?
Like a superhero’s shield, UV-protective spray will guard your artwork from harmful sun rays! You’ll want to apply 2-3 light coats of UV-resistant clear sealer, letting each layer dry completely. Keep your pieces away from direct sunlight, and display them behind UV-protective glass or acrylic sheets. Don’t forget to rotate your artwork occasionally so it doesn’t get uneven exposure!

