This website contains affiliate links. Some products are gifted by the brand to test. As an Amazon Associate, I earn from qualifying purchases. The content on this website was created with the help of AI.
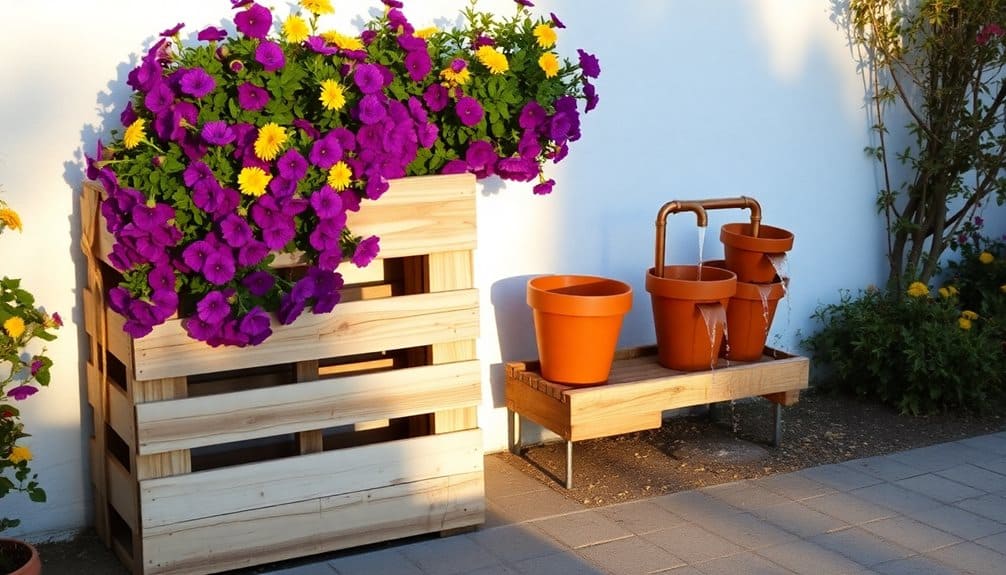
You’ll find several rewarding weekend DIY garden projects that can transform your outdoor space in just 1-2 days. Start with a simple raised garden bed using cedar boards and corner brackets, or construct rustic planter boxes from repurposed pallets. For vertical interest, build a bamboo trellis or install an herb garden wall. Create visual appeal with an upcycled water feature or lay a curved stone pathway. Add functionality with a sturdy garden bench, or enhance evening gatherings with a safety-conscious fire pit. These straightforward builds require basic tools and moderate skills, offering lasting improvements to your garden landscape.
Key Takeaways
- Simple raised garden beds can be built in a weekend using eight 2×6 cedar boards, screws, and brackets for improved drainage.
- Pallet wood planter boxes offer quick construction using recycled materials and require minimal tools for assembly.
- Bamboo trellises create vertical growing space in hours using natural materials and basic lashing techniques.
- Stone pathways can transform garden spaces in two days using gravel base, landscape fabric, and pavers.
- Container water features add instant appeal using submersible pumps, watertight containers, and flexible tubing.
Simple Raised Garden Beds
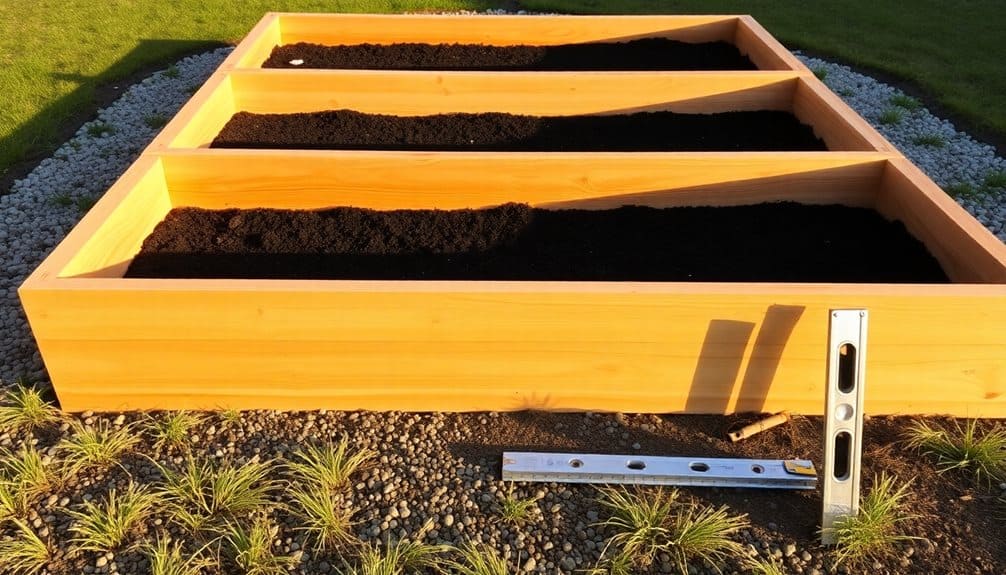
When planning a productive garden space, raised beds offer significant advantages over traditional in-ground planting. You’ll benefit from improved drainage, better soil control, reduced soil compaction, and easier access for planting and maintenance. A basic 4’x8′ raised bed can be constructed in under two hours using weather-resistant lumber.
You’ll need eight 2×6 cedar boards (two 8′ lengths and two 4′ lengths), 3-inch deck screws, and corner brackets. Cut your 8′ boards in half to create the side panels. Position the boards to form a rectangle, ensuring corners are square. Secure the joints using corner brackets and deck screws at 12-inch intervals.
For ideal plant growth, you’ll want a minimum soil depth of 12 inches, requiring two layers of 2×6 boards. Add internal corner posts using 4×4 lumber for structural stability. Line the bottom with hardware cloth to prevent burrowing pests, then fill with a mix of 60% topsoil, 30% compost, and 10% perlite. Position your bed in a location receiving 6-8 hours of direct sunlight daily, ensuring the ground beneath is level. Consider leaving 2-3 feet spacing between multiple raised beds to ensure adequate maintenance access and pathways.
Pallet Wood Planter Boxes
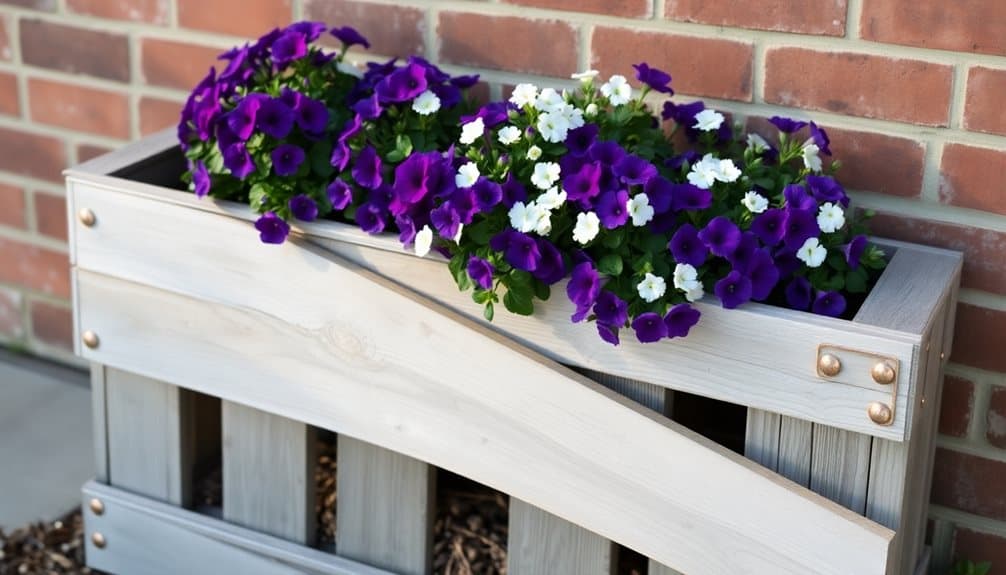
Transform discarded shipping pallets into charming planter boxes by breaking down and repurposing their durable hardwood slats. You’ll need a pry bar, hammer, and protective gear to carefully dismantle the pallets while preserving the wood’s integrity. Remove all nails and sand any rough spots to prevent splinters.
Cut the slats to your desired dimensions, typically 24″ x 12″ x 12″ for a standard planter. Construct the base first, using the thicker support boards for structural integrity. Attach the side panels using weatherproof wood screws, ensuring 1/4″ gaps between slats for drainage. Add corner braces for reinforcement and stability.
Line the interior with landscape fabric to prevent soil erosion while maintaining drainage. Pre-drill drainage holes through the bottom slats at 4″ intervals. Apply two coats of exterior-grade wood sealer to protect against moisture and extend the planter’s lifespan. You’ll want to elevate the finished box on pressure-treated feet or bricks to prevent direct ground contact and wood rot. These boxes work exceptionally well for herbs, shallow-rooted vegetables, and ornamental plants that don’t require deep soil. Regular weather resistance inspections will help maintain your planter boxes, just as beekeepers conduct annual checks on their hive stands.
Garden Trellis From Bamboo
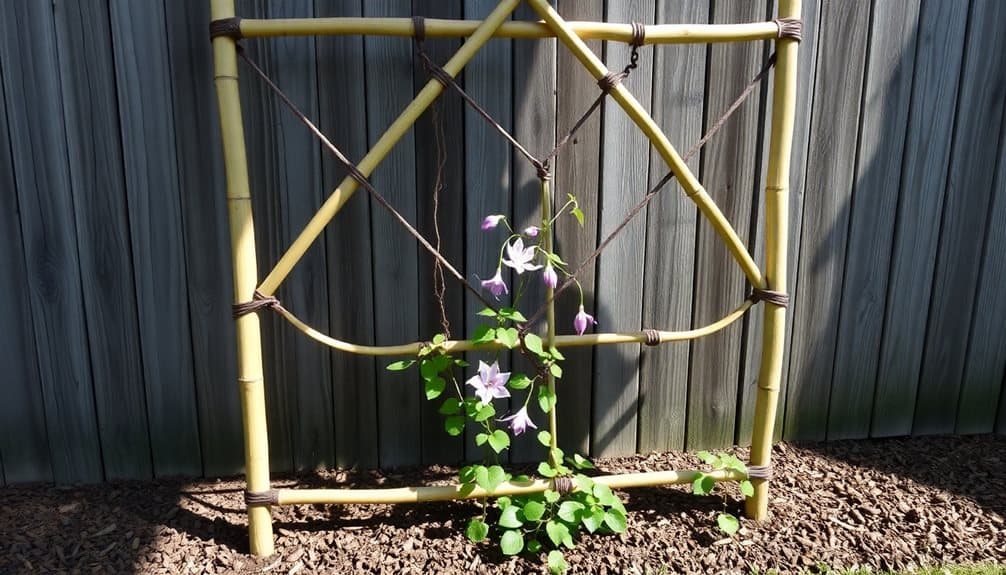
Building a garden trellis from bamboo poles offers a sustainable alternative to store-bought supports while complementing natural garden aesthetics. You’ll need 6-8 bamboo poles (1-2 inches diameter), natural twine or garden wire, pruning shears, and a post hole digger to create this durable climbing structure for your vines and flowering plants.
Start by digging 12-inch holes for your vertical supports, spacing them 24 inches apart. Set your vertical bamboo poles at least 12 inches deep, ensuring they’re plumb before backfilling with soil. You’ll then create the horizontal supports by lashing additional bamboo poles across the vertical pieces using a figure-eight binding technique at each intersection.
- Position your trellis where it receives ideal sunlight for your climbing plants while considering the shadow it’ll cast on other garden areas
- Create diagonal bracing between vertical and horizontal poles for enhanced stability in windy conditions
- Treat the bamboo with a natural preservative oil to extend its lifespan to 5+ years
Once completed, you’ll have a sturdy, eco-friendly structure that can support heavy climbers like grapes, wisteria, or climbing roses while maintaining your garden’s organic appearance. For optimal tool maintenance during construction, store your pruning shears and other equipment in a weather-resistant deck box to protect them from moisture and extend their lifespan.
Upcycled Container Water Features

A simple container water feature can turn ordinary recycled vessels into soothing garden focal points. You’ll need a submersible pump, watertight container, flexible tubing, and a power source to create your own recirculating fountain. Old ceramic pots, metal watering cans, or glass vessels work exceptionally well as primary containers.
Start by drilling a hole near the base of your chosen container for the power cord, then seal it thoroughly with waterproof silicone. Install the submersible pump at the container’s bottom, attaching the flexible tubing to direct water flow. You’ll want to position decorative rocks or a metal grate above the pump to conceal it while maintaining accessibility for maintenance.
For multi-tiered designs, you’ll need to stabilize each vessel carefully. Use waterproof construction adhesive to secure stacked containers, making sure they’re perfectly level to prevent overflow. It’s vital to maintain proper water levels and clean the pump’s filter monthly to prevent clogging.
Consider adding LED lighting for nighttime ambiance, but verify all electrical connections are properly rated for outdoor use and protected from moisture. You’ll also want to treat the water weekly with an algaecide to keep it clear. For optimal evening illumination, select 25-watt LED lights that provide the equivalent brightness of a 200-watt incandescent bulb while maintaining energy efficiency.
Stone Path Design

Well-designed stone paths create essential garden structure while providing durable, all-weather access through your landscape. When planning your path, first establish the route by laying out a garden hose to visualize the flow. You’ll want gentle curves rather than sharp turns, maintaining a consistent width of 36-48 inches for comfortable passage.
Select your stone materials based on your garden’s style and local availability. Natural flagstone, slate, or granite pavers offer lasting durability, while manufactured concrete pavers provide cost-effective alternatives. You’ll need approximately 10% extra material to account for cuts and breakage.
- Excavate the path 6 inches deep, plus the thickness of your chosen stone
- Install landscape fabric and add 4 inches of compacted gravel base
- Set stones with 1/2-inch gaps, using polymeric sand for stability
Level each stone using a rubber mallet and torpedo level, ensuring proper drainage with a slight slope away from structures (1 inch per 8 feet). For a professional finish, edge your path with metal restraints or soldier course pavers to prevent stone migration and maintain crisp lines over time. Consider integrating your path with a polycarbonate greenhouse to create a year-round gardening sanctuary that withstands harsh weather conditions.
Rustic Garden Bench

Create your own charming outdoor seating by crafting a rustic garden bench from reclaimed lumber and basic tools. You’ll need 2×6 boards for the seat, 4×4 posts for legs, and 2x4s for support bracing. Select weather-resistant wood like cedar or treated pine if you’re not using reclaimed materials.
Begin by cutting your 4×4 posts to 18 inches for the legs, ensuring square cuts for stability. Cut the 2×6 seat boards to 48 inches, allowing for a comfortable two-person bench. You’ll need three boards for the seat width. For the support structure, cut two 2x4s at 42 inches for front and back aprons.
Assemble the base frame first, connecting the legs to the aprons using 3-inch deck screws and waterproof wood glue. Pre-drill holes to prevent splitting. Space the seat boards 1/8 inch apart for drainage, securing them to the support frame with 2½-inch screws. Add diagonal bracing between the legs using 2×4 cuts at 45-degree angles for enhanced stability. Sand all edges, paying special attention to the seat surface, then apply two coats of exterior sealant for longevity.
Herb Garden Wall
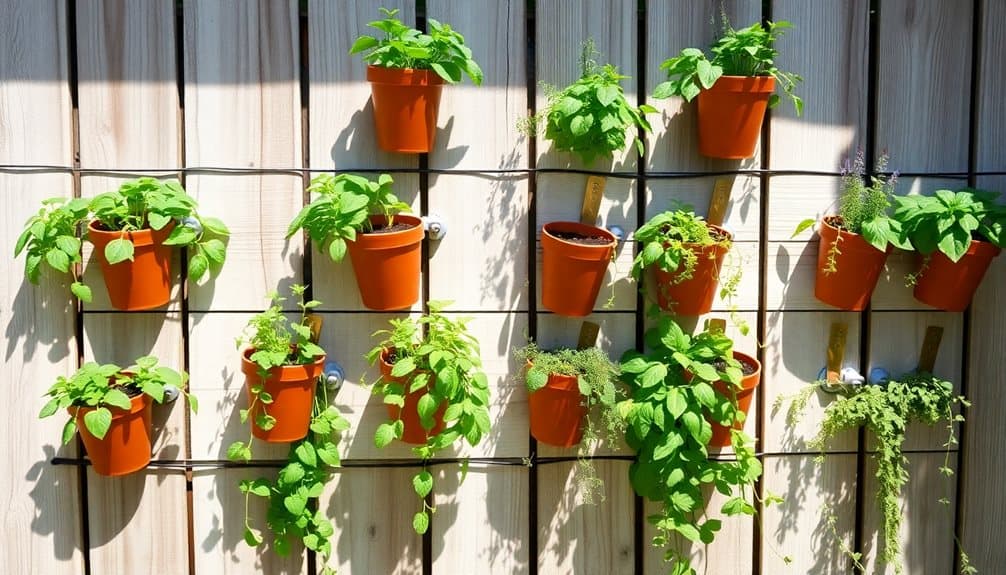
Along your exterior wall, vertical herb gardens maximize growing space while adding visual appeal to unused surfaces. You’ll need pressure-treated lumber for the frame, cedar planter boxes, and galvanized mounting hardware to support the weight when fully saturated. Select a south-facing wall that receives 6-8 hours of direct sunlight and guarantee proper water drainage to protect your home’s exterior.
Build individual planter boxes 24 inches wide by 8 inches deep, spacing them 12 inches apart vertically. Install a drip irrigation system using 1/4-inch tubing with adjustable emitters for consistent watering. Your herb selection should consider varying root depths and growth patterns.
- Mediterranean herbs like rosemary and thyme work best on upper levels where drainage is essential
- Leafy herbs such as basil and parsley thrive in middle sections with moderate moisture
- Shallow-rooted herbs like oregano and chives perform well in lower planters
Incorporate a weed barrier fabric behind the planters and add a layer of gravel at each box’s base for proper drainage. Secure all mounting brackets into wall studs or use appropriate masonry anchors for brick surfaces.
Backyard Fire Pit

Throughout outdoor living spaces, a properly constructed fire pit serves as both a focal point and functional gathering area. To build one, you’ll need to select a location at least 10 feet from structures and overhanging trees. Mark a circle with a 4-foot diameter using spray paint, then excavate 6 inches deep.
Pour a 2-inch layer of gravel for drainage, followed by a level 4-inch concrete base. Once cured, arrange your first layer of retaining wall blocks in a circle, using masonry adhesive between each block. You’ll need roughly 30-40 blocks total, depending on their size. Stack subsequent layers in a staggered pattern, offsetting each block for stability.
Cap the top layer with flat stones, securing them with adhesive. Install a steel fire ring insert to protect the blocks from direct heat. The ring’s lip should rest on top of your blocks, creating a seamless look. Add 2 inches of sand inside the pit for heat distribution and drainage. You’ll want to cure your fire pit by building small fires first, allowing the materials to adjust gradually to heat exposure.
Frequently Asked Questions
How Long Will Pressure-Treated Lumber Last in Contact With Garden Soil?
You can expect pressure-treated lumber to last 20-30 years when in contact with soil, provided it’s rated for ground contact (UC4A or UC4B rating). Your lumber’s longevity depends on its treatment level, soil moisture, and drainage conditions. It’ll resist rot, fungi, and insects better than untreated wood, but you’ll maximize its lifespan by ensuring proper drainage and using a higher grade of treatment.
What Permits Do I Need Before Starting Backyard DIY Projects?
Did you know that 23% of homeowners face fines for starting projects without proper permits? You’ll need to check with your local building department for specific requirements, but generally, you’ll require permits for structures over 120 square feet, any electrical work, plumbing changes, or projects that alter your property’s drainage. Don’t forget to take into account HOA restrictions and setback requirements before breaking ground on your backyard projects.
Can I Use Recycled Tires for Garden Projects Safely?
You can use recycled tires in garden projects with specific safety considerations. Choose tires free from metal debris and severe wear. Don’t use them for food-producing plants, as tires can leach chemicals like zinc, PAHs, and volatile organic compounds into soil. For decorative gardens, paint tires with non-toxic exterior rubber sealant to minimize chemical exposure and UV degradation. Position them away from direct sun to prevent tire breakdown.
Which Power Tools Are Essential for Beginner DIY Garden Projects?
You’ll need a cordless drill with various bits for assembly and pilot holes, a circular saw for straight cuts in lumber, and a pruning saw for garden maintenance. Add a power washer for cleaning and prep work. While not strictly power tools, don’t forget a sturdy wheelbarrow and quality hand tools. For more advanced projects, consider investing in an orbital sander and reciprocating saw.
How Much Should I Budget for Basic Garden Project Materials?
You’ll need to budget $200-400 for essential garden project materials. This includes lumber ($75-150), hardware like screws and brackets ($30-50), concrete mix ($25-40), landscape fabric ($20-30), and basic building materials such as gravel or pavers ($50-100). Remember to factor in a 15% contingency for unexpected needs. These costs can vary based on your location and material quality preferences.

