This website contains affiliate links. Some products are gifted by the brand to test. As an Amazon Associate, I earn from qualifying purchases. The content on this website was created with the help of AI.
Transform your living space with these ten affordable DIY projects that pack designer style into a $50-or-less budget. You’ll create stunning focal points with rustic mason jar pendants casting warm pools of light and geometric wall art adding modern drama. Maximize corners with floating shelves, while macramé plant hangers bring bohemian flair to vertical spaces. Add personality through custom throw pillows, woven rope baskets, and distressed wood signs. String art and hand-painted terra cotta pots inject artistic charm without breaking the bank. Let’s explore these creative ways to elevate your home’s aesthetic on a budget.
Key Takeaways
- Mason jar light fixtures create rustic ambiance for $15-25 each using simple materials like jars, pendant kits, and Edison bulbs.
- Macrame plant hangers cost under $25 and require only cotton cord, wooden beads, and basic knot techniques.
- Custom throw pillows can be made economically using fabric, piping cord, and stuffing for unique home accents.
- Floating corner shelves maximize space using affordable pine boards and corner brackets, perfect for displaying decor items.
- Painted terra cotta pots transform basic planters into personalized decor with primer, paint, and weather-resistant sealer.
Rustic Mason Jar Light Fixtures
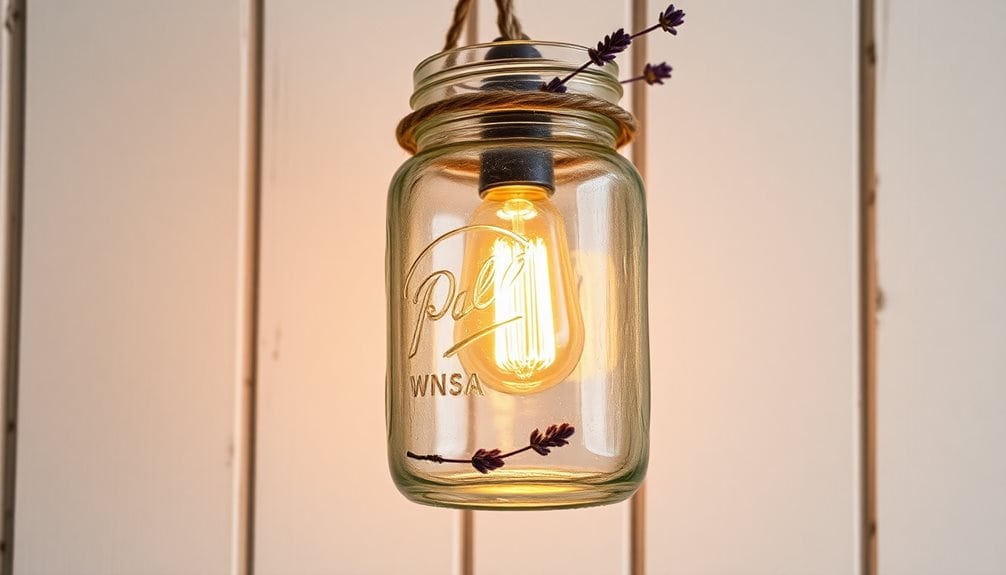
Mason jar light fixtures bring timeless rustic charm to any room while casting a warm, inviting glow through vintage-inspired glass. You’ll need quart-sized Ball or Mason jars, pendant light kits, Edison bulbs, and basic tools to create these eye-catching fixtures. The weathered zinc lids and textured glass perfectly complement farmhouse, industrial, or cottage-style décor.
Start by drilling a 3/8-inch hole through the jar’s metal lid for the light cord. Remove any sharp edges with a metal file, then thread your pendant kit’s cord through the opening. Install the socket following the kit’s instructions, being careful to secure all electrical connections. You can leave the jars clear for maximum light or customize them with frosted spray paint for a softer effect.
Mount your fixtures individually over a kitchen island, cluster three at varying heights for a dining room centerpiece, or line them along a hallway. For added character, choose amber-tinted jars or wrap copper wire around the neck. These versatile lights cost about $15-25 per fixture, depending on your chosen materials, and they’ll transform your space with their vintage-industrial appeal. Like modern closet systems that support up to 890 pounds, these mason jar fixtures are surprisingly sturdy when properly installed.
Geometric Wall Art Display

Bold angles and striking shapes take center stage with geometric wall art, offering a modern twist on traditional gallery displays. Using wood strips, metallic paint, and basic mounting hardware, you’ll create an eye-catching focal point that transforms blank walls into dynamic visual statements.
Start by cutting 1×2 pine strips at various angles – 45, 60, and 30 degrees work best. You’ll need twelve 12-inch pieces and eight 8-inch pieces. Sand the edges smooth, then apply two coats of your chosen metallic paint (copper and gold create warming effects, while silver and gunmetal offer industrial appeal). Once dry, arrange your pieces on kraft paper to test different patterns before mounting.
Secure the geometric pieces directly to your wall using small finish nails or mounting adhesive, maintaining 2-3 inch spaces between elements. Create depth by overlapping select pieces at corners. The beauty of this project lies in its versatility – you can expand the design horizontally or vertically, cluster shapes tightly for intensity, or spread them out for a lighter feel. Consider painting your wall a contrasting color first to make the metallic geometrics pop even more dramatically.
Like outdoor garden decor, applying a UV-resistant clear coat to your finished geometric wall art will prevent fading and extend its lifespan significantly.
Floating Corner Shelves
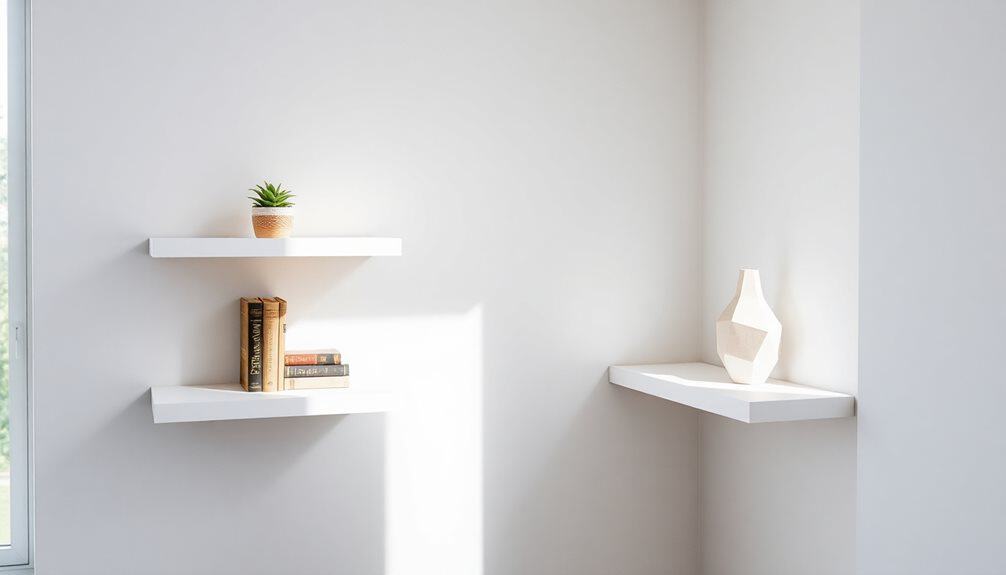
Tucked into unused corners, floating shelves transform dead space into striking storage that appears to defy gravity. These L-shaped wooden platforms create an elegant architectural feature while maximizing your room’s vertical potential. You’ll find they’re perfect for displaying treasured photos, small potted plants, or curated collections of books.
To create your own floating corner shelves, you’ll need 1×8 pine boards, a miter saw, wood glue, and heavy-duty corner brackets. Cut your boards at precise 45-degree angles to form seamless L-shaped connections. Sand the edges smooth and apply your choice of stain or paint to match your room’s aesthetic. For a modern look, try matte black or crisp white; for rustic charm, opt for natural wood tones.
Install the brackets securely into wall studs using a level to guarantee perfect alignment. You can stack multiple shelves at varying heights to create visual interest, keeping 12-16 inches of space between each level. The key to professional-looking results lies in hiding the mounting hardware completely behind the shelf boards, maintaining that clean, floating appearance that makes these shelves so striking. For added visual impact, consider incorporating metal wall decor between shelving levels to create dynamic light and shadow interplay.
Macrame Plant Hangers

Natural fibers woven into intricate patterns create stunning macrame plant hangers that add bohemian charm to any room. These versatile decorative pieces suspend your favorite potted plants from the ceiling, allowing you to maximize vertical space while creating visual interest. With basic materials like cotton cord, wooden beads, and a metal ring, you’ll craft a custom planter that costs under $25.
Start by measuring eight 6-foot lengths of cord and fold them in half through your metal ring. Master essential macrame knots like the square knot and spiral knot to create geometric patterns that cascade down from the ring. You’ll want to space your knots 2-3 inches apart, forming diamond shapes and twists that cradle your plant pot securely. Thread wooden beads at key points to add natural accents and visual weight to your design.
As you work downward, divide your cords into four sections to create the basket that will hold your pot. Finish with gathering knots about 8 inches below where your pot will sit, then trim and unravel the remaining cord into a decorative fringe that adds movement and texture to your piece. Beautiful plant hangers can elevate any space while bringing nature indoors.
Patterned Throw Pillows
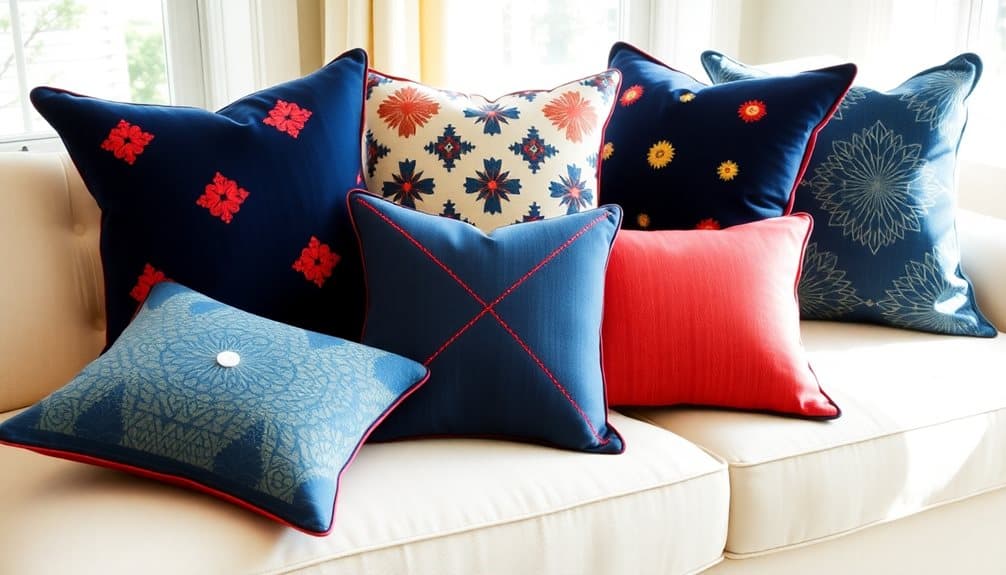
Crafting your own patterned throw pillows lets you infuse personal style into any room while saving money on designer versions. You’ll need fabric in your chosen pattern, coordinating solid fabric for the back, piping cord, zipper, and stuffing. Select durable materials like cotton canvas or upholstery-weight fabrics that can withstand daily use.
Start by cutting two 18-inch squares for a standard throw pillow, adding a 1/2-inch seam allowance. Create custom patterns using fabric paint, block printing, or stencils if you can’t find the perfect print. For geometric designs, use painter’s tape to mark off clean lines. Install a hidden zipper along the bottom edge for easy cover removal and cleaning.
To add professional flair, wrap piping cord with bias tape in a complementary color and stitch it between the front and back pieces. Press all seams carefully for crisp edges. Before stuffing, turn the cover right side out and check corners for proper definition. Use polyester fiberfill or a pre-made pillow form for the insert, making sure to fill corners completely for a plump, designer look.
Framed Pressed Flower Collection

A pressed flower collection brings the elegance of your garden indoors through sophisticated wall art. By arranging delicate blooms within floating frames, you’ll create a timeless botanical display that captures nature’s fleeting beauty. Select flowers with vibrant colors and interesting shapes, such as pansies, daisies, violets, and ferns, ensuring they’re completely dry before pressing.
To create your collection, you’ll need clear glass frames, acid-free paper, tweezers, and pressed flowers. Position your specimens on white cardstock, experimenting with different arrangements until you achieve the perfect composition. Layer multiple flowers for depth, or create a minimalist display with single stems. Once you’ve finalized the design, carefully secure each element with archival-quality adhesive.
Arrange your frames in a gallery-style grouping, mixing various sizes for visual interest. Consider organizing by color palette, flower type, or season. White or natural wood frames work best, allowing your preserved botanicals to take center stage. Mount the collection in a spot away from direct sunlight to prevent fading, creating an eye-catching focal point that celebrates nature’s intricate details while adding a personal touch to your space. For those who grow their own flowers, use a soaker hose system to nurture healthy, vibrant blooms perfect for pressing.
Woven Rope Basket
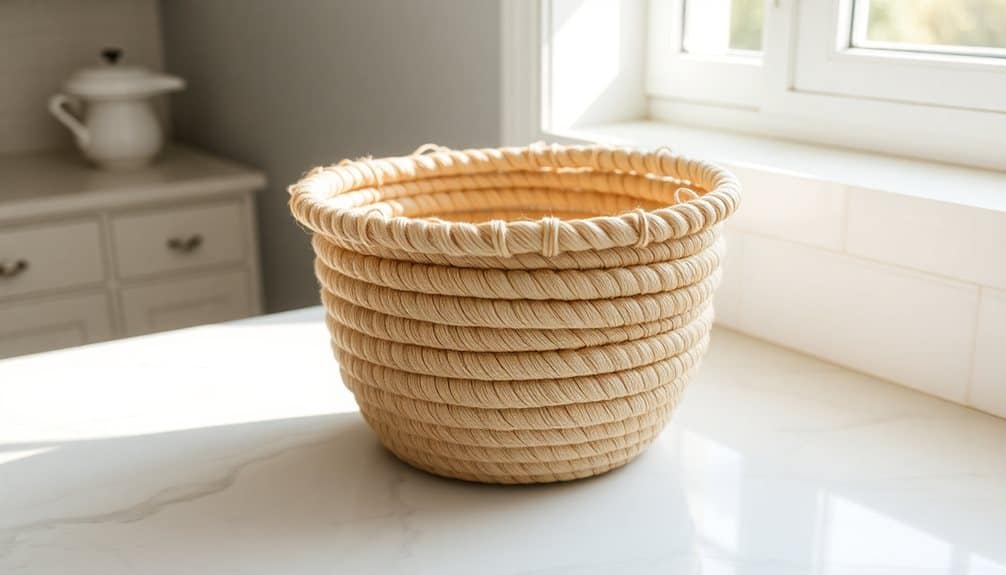
Modern rope baskets effortlessly blend form and function while adding textural interest to any room. With just cotton rope, fabric glue, and a steady hand, you’ll create a stunning storage piece that looks like it came from a high-end boutique. You’ll need about 50 feet of 1/2-inch cotton rope, fabric glue, and scissors to complete this project.
Start by coiling the rope into a tight spiral for the base, securing it with fabric glue as you go. Once you’ve created a 6-inch circle, begin building the walls by stacking coils and gradually angling them outward. The key to achieving a professional look lies in maintaining consistent spacing between rows and applying glue sparingly to prevent seepage.
You can customize your basket‘s height, shape, and design by varying the coil placement. Add visual interest by incorporating different rope colors or weaving patterns at specific intervals. For stability, reinforce the base with additional glue and let it dry completely before use. The finished basket works beautifully for storing magazines, throw blankets, or even as a catch-all for entryway essentials, while its neutral palette complements any decor style.
Distressed Wood Signs

Rustic wood signs bring timeless farmhouse charm to any wall while letting you showcase meaningful quotes or personal mantras. By distressing new wood, you’ll create an aged appearance that adds character and vintage appeal to your space. Start with a pine board, sand it smooth, then apply your chosen stain color to achieve the perfect weathered tone.
For authentic-looking distressing, you’ll want to:
- Strike the wood’s surface with a chain, hammer, or screwdriver to create natural-looking dents and marks
- Rub the edges with sandpaper to mimic years of wear and tear
- Apply white or cream paint, then sand portions away to let the wood grain show through
- Add strategic scratches and nicks using steel wool for dimension
Once you’ve achieved your desired distressed look, transfer your text using a stencil or carbon paper. Paint your letters with a contrasting color, such as white on dark wood or black on light wood. Seal your finished piece with clear matte polyurethane to protect your artwork while maintaining its rustic appearance. Add picture hangers to the back, and your custom sign is ready to display.
Painted Terra Cotta Pots

Transforming ordinary terra cotta pots into eye-catching decorative pieces lets you personalize your indoor or outdoor spaces with vibrant colors and unique patterns. You’ll need clean terra cotta pots, acrylic paint, sealer, brushes, and basic painting supplies to get started. Before painting, seal the pots inside and out with a clear primer to prevent moisture absorption and paint peeling.
Choose a color scheme that complements your existing decor. You can opt for solid colors, geometric patterns, or intricate designs using stencils. For a modern look, try color blocking with crisp lines or create an ombré effect by blending two or three complementary shades. If you’re feeling artistic, hand-paint botanical motifs or abstract patterns using fine-tipped brushes.
After your design is complete, apply two coats of weather-resistant sealer to protect the paint from sun and rain damage. You can cluster different-sized painted pots on your patio, create a colorful windowsill herb garden, or use them as striking centerpieces. Don’t forget to drill drainage holes if you’re planning to use them for live plants, and elevate the pots slightly off surfaces to prevent water damage.
String Art Wall Decor

With minimal materials and maximum impact, string art transforms blank walls into dimensional masterpieces of geometric precision. You’ll need a wooden board, small nails, colorful embroidery thread, and a hammer to create stunning wall art that catches light and casts intricate shadows. Whether you choose a minimalist heart design or an elaborate mandala pattern, string art adds texture and visual interest to any room.
Start by selecting a pre-stained or painted wooden board as your base, then transfer your chosen design using transfer paper or a printed template. Map out your nail placement points about 1/2 inch apart along the pattern lines, then carefully hammer each nail halfway into the board.
- Metallic gold thread woven between copper nails on dark walnut wood creates a sophisticated sunburst pattern
- Navy blue and white strings intersecting on whitewashed pine form a nautical anchor motif
- Rainbow-colored threads crossing over matte black nails produce a vibrant geometric mountain scene
- Soft pink and gray strings delicately wrapped around silver nails shape a dreamy cloud silhouette
Connect the nails by wrapping your thread in specific patterns, building layers of depth and dimension until your design emerges.
Frequently Asked Questions
How Long Should I Expect These DIY Projects to Take?
As you sit at your workbench, sunlight streaming through the window onto your scattered supplies, you’ll find most simple DIY projects take 2-4 hours to complete. More intricate ones, like custom shelving or mosaic wall art, might stretch across a weekend. You’ll spend about half your time gathering materials and prepping your workspace, while the actual crafting flows naturally through your creative process.
What Basic Tools Do I Need to Start These Home Decor Projects?
You’ll need a reliable set of basic tools to jumpstart your creative projects: a hammer, screwdrivers (both Phillips and flathead), measuring tape, level, utility knife, and a drill with basic bits. Don’t forget essential supplies like sandpaper, paintbrushes, pliers, and a sturdy pair of scissors. Keep these organized in a portable toolbox, and you’ll be ready to tackle decorative transformations at a moment’s notice.
Can These Projects Be Done Without Prior Crafting Experience?
You’ll find most beginner-level crafting projects quite approachable, even without prior experience. Start with simpler tasks like painting picture frames or creating throw pillows, where mistakes are easily fixable. As you build confidence, you can tackle more complex projects. Many techniques are intuitive, and you’ll learn by doing. Online tutorials and step-by-step guides make the learning process smoother and more enjoyable.
Are There Child-Friendly Alternatives for These Decor Projects?
Like a butterfly emerging from its cocoon, your child’s creativity can transform simple materials into beautiful décor. You’ll find kid-friendly versions using washable paint, foam shapes, and safety scissors. Let your little ones create paper garlands, painted mason jars, or fabric-wrapped canvases. You can swap hot glue for school glue, replace glass with plastic containers, and use wooden beads instead of delicate materials.
Where Can I Find Inspiration for Different Color Schemes and Patterns?
You’ll find endless color inspiration on Pinterest boards, interior design blogs, and Instagram accounts dedicated to home styling. Nature can spark unique palettes – capture photos of sunsets, gardens, or beaches that catch your eye. Design apps like Coolors and Color Hunt let you generate custom schemes instantly. Browse home decor magazines, fabric stores, and wallpaper collections to discover exciting patterns and print combinations that resonate with your style.

