This website contains affiliate links. Some products are gifted by the brand to test. As an Amazon Associate, I earn from qualifying purchases. The content on this website was created with the help of AI.
Transform your living space with these achievable weekend DIY projects that require only basic tools and skills. You’ll find satisfying options like installing rustic floating shelves with hollow bracket systems, creating a modern geometric wall display using precise angle cuts, or building a window seat storage bench complete with upholstered cushioning. Other quick transformations include assembling a farmhouse coffee table, mounting a vertical herb garden, designing a cozy reading nook, updating your bathroom vanity, constructing an outdoor fire pit, or converting empty wall space into a built-in bookcase. These detailed instructions will guide you through each step-by-step renovation.
Key Takeaways
- Cabinet painting transforms kitchens quickly with basic supplies like paint, rollers, and brushes, requiring only 48 hours of curing time.
- Modern geometric wall art creates dramatic visual impact using simple lumber, wood glue, and stain or paint.
- A cozy reading nook can be assembled by installing floating shelves, adding lighting, and arranging comfortable seating.
- The rustic floating shelves project needs only wood planks, brackets, and basic tools for quick installation.
- Bathroom vanity updates are achievable through sanding, painting, and hardware replacement in a single weekend.
Rustic Floating Shelves
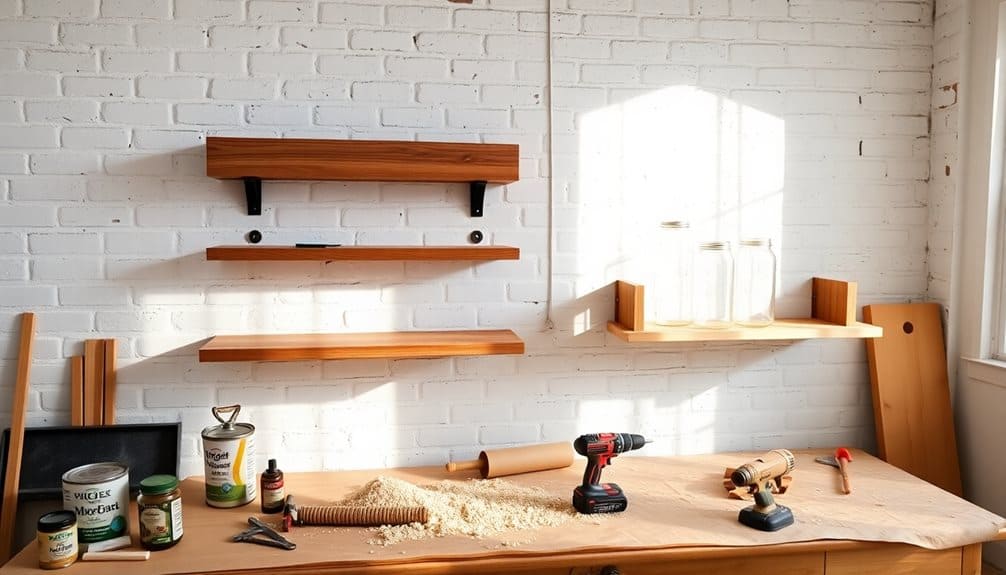
Whether you’re looking to add storage or create a striking visual display, rustic floating shelves offer a perfect blend of functionality and farmhouse charm. To create these shelves, you’ll need a solid wood plank (preferably pine or oak), a hollow floating shelf bracket system, wood stain, and basic tools like a drill, level, and screwdriver.
Begin by cutting your wood plank to your desired length, then sand all surfaces thoroughly with 120-grit sandpaper, followed by 220-grit for smoothness. Apply your chosen wood stain evenly using a foam brush, wiping excess with a clean cloth. Allow 24 hours for complete drying.
Install the bracket system by marking your wall studs and drilling pilot holes. Mount the bracket hardware using a level to guarantee perfect alignment. Each bracket should support 30-50 pounds, depending on your chosen system. Slide your finished wood shelf over the mounted brackets, secure with provided screws, and check for stability.
For a more weathered appearance, you can distress the wood before staining by striking it with chains or creating dents with a hammer. This technique adds authentic character to your finished shelves.
Enhance your shelves’ rustic appeal by styling them with dried pampas grass arrangements that require no maintenance and last indefinitely.
Modern Geometric Wall Art

Through the combination of basic lumber and precise cutting angles, modern geometric wall art transforms ordinary spaces into stunning focal points. You’ll need 1×2 pine boards, a miter saw, wood glue, finishing nails, and your choice of wood stain or paint. Begin by sketching your design on paper, ensuring your angles create a cohesive pattern that fits your intended wall space.
Set your miter saw to cut precise 30-, 45-, and 60-degree angles based on your design. Cut your boards to various lengths, maintaining consistent measurements for repeating segments. You’ll want to lay out all pieces on a flat surface before assembly to verify your pattern. Start connecting pieces using wood glue at the joints, reinforcing with finishing nails where needed.
Once you’ve assembled your geometric pattern, sand any rough edges and clean the surface thoroughly. Apply your chosen finish in even coats, allowing proper drying time between applications. Mount your completed piece using D-rings or a French cleat system, ensuring it’s level and secured to wall studs. Your modern geometric wall art will create dramatic shadows and visual interest, serving as a sophisticated architectural element in your space. When working in your garden workshop, keep a gardening fork nearby to maintain proper workspace organization and tool accessibility.
Window Seat Storage Bench

Building a window seat storage bench requires five essential components: a sturdy frame, a hinged top, interior compartments, cushioning, and decorative trim. You’ll need to measure your window space precisely and account for wall moldings before cutting your lumber to size. The frame construction uses 2x4s for the base and vertical supports, while ¾-inch plywood works well for the sides and compartment dividers.
For maximum functionality, install heavy-duty hinges that can support the weight of the lid and prevent slamming. Create the storage compartments using additional plywood pieces, ensuring they’re properly reinforced to hold heavy items.
- Use weather-stripping tape along the lid’s edges to prevent dust from entering the storage space
- Install lid support hinges to hold the top open safely while accessing stored items
- Add ventilation holes in hidden areas if you’re storing fabric items
For the cushioning, cut high-density foam to size and wrap it in batting before covering with your chosen upholstery fabric. Secure decorative trim using a nail gun and wood glue to conceal any exposed edges. Don’t forget to sand all visible surfaces and apply a proper finish to protect the wood from wear and tear. Consider adding wall-mounted hooks above your window seat to maximize vertical storage space and create a coordinated look.
Farmhouse Coffee Table

A rustic farmhouse coffee table transforms your living space while providing practical functionality with its ample surface area and bottom shelf. You’ll need 2x4s and 2x6s for the frame, 1x4s for the shelf, and 1x6s for the tabletop. The project requires basic tools: a miter saw, drill, wood screws, and sandpaper.
Begin by cutting your lumber to size: four 40-inch pieces for the tabletop, two 36-inch pieces for the sides, and four 16-inch pieces for the ends. Create the base frame by connecting the side and end pieces in a rectangular shape using pocket holes. Attach the legs at each corner using wood screws and guarantee they’re perfectly square with a level.
Install the bottom shelf supports and lay the 1x4s across them, spacing them evenly. For the tabletop, arrange the 1x6s and secure them to the frame using countersunk screws. Sand all surfaces thoroughly, starting with 80-grit and progressing to 220-grit sandpaper. Apply your chosen stain in even strokes, following the wood grain. Once dry, protect your table with two coats of polyurethane, sanding lightly between coats. To maintain the table’s beauty and prevent moisture damage, apply mineral oil every 3-4 months as part of regular maintenance.
Hanging Herb Garden

Fresh herbs elevate your cooking year-round with this space-saving vertical garden project that requires minimal materials and tools. Using wooden pallets or pre-cut cedar planks, you’ll create a modular system that attaches securely to any wall with adequate sunlight exposure.
Start by measuring your designated wall space and cutting the wood to size, ensuring each shelf can support 4-inch herb pots. Sand all surfaces thoroughly and apply weather-resistant sealant to protect against moisture. Pre-drill mounting holes at 16-inch intervals to align with wall studs, then secure the structure using galvanized lag bolts.
- Install a drip irrigation system using 1/4-inch tubing and adjustable emitters for each pot position
- Add a permeable landscape fabric backing to prevent soil spillage and water damage
- Incorporate a collect-and-drain system at the base to manage excess water
Position your herbs strategically, placing sun-loving varieties like basil and oregano on upper levels, while shade-tolerant herbs like mint and parsley can thrive below. Your vertical garden will need 6-8 hours of daily sunlight and regular fertilization every three weeks during growing season to maintain ideal yield. For propagating new herbs, consider adding propagation test tubes along the edges to multiply your favorite varieties.
Painted Kitchen Cabinet Makeover

Moving from outdoor herb cultivation to indoor improvements, painted cabinets can dramatically transform your kitchen‘s appearance for a fraction of replacement costs. Begin by removing all hardware and thoroughly cleaning cabinet surfaces with trisodium phosphate (TSP) to remove grease and grime. Sand all surfaces with 120-grit sandpaper, followed by 220-grit for smoothness.
Apply a high-adhesion primer specifically formulated for cabinets, using a foam roller for flat surfaces and an angled brush for details. Let it dry completely for 24 hours. You’ll need two coats of paint – opt for semi-gloss or satin finish cabinet paint for durability. Apply thin, even coats using a combination of foam roller and high-quality synthetic brush techniques.
Between coats, lightly sand with 320-grit sandpaper to guarantee a professional finish. Allow 48 hours of curing time before reattaching hardware. For best results, work systematically: label doors and hardware, paint upper cabinets first, then lowers. Consider updating handles and hinges to complete the transformation. This project requires approximately 12-15 hours of active work time spread across two days.
Cozy Reading Nook
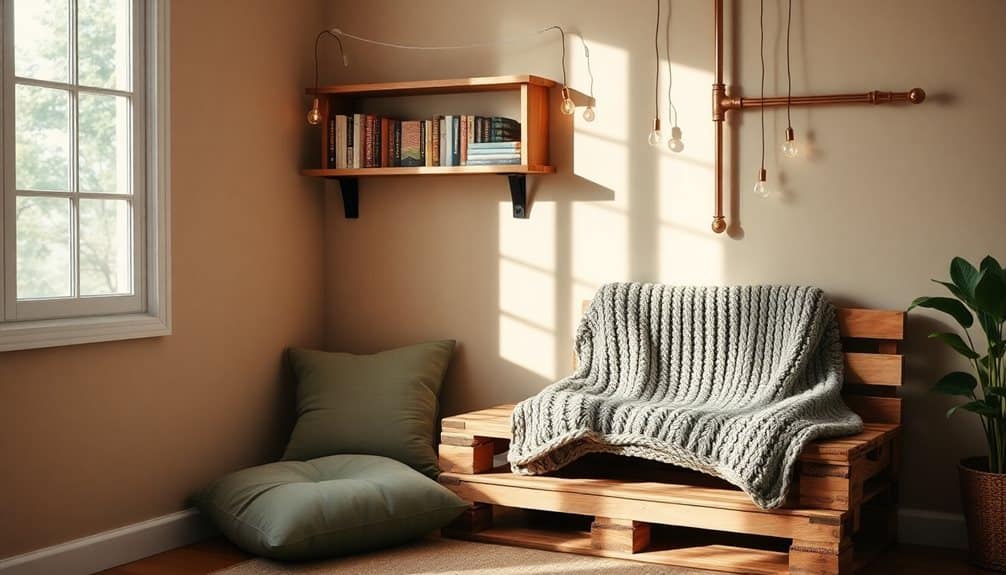
Creating your own cozy reading nook requires careful consideration of three essential elements: lighting, seating, and storage. Start by selecting a corner or window space that’s at least 4×4 feet to accommodate a comfortable chair and small side table. Install adjustable LED wall sconces or a floor lamp with a color temperature between 2700K and 3000K for ideal reading conditions.
For the seating arrangement, choose an upholstered armchair with a seat depth of at least 21 inches and supportive lumbar cushioning. Add a footstool or ottoman that’s 16-18 inches high to promote proper ergonomic positioning while reading.
- Install floating shelves (12 inches deep) within arm’s reach to store current reads and display favorite books
- Layer the space with a plush area rug (minimum 5×7 feet) featuring a pile height of 0.5 inches for sound absorption
- Mount blackout curtains on an adjustable rod system to control natural light levels throughout the day
Complete your nook with a compact side table positioned 6-8 inches from the chair’s arm, ensuring your reading materials and beverages remain within easy reach. Add a throw blanket and lumbar pillow for extended comfort during reading sessions.
Bathroom Vanity Update
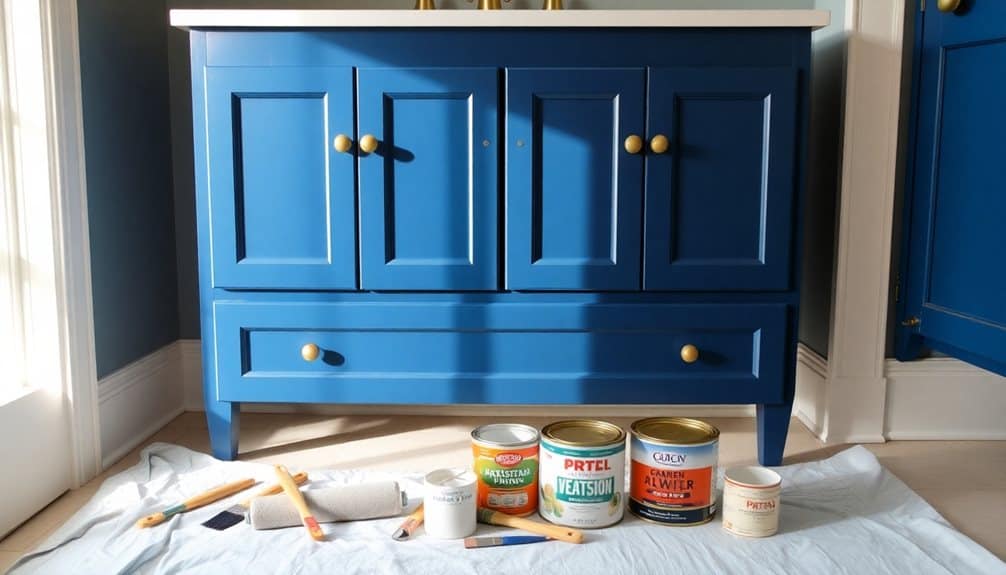
Your bathroom vanity serves as the centerpiece of daily routines, and updating it can transform your space without a complete renovation. This project requires basic tools: sandpaper, primer, paint, new hardware, and a screwdriver. Start by removing all drawers, doors, and existing hardware, then thoroughly clean surfaces with a degreasing agent.
Sand the vanity’s surface with 150-grit sandpaper, followed by 220-grit for smoothness. Wipe away dust with a tack cloth before applying an oil-based primer. Once dry, sand lightly with 320-grit paper. Apply two coats of paint using a foam roller for flat surfaces and an angled brush for details, allowing proper drying time between coats.
Install new hardware by measuring and marking precise locations for knobs or pulls. If existing holes don’t align, fill them with wood putty and drill new ones. Consider updating the faucet and adding a fresh caulk line where the vanity meets the wall. Complete the transformation by cleaning the mirror, replacing the light fixture, and organizing the newly refreshed drawers with drawer organizers for maximum functionality.
Outdoor Fire Pit
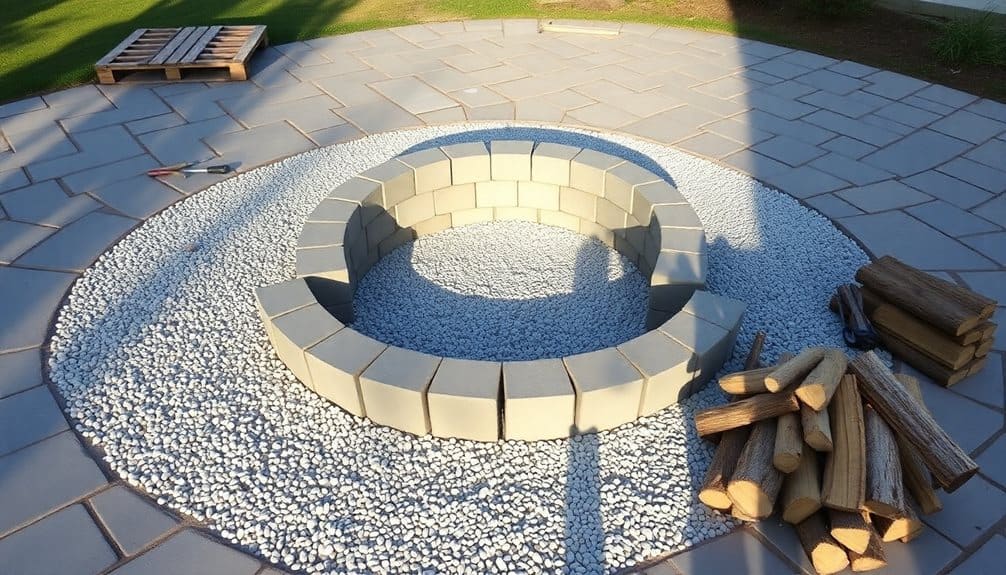
Building an outdoor fire pit can transform a backyard into a cozy gathering space while adding value to your property. You’ll need to start by selecting a level location at least 10 feet away from structures and overhanging trees. Begin by marking a circle with spray paint, using a string attached to a center stake to guarantee perfect symmetry.
For a standard 36-inch diameter fire pit, you’ll need approximately 80-100 retaining wall blocks. Excavate the marked area to a depth of 6 inches, then add 2 inches of gravel for drainage. Layer your blocks in a circular pattern, using masonry adhesive between levels for stability. Install a metal fire ring inside the structure to protect the blocks from direct heat.
- Use a level on each course of blocks to maintain even height and prevent tilting
- Install a layer of heat-resistant lava rock or fire glass at the bottom for enhanced drainage
- Add metal grates or mesh screens to control sparks and guarantee safety
Complete the project by creating a 2-foot perimeter of gravel around the pit to establish a clear fire-safe zone and improve aesthetics.
Built-In Bookcase Transformation
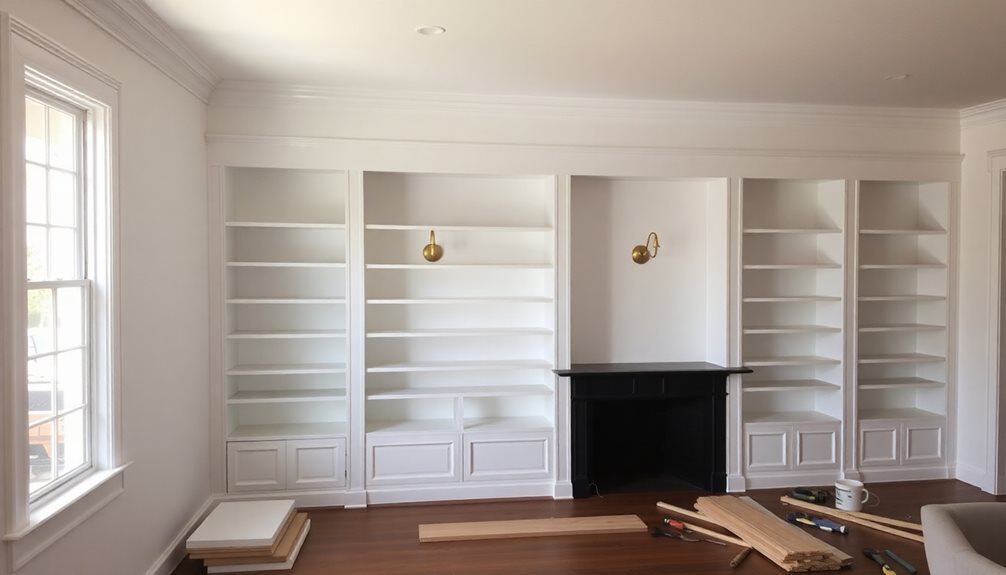
Transforming basic shelving into custom built-in bookcases can dramatically elevate a room’s aesthetic while maximizing storage space. You’ll need basic carpentry tools, MDF or plywood, trim molding, wood filler, primer, and paint to complete this project. Begin by removing any existing baseboards where the bookcase will sit.
Secure the existing shelving unit to wall studs using 3-inch screws, ensuring it’s perfectly level. Cut MDF panels to create side panels and a top piece that extends to the ceiling. Install these pieces using wood glue and finish nails. Add face frames using 1×2 lumber to cover any exposed edges and create a built-in appearance.
Apply crown molding at the ceiling junction and base molding at the floor to integrate the unit seamlessly with your room’s existing trim. Fill nail holes and seams with wood filler, then sand all surfaces until smooth. Prime all surfaces with a high-quality primer, paying special attention to MDF edges. Finally, apply two coats of semi-gloss paint, matching your room’s trim color. Allow 24 hours of curing time before loading your newly transformed built-in bookcase with books and decorative items.
Frequently Asked Questions
What Tools Should Every DIY Beginner Have in Their Basic Toolkit?
Whether you’re building or fixing, measuring or marking, you’ll need these essential tools: a claw hammer, flathead and Phillips screwdrivers, adjustable wrench, needle-nose pliers, utility knife, level, tape measure, and cordless drill with basic bits. Don’t forget safety gear – protective goggles and work gloves. Add a stud finder, putty knife, and Allen wrench set to round out your starter toolkit.
How Do I Determine if a Project Requires a Building Permit?
You’ll need to contact your local building department or planning office to determine permit requirements. Projects typically needing permits include structural changes, electrical work, plumbing modifications, room additions, deck construction, and major renovations. Check your municipality’s website for their specific requirements, or call directly. Don’t skip this step, as unpermitted work can result in fines, mandatory removal, or complications when selling your property.
What Safety Equipment Is Essential for DIY Home Improvement Projects?
You’ll need safety glasses to protect against debris, a quality dust mask or respirator for harmful particles, and work gloves rated for your specific task. Don’t forget ear protection when using power tools, and wear steel-toed boots to guard against falling objects. A hard hat becomes essential for overhead work, while knee pads protect during floor-level tasks. Keep a first-aid kit readily accessible.
Which DIY Projects Add the Most Value to a Home?
You’ll gain the highest return on investment by focusing on kitchen and bathroom updates, including cabinet refinishing, modern hardware installation, and backsplash upgrades. Fresh interior paint can yield a 107% ROI, while installing new garage doors offers 93.8% returns. Adding curb appeal through landscaping, updating light fixtures, and replacing the front door consistently deliver 60-80% ROI. Smart home technology integration also increases property value substantially.
How Do I Find the Wall Studs Without a Stud Finder?
You can locate wall studs by first measuring 16 inches from a corner, as studs are typically spaced at this interval. Knock on the wall and listen for a solid sound versus a hollow one. Look for electrical outlets, which are usually mounted to studs. You’ll also find studs around windows and doors. Use a thin nail to verify the stud’s exact position once you’ve narrowed down the location.


