This website contains affiliate links. Some products are gifted by the brand to test. As an Amazon Associate, I earn from qualifying purchases. The content on this website was created with the help of AI.
You’ll enhance your woodworking efficiency by building three essential shop storage solutions: a custom drill bit organizer, a portable tool tote, and a wall-mounted small parts cabinet. The drill bit organizer requires a 12″ x 18″ hardwood piece with graduated holes and size markings. Your portable tool tote, built from 3/4-inch oak or maple, features customizable compartments and measures 24″ L x 12″ W x 14″ H. The wall-mounted cabinet, constructed from ¾-inch plywood, provides organized storage for small parts using ball-bearing drawer slides. These projects incorporate proper tool protection techniques and maintenance principles to maximize your workshop’s functionality and tool longevity.
Key Takeaways
- The Portable Tool Tote offers a weekend project using hardwood, featuring customizable compartments and requiring basic woodworking skills.
- A Custom Drill Bit Organizer can be completed in one weekend using a 12″ x 18″ hardwood piece with graduated holes.
- The Wall-Mounted Small Parts Cabinet provides organized storage and can be assembled over a weekend with plywood and drawer slides.
- Each project requires common tools like a saw, drill, and measuring instruments, making them accessible for DIY woodworkers.
- All three projects can be finished with polyurethane coating for durability and protection against workshop wear.
Custom Drill Bit Organizer

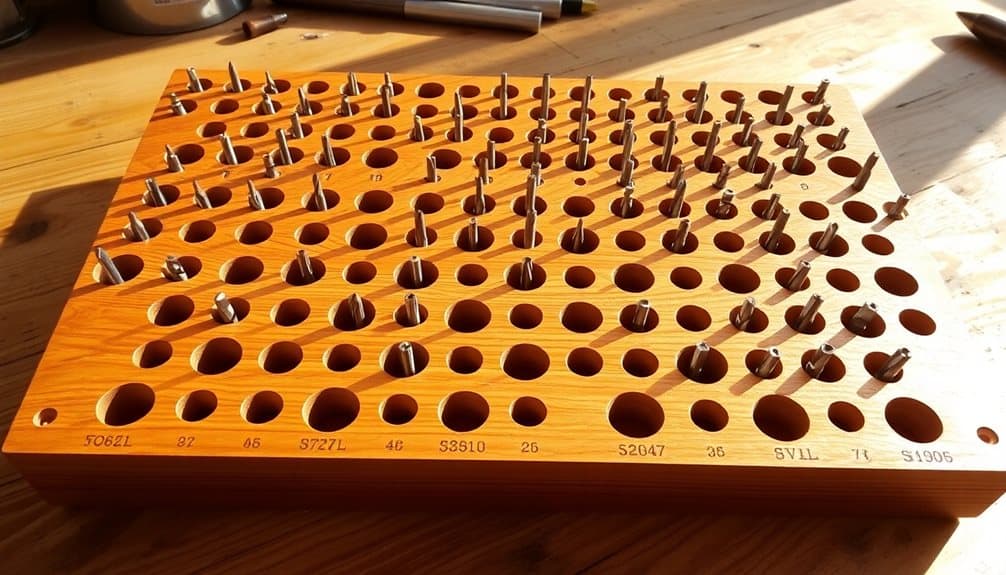
A well-organized drill bit collection is essential for efficient woodworking. Building your own drill bit organizer guarantees each bit is visible, accessible, and protected from damage. You’ll need a 12″ x 18″ piece of 3/4″ hardwood, a drill press, and graduated drill bits matching your collection’s sizes.
Start by measuring and marking a grid pattern with 1-1/2″ spacing between holes. Use a center punch to prevent bit wandering, then drill pilot holes at each intersection. Follow with progressively larger bits until you’ve reached the desired diameter for each storage hole. The holes should be 1/4″ deeper than your longest bit to prevent tip damage.
For enhanced organization, engrave or burn size markings next to each hole. Apply two coats of polyurethane to protect the wood and prevent moisture absorption. Mount the organizer vertically using keyhole slots or French cleats, guaranteeing it’s securely fastened to wall studs. Consider adding a shallow lip at the bottom to catch any bits that might work loose.
Don’t forget to include holes for specialty bits like Forstner bits, spade bits, and countersinks. Label these sections clearly for quick identification during projects. Regular cleaning and proper storage in your organizer will help prevent resin and debris buildup that can significantly reduce bit performance.
Portable Tool Tote

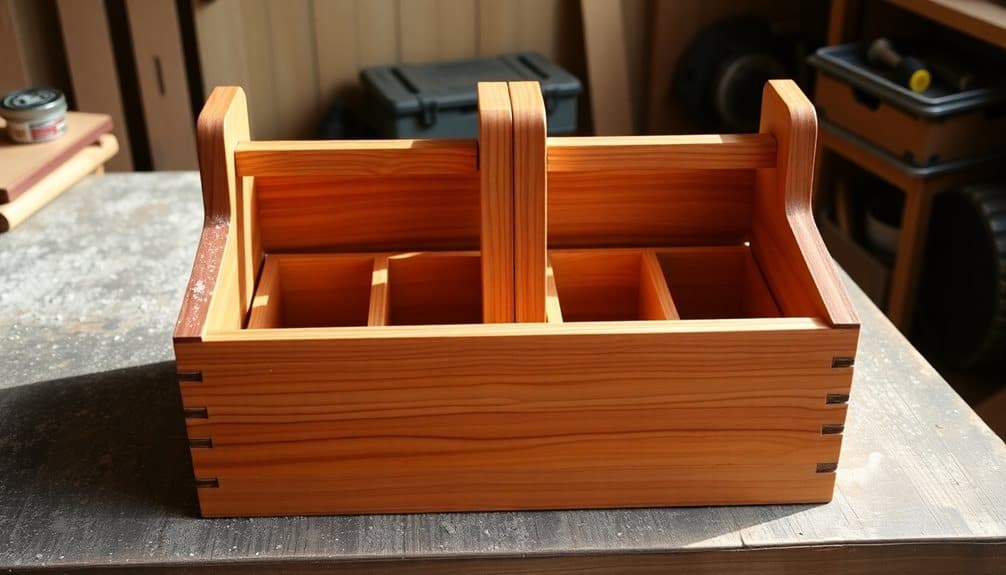
Every woodworker needs a reliable portable tool tote to transport essential hand tools between job sites or around the workshop. You’ll want to construct your tote using 3/4-inch hardwood like oak or maple for durability, with dado joints and reinforced corners for structural integrity. The recommended dimensions are 24 inches long, 12 inches wide, and 14 inches high, providing ample space for hand planes, chisels, and marking tools.
When designing your tool tote, incorporate these vital features:
- A center divider with customizable compartments to prevent tools from scratching against each other
- A comfortable grip handle reinforced with through-tenons and secured with wedges
- A protective bottom layer of 1/4-inch plywood to shield against moisture and wear
Begin construction by cutting all pieces to size, ensuring square edges and precise measurements. Apply waterproof wood glue to all joints, and secure with #8 brass screws for corrosion resistance. Don’t forget to sand all surfaces to 220-grit and apply three coats of polyurethane for protection. Consider adding leather or rubber feet to elevate the tote and prevent direct ground contact. Keeping tools elevated off ground prevents moisture damage and extends their lifespan, similar to proper firewood storage practices.
Wall-Mounted Small Parts Cabinet

Storage-smart woodworkers need an organized solution for keeping screws, nails, washers, and other small parts readily accessible. A wall-mounted small parts cabinet with multiple drawers provides efficient organization while maximizing vertical space in your workshop.
Begin by cutting ¾-inch hardwood plywood for the cabinet’s case, measuring 24 inches wide by 36 inches tall. The cabinet depth should be 6 inches to accommodate standard drawer slides. Install a French cleat mounting system on the back panel for secure wall attachment. Cut drawer fronts from solid maple or oak, sizing them at 4 inches tall by 11 inches wide.
You’ll need 12 sets of ball-bearing drawer slides rated for 50 pounds. Mount these at 3-inch intervals, ensuring proper spacing for drawer operation. Construct drawers using ½-inch Baltic birch plywood with dado joints and wood glue. Add dividers using ¼-inch plywood, creating adjustable compartments.
For durability, apply two coats of water-based polyurethane to all surfaces. Install drawer pulls centered on each front, and add small label holders for contents identification. Remember to anchor the French cleat into wall studs using 3-inch lag screws for safe, secure mounting. Similar to modern garden tool racks, this cabinet can be enhanced with rubber-coated hooks to prevent items from slipping and reduce wear on the storage surfaces.
Frequently Asked Questions
What Safety Gear Should I Wear When Working With Power Tools?
You’ll need ANSI-rated safety glasses to protect against flying debris, and hearing protection rated at least 25 NRR when using loud power tools. Wear a dust mask or respirator rated N95 or higher for fine particles. Don’t forget steel-toed boots, and avoid loose clothing that could get caught. Keep your hair tied back, remove jewelry, and always use fitted work gloves designed for power tool use.
How Long Should Wood Stain Dry Before Applying a Protective Finish?
Like watching paint dry on a masterpiece, staining wood requires patience for ideal results. You’ll need to let oil-based stains dry for 24-48 hours, while water-based stains typically need 4-6 hours. Check your stain’s label for specific drying times, as humidity and temperature can affect the process. Don’t rush – if the stain hasn’t fully dried, your protective finish won’t adhere properly and could become cloudy or uneven.
Which Wood Types Are Most Beginner-Friendly for DIY Projects?
For your first woodworking projects, select pine or poplar, as they’re readily available, cost-effective, and easy to cut. Pine’s soft nature makes it forgiving when you’re learning tool control, though it can dent easily. Cedar’s another viable option, offering natural weather resistance. If you’re willing to spend more, red oak provides excellent stability and strong grain patterns for practice with power tools.
Can Power Tool Batteries Be Left Charging Overnight?
You shouldn’t leave power tool batteries charging overnight. While modern lithium-ion batteries have built-in protection circuits, extended charging can reduce battery life and pose safety risks. Most power tool batteries reach full charge in 30-90 minutes. Once charged, remove them from the charger. For ideal battery longevity, store your batteries at room temperature, maintain 40-80% charge, and use manufacturer-approved chargers only.
What’s the Best Workspace Ventilation Setup for Woodworking Projects?
Don’t let your workshop become a dust castle in the sky – proper ventilation is essential for your health. You’ll need a three-part system: a dust collection system with a minimum 1,000 CFM rating connected to your tools, an ambient air filtration unit mounted overhead that cycles air 6-8 times per hour, and external ventilation fans rated at least 400 CFM to exhaust fumes and fine particles.


