This website contains affiliate links. Some products are gifted by the brand to test. As an Amazon Associate, I earn from qualifying purchases. The content on this website was created with the help of AI.
You’ll maximize your dorm room’s space by implementing smart vertical storage solutions and under-bed organization. Install over-the-door organizers, tension rods, and pegboards to utilize wall space effectively. Place bed risers to create 6-8 inches of extra storage underneath, using wheeled containers for easy access. Optimize your desk with stackable components and drawer dividers, while keeping your closet efficient with slim hangers and vacuum storage bags. Create a digital organization system using cloud storage and apps like Sortly. These fundamental strategies are just the beginning of transforming your cramped space into an efficiently organized living area.
Key Takeaways
- Maximize vertical space with over-the-door organizers, floating shelves, and wall-mounted storage solutions to keep floor space clear.
- Use bed risers and under-bed storage containers with wheels to create additional storage space for seasonal items.
- Install closet organization systems with double hanging rods and slim hangers to double available clothing storage capacity.
- Implement a desk organization system with zones for workspace, supplies, and filing to maintain study area efficiency.
- Group similar items together and label storage containers clearly for quick access and maintained organization.
Vertical Storage Solutions

Dorm room walls offer prime real estate for maximizing your storage potential. By utilizing vertical space effectively, you’ll double or triple your available storage without sacrificing precious floor space. Install sturdy over-the-door organizers for shoes, accessories, or school supplies, and mount adhesive hooks at varying heights to hang bags, coats, and umbrellas.
Consider investing in stackable storage cubes or modular shelving systems that extend from floor to ceiling. You’ll want to secure these properly to meet dorm regulations while creating designated zones for books, electronics, and personal items. Install tension rods between walls to hang additional storage pockets, or mount floating shelves for displaying photos and storing frequently used items.
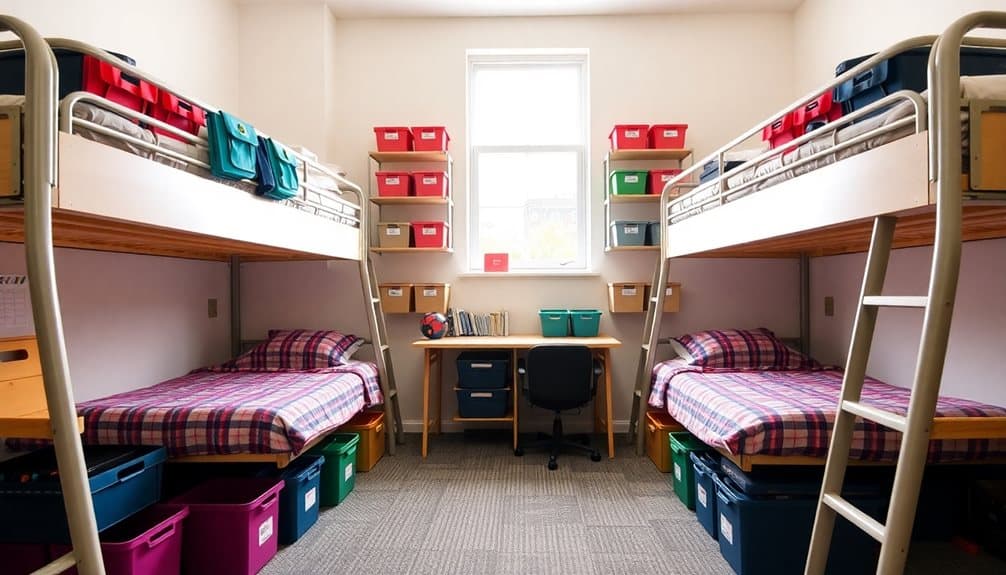
Don’t overlook the space behind your door or under your bed. Attach a pegboard to create a customizable storage wall for hanging tools, jewelry, or art supplies. Use bed risers to increase under-bed storage capacity, then slide in flat containers for seasonal clothing and extra linens. Command strips and removable adhesive solutions guarantee you won’t damage walls while maximizing every vertical inch of your living space. Most storage cubes can hold up to 11 pounds per cube, making them perfect for organizing textbooks and school supplies.
Under-Bed Storage Strategies

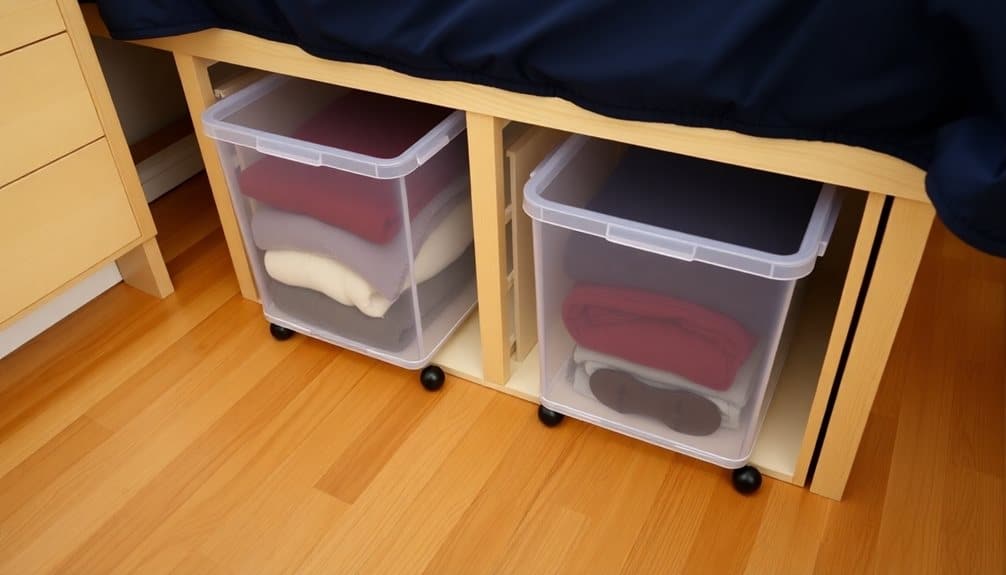
The space underneath your bed represents one of the most valuable storage areas in your dorm room. To maximize this space, invest in bed risers that can safely elevate your bed by 6-8 inches, creating additional storage volume underneath. Choose sturdy plastic or metal risers rated for your bed’s weight.
Select long, flat storage containers specifically designed for under-bed use. Opt for containers with wheels or smooth bottoms for easy access, and measure your under-bed clearance before purchasing. You’ll want containers that leave at least an inch of space to slide smoothly. Organize these containers by category: seasonal clothing, shoes, extra bedding, or school supplies.
Use vacuum storage bags for bulky items like winter coats and extra blankets – they’ll compress to a third of their original size. Label each container clearly on both the end and top for quick identification. Consider creating a map of your under-bed storage layout, noting which items are stored in which containers. Install a bed skirt or use coordinated containers if you’d like to keep your storage hidden while maintaining a neat appearance. Look for containers with breathable materials to prevent moisture buildup during extended storage periods.
Door Space Optimization

Most dorm doors offer untapped vertical storage potential that you can transform into functional space. Install an over-the-door organizer with clear pockets to store toiletries, school supplies, and small accessories. Choose a sturdy model with reinforced seams that won’t sag under weight or tear at mounting points.
Mount adhesive hooks on the door’s interior side to hang towels, robes, or your backpack. Space them evenly, keeping weight distribution in mind, and select hooks rated for at least 5 pounds each. You’ll need to position them at different heights to prevent items from overlapping.
Don’t forget the door’s exterior side – it’s perfect for a compact message board or calendar. Install a slim whiteboard with markers and eraser attached via magnetic strips. Below it, add a mesh pocket organizer for incoming mail and important documents.
For shoes, attach a narrow over-the-door rack with adjustable tiers. Look for one with non-slip grips that won’t damage the door’s surface. You can typically fit 6-8 pairs of shoes while maintaining easy access to frequently worn items.
Space-saving shoe organizers can maximize your storage capacity while keeping footwear neatly arranged and easily accessible.
Desk Organization Systems

Smart desk organization starts with vertical space maximization using stackable components. Install a desktop shelf unit to create multiple tiers for books, supplies, and electronics. You’ll want to position your monitor or laptop at eye level, with frequently used items on the middle shelf and reference materials above.
Divide your desk’s surface area into three distinct zones: primary workspace in the center, tools and supplies on the dominant-hand side, and a filing system on the other. Use drawer organizers with adjustable dividers to separate writing implements, sticky notes, and small electronics. Mount a magnetic strip under your top shelf to hold scissors, rulers, and metal accessories.
Invest in cord management solutions – rubber grommets, cable clips, and a power strip mount – to keep wires organized underneath your desk. Add task lighting with a clip-on LED lamp that doesn’t consume precious desk space. Maximize corner spaces with triangular organizers or rotating supply caddies. Consider a mobile filing cart that slides under your desk for documents and larger supplies you don’t need daily access to. Keep your desk utensils neatly arranged with smart utensil organizers that maximize vertical storage space.
Closet Space Management

Moving from desk organization to wardrobe solutions, your dorm closet needs a strategic approach to maximize every cubic inch. Start by installing an additional tension rod below the existing one to double your hanging space. Use slim, velvet hangers instead of bulky plastic ones to gain 50% more hanging capacity while preventing clothes from slipping.
Utilize vertical space with a hanging shoe organizer, which can store not just footwear but also accessories, rolled t-shirts, and toiletries. Install adhesive hooks on the closet’s side walls for bags, belts, and scarves. Consider adding a small chest of drawers underneath hanging clothes if space permits.
Don’t neglect the closet door – mount an over-the-door organizer with clear pockets for smaller items like socks, underwear, and workout clothes. Vacuum storage bags can compress bulky winter items to one-third their original size. Label everything clearly and group similar items together. Rotate your wardrobe seasonally, storing off-season clothes under your bed in flat containers. Remember to maintain a “one in, one out” policy to prevent overcrowding and keep your closet system functional throughout the semester.
For maximum stability and safety, ensure your hanging rods and extenders stay within 33 pounds weight capacity to prevent accidental detachment or damage to your clothing.
Multi-Purpose Furniture Ideas

Three essential pieces of multi-purpose furniture can transform your cramped dorm room into a versatile living space. First, invest in a loft bed with a built-in desk underneath, which creates a dedicated study area without sacrificing precious floor space. Choose one with integrated shelving and cable management to maximize functionality.
Second, select an ottoman that doubles as storage and seating. You’ll want one with a sturdy lid that can support weight when closed, plus interior compartments to organize seasonal items, textbooks, or extra bedding. Position it at the foot of your bed or use it as a makeshift coffee table when friends visit.
Third, opt for a folding desk that can expand when you need extra workspace and collapse when you don’t. Look for models with built-in storage compartments and a smooth folding mechanism. When collapsed, it shouldn’t protrude more than six inches from the wall, allowing you to reclaim floor space instantly. Mount it near an outlet to create a convenient charging station for your devices, and consider adding a slim folding chair that you can easily tuck away when not in use.
Wall Storage Hacks

Your dorm room’s walls offer untapped vertical storage potential that can free up valuable floor space. By implementing strategic wall-mounted solutions, you’ll maximize every square inch while keeping essential items within arm’s reach. Install adhesive hooks and mounting strips that won’t damage walls to create functional storage zones throughout your room.
Transform your walls into organized storage areas with these practical solutions:
- Mount floating shelves at staggered heights to display books, photos, and decorative items while creating storage space for school supplies and electronics
- Install an over-the-door organizer with clear pockets to store shoes, accessories, or toiletries without taking up closet space
- Attach magnetic strips to hold makeup, scissors, and other metal items, creating a space-saving vanity area
- Use mesh wall pockets or fabric organizers to sort papers, magazines, and documents while keeping your desk clear
For maximum efficiency, group similar items together and label storage areas clearly. Position frequently used items at eye level, while seasonal or rarely used items can go higher. Remember to check your dorm’s policies regarding wall attachments and use appropriate mounting hardware that’s approved for your building.
Digital Organization Methods

Smart digital tools can revolutionize how you manage your dorm room‘s limited space and academic life. Start by creating digital versions of your textbooks and study materials when possible, storing them in cloud services like Google Drive or Dropbox. Use apps like CamScanner to digitize handouts and notes, reducing paper clutter while keeping documents searchable and organized.
Install a room organization app like Sortly to inventory your belongings and track what’s stored in boxes or drawers. Create QR codes for storage containers, linking them to detailed lists of contents. Use Microsoft OneNote or Evernote to maintain digital shopping lists, maintenance schedules, and cleaning routines for your dorm space.
Set up a shared digital calendar with your roommate using Google Calendar or Apple Calendar to coordinate cleaning schedules, quiet hours, and visitor times. Download apps like Splitwise to track shared expenses and bills. Use smart home apps to control LED lights, fans, or other electronics, reducing cord clutter. Consider a password manager like LastPass to securely store Wi-Fi passwords, student portal logins, and other digital credentials in one organized location.
Shared Space Coordination

Beyond digital tools, successful dorm living depends on clear agreements with your roommate about shared spaces. You’ll need to establish specific protocols for common areas, storage allocation, and visitor policies right from the start. Create a written agreement that outlines expectations and responsibilities, then post it where you’ll both see it daily.
Divide your dorm room into clearly defined zones that respect both residents’ needs. Set boundaries for personal spaces while maximizing shared areas through smart furniture placement and storage solutions. Consider implementing these essential coordination strategies:
- Create a cleaning schedule that rotates responsibilities weekly, including trash removal, floor cleaning, and surface wiping
- Establish quiet hours that align with both roommates’ class schedules and study habits
- Design a bathroom schedule for morning routines to prevent timing conflicts
- Use shared calendar apps to coordinate visitor times and overnight guest notifications
Don’t forget to schedule monthly check-ins to review and adjust these arrangements. Being flexible while maintaining clear boundaries will help you navigate shared living successfully. If conflicts arise, refer back to your original agreement and make necessary adjustments together.
Frequently Asked Questions
How Often Should I Deep Clean My Dorm Room to Maintain Organization?
You should deep clean your dorm room every two weeks to maintain ideal organization. Start by dedicating 2-3 hours to thoroughly dust, vacuum, wipe surfaces, and reorganize drawers and closets. Don’t forget to wash bedding, sanitize doorknobs, and clean window sills. Between deep cleans, perform daily 10-minute tidying sessions to prevent clutter buildup and maintain your organizational systems.
What’s the Best Way to Organize Seasonal Items When Going Home?
Sort your seasonal items into clear storage bins with detailed labels. You’ll want to pack winter coats, boots, and heavy sweaters separately from summer shorts and swimwear. Vacuum-seal bags work great for bulky items, saving up to 75% of space. Create a digital inventory list with photos, noting each container’s contents. Store important items in easily accessible spots, and keep frequently used pieces within reach.
Are There Restrictions on Using Command Strips in Dorm Rooms?
You’ll need to check your specific dorm’s policies, as restrictions vary by institution. Most dorms allow Command strips but require you to remove them properly to avoid wall damage. Don’t exceed the weight limit listed on the package, and keep your receipts in case of damage charges. Choose the correct strip size for your items, and always test one strip in an inconspicuous spot first.
How Can I Prevent Mold Growth in Storage Containers?
Like Hercules battling the ever-growing Hydra, you’ll need to fight moisture persistently to prevent mold. Start by thoroughly drying items before storage, and add silica gel packets or activated charcoal sachets to your containers. Don’t store damp items, and choose containers with secure, airtight seals. Periodically check and air out stored items, especially in humid conditions. Consider using dehumidifiers in your storage space.
What’s the Ideal Room Temperature for Preserving Stored Items?
You’ll want to maintain your storage area between 55-75°F (13-24°C) for most household items. Keep humidity levels at 30-50% to prevent moisture damage. Electronics work best at 65-70°F, while fabrics and paper documents prefer cooler temperatures around 60-65°F. Don’t let the temperature fluctuate drastically, as these changes can damage sensitive items through expansion and contraction.


