This website contains affiliate links. Some products are gifted by the brand to test. As an Amazon Associate, I earn from qualifying purchases. The content on this website was created with the help of AI.
Transform your chaotic pantry by starting with a complete cleanout and assessment of your space. You’ll want to group similar items together, creating designated zones for baking supplies, canned goods, snacks, and cooking essentials. Invest in clear, airtight containers and label everything clearly to maintain organization. Position frequently used items at eye level, and use tiered organizers or lazy susans to maximize corner spaces. Establish a regular maintenance schedule with weekly quick checks and monthly deep cleans. These foundational steps will set you up for a lasting pantry transformation that simplifies your daily cooking routine.
Key Takeaways
- Empty and clean your pantry completely, then group similar items together into designated zones for efficient storage and access.
- Use clear, airtight containers for dry goods and implement tiered shelf organizers for optimal visibility and freshness.
- Label all containers and shelves clearly, including expiration dates, to maintain organization and track inventory effectively.
- Position frequently used items at eye level and store heavier items on lower shelves for safety and convenience.
- Conduct regular maintenance checks and update your inventory list weekly to prevent clutter and reduce food waste.
Empty and Assess Your Space

The foundation of an organized pantry begins with a clean slate. Remove every single item from your shelves and place them on a nearby counter or table. As you empty the space, take note of any spills, crumbs, or sticky residue that needs attention.
Once your pantry is empty, grab your cleaning supplies and thoroughly wipe down each shelf. Use warm, soapy water to remove stubborn stains, and don’t forget to clean the corners and edges. Let the shelves dry completely before moving forward.
While your shelves are bare, measure the dimensions of your pantry space. Note the height between shelves, depth of the shelves, and total width available. These measurements will help you plan for storage containers and organizational tools. Also, assess your lighting situation – if it’s dim, consider adding battery-operated LED strips or puck lights.
Take this opportunity to evaluate your shelf configuration. Could you adjust the height between shelves to better accommodate tall items? Would adding extra shelving or installing door-mounted racks maximize your storage capacity? Make these structural decisions before restocking your pantry.
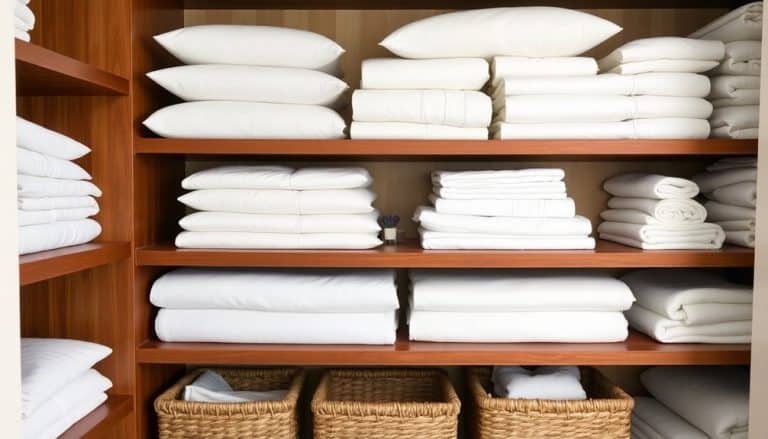
Consider using storage bins similar to those in your refrigerator to keep pantry items neatly contained and easily accessible.
Sort Items By Category
With your clean pantry shelves ready for action, it’s time to focus on organizing your items into clear, logical categories. Start by grouping similar items together: baking supplies, breakfast foods, canned goods, snacks, pasta and grains, and cooking oils. Create a separate category for items you use most frequently to guarantee easy access.
Sort through your canned goods by type – vegetables, fruits, beans, and soups. Group your baking supplies into subcategories like flour, sugar, baking powder, and extracts. Arrange breakfast items such as cereals, oatmeal, and granola bars together. Create a dedicated space for pasta, rice, and other grains.
Don’t forget to establish zones for specialty items like international ingredients, dietary-specific foods, or bulk purchases. Place heavy items on lower shelves for safety and convenience. Consider creating a separate section for unopened backup items and keep frequently used ingredients at eye level. If you’re dealing with partial packages, combine them when possible to save space. This systematic approach will make it easier to track inventory and create shopping lists while maximizing your pantry’s functionality. Using movable dividers can help maintain these organized categories and make adjusting your storage system quick and simple.
Choose Storage Solutions

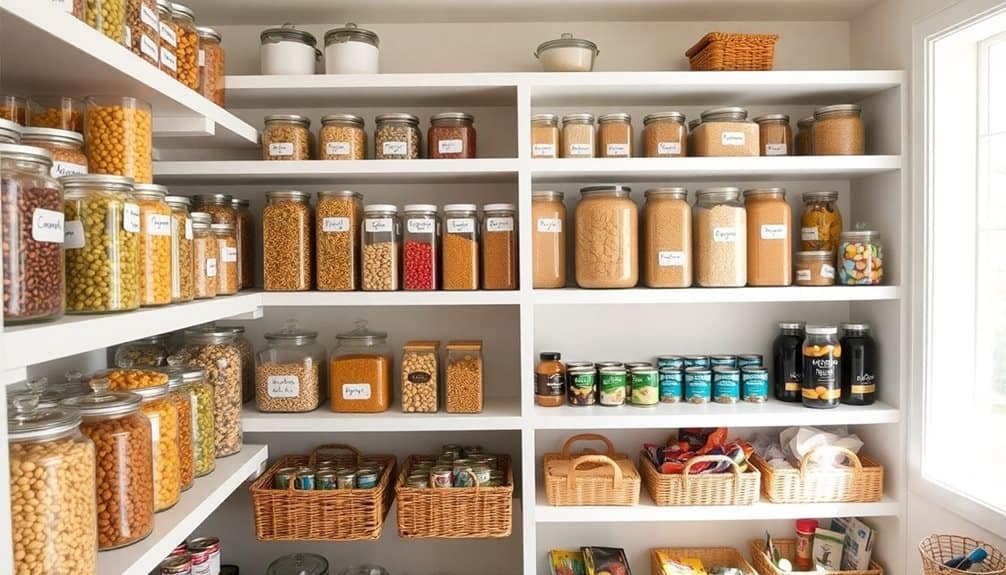
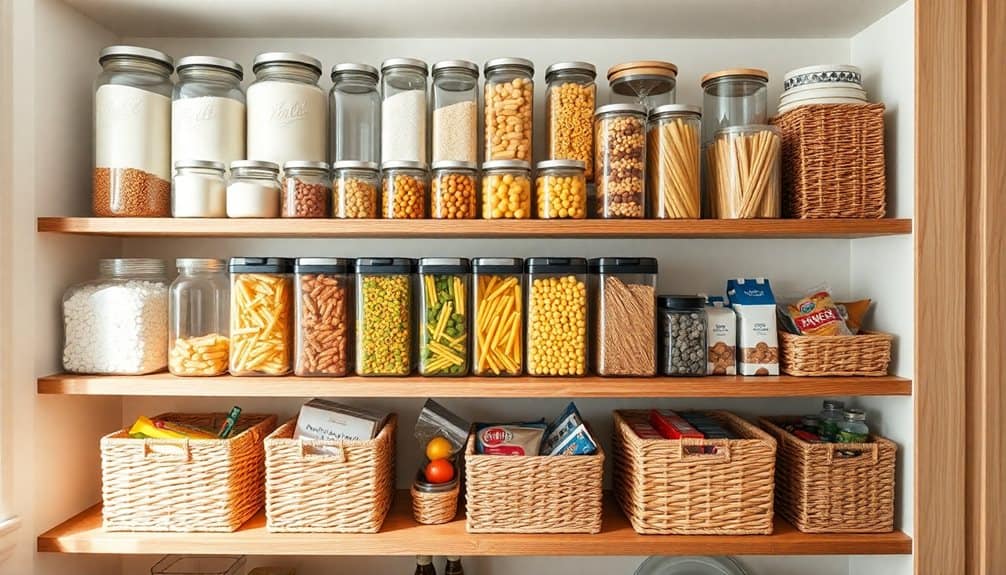
Selecting appropriate storage containers forms the foundation of an efficient pantry system. You’ll want to invest in clear, airtight containers for dry goods like flour, sugar, pasta, and grains. These containers protect against moisture and pests while allowing you to quickly identify contents and monitor inventory levels.
For canned goods and jars, consider installing tiered shelf organizers or lazy susans. These maximize vertical space and prevent items from getting lost in the back of deep shelves. You’ll find that pull-out drawer systems work exceptionally well for smaller items like spice jars and sauce packets.
Don’t overlook the value of bins and baskets. Use sturdy plastic bins for grouping snack items, and employ wire baskets for storing produce that doesn’t require refrigeration. Label each container clearly with waterproof labels or a label maker to maintain organization long-term.
For awkward spaces, try door-mounted organizers or adjustable shelf risers. These solutions help utilize every inch of available space. Remember to measure your shelves carefully before purchasing any storage solutions to guarantee a proper fit and avoid wasting money on incompatible items. Stylish pantry baskets can transform your kitchen while maintaining both functionality and aesthetic appeal.
Create Designated Zones

Creating distinct zones in your pantry provides a logical framework for storing different types of items. Establish specific areas for breakfast foods, baking supplies, canned goods, snacks, pasta, and cooking essentials. You’ll want to group similar items together based on their use and frequency of access.
Position your most frequently used items at eye level for easy reach. Place breakfast items and everyday snacks in this prime real estate. Designate the middle shelves for cooking staples like pasta, rice, and canned goods. Reserve upper shelves for seasonal items and bulk purchases you don’t need often.
Create a baking zone where you’ll store flour, sugar, baking powder, and other dessert-making essentials together. Set up a separate area for spices and cooking oils near your kitchen entrance for convenient meal prep access. Don’t forget to establish a designated spot for beverages and drink mixes.
Consider your family’s dietary needs when creating zones. If you have children, place their approved snacks on lower shelves where they can reach them. Keep specialty foods, such as gluten-free or allergen-free items, in their own clearly marked section to prevent cross-contamination. For additional vertical storage, consider installing over-the-door organizers to maximize space for lighter pantry items and snacks.
Label Everything Clearly
Clear labeling forms the backbone of an organized pantry system. Without proper labels, even the most meticulously sorted shelves can quickly descend into chaos. Invest in a quality label maker or create waterproof handwritten labels that’ll withstand moisture and handling. Don’t forget to include expiration dates on containers when transferring items from their original packaging.
Label both the containers and the shelf spaces where they belong. This dual-labeling system guarantees items return to their designated spots after use. For bulk items divided into smaller containers, note the original purchase date and any specific storage instructions. When labeling, use clear, legible fonts or handwriting and maintain consistency in your labeling style throughout the pantry.
Consider using storage cubes’ capacity of up to 11 pounds per section when organizing heavier pantry items.
- You’ll never waste money buying duplicates of items you already have but couldn’t find
- You’ll save precious time when cooking, knowing exactly where everything is
- You’ll feel a sense of accomplishment every time you open your perfectly labeled pantry
Consider creating a master inventory list that matches your labeling system. Update it regularly as you add or remove items, and keep it accessible, perhaps mounted inside the pantry door.
Stock Smart and Rotate Items

With your labels in place, proper stock management becomes your next priority. Start by implementing the FIFO method (First In, First Out) to guarantee you’re using older items before newer ones. Place newer products behind older ones on your shelves, and always check expiration dates when unpacking groceries.
Monitor your inventory levels closely and maintain a running shopping list as items get low. You’ll want to stock frequently used items in larger quantities while limiting specialty ingredients to just what you’ll use within six months. Keep a minimum of two weeks’ worth of pantry staples on hand for emergency preparedness.
When restocking shelves, take time to inspect each item’s integrity. Check for dents in cans, tears in packages, or signs of pest activity. Remove anything that’s expired or compromised. Place items with the closest expiration dates at the front of each category section. Don’t forget to regularly audit your inventory – set a quarterly reminder to review everything, checking dates and culling items you’re unlikely to use. This systematic approach prevents food waste and guarantees you’re always working with fresh ingredients.
Maintain Your Organized System

Organization requires ongoing commitment to maintain your newly structured pantry system. You’ll need to perform regular maintenance checks and establish consistent habits to prevent your pantry from reverting to its previous chaotic state. Set aside 15 minutes each week to assess your storage space, wipe down shelves, and realign containers.
Create a cleaning schedule that includes monthly deep-cleaning sessions. Remove everything from your shelves, vacuum crumbs, and sanitize surfaces with food-safe cleaners. Check for expired items and update your inventory list while restocking. When you bring home new groceries, immediately transfer them into your designated containers and add expiration dates if needed.
- You’ll feel a sense of pride every time you open your pantry doors to find everything in its proper place
- You’ll experience less stress during meal preparation when you can quickly locate ingredients
- You’ll save money by preventing food waste and avoiding duplicate purchases
Remember to adjust your system as your needs change. If certain zones aren’t working efficiently, don’t hesitate to reconfigure them. Keep labels clear and visible, and regularly assess whether your container sizes still match your shopping habits.
Frequently Asked Questions
How Do I Prevent Pests From Invading My Organized Pantry?
Store your dry goods in airtight containers made of glass or heavy-duty plastic to block pest entry points. Don’t forget to wipe containers clean before refilling them. Place bay leaves and food-grade diatomaceous earth around shelf corners to repel insects naturally. Check food packages regularly for signs of infestation, and maintain a cool, dry environment. Seal any wall cracks or holes where pests might enter.
What’s the Ideal Temperature and Humidity Level for a Pantry?
Just like a wine cellar needs perfect conditions, your pantry requires specific temperature and humidity levels to keep food fresh. You’ll want to maintain temperatures between 50-70°F (10-21°C), with 60°F being ideal. Keep humidity levels between 50-60% to prevent moisture damage while avoiding excessive dryness. You can monitor these conditions easily with an inexpensive thermometer-hygrometer combo device placed on your pantry shelf.
Should I Store Cleaning Supplies in the Same Pantry as Food?
You shouldn’t store cleaning supplies in the same pantry as food due to safety concerns. Chemical fumes can contaminate food items, and accidental spills pose serious health risks. Instead, keep your cleaning supplies in a separate cabinet, ideally in a laundry room, garage, or under the kitchen sink. If you must use the same pantry, create a dedicated bottom shelf with a protective barrier and clear labeling.
How Often Should I Completely Reorganize My Entire Pantry System?
You’ll want to do a complete pantry overhaul every 6-12 months, depending on your usage patterns and organizational needs. Schedule your deep reorganization during seasonal changes – spring and fall work well. Between major reorganizations, perform quick monthly maintenance checks to rotate products, wipe shelves, and adjust systems that aren’t working. Watch for signs you need to reorganize sooner, like difficulty finding items or expired foods accumulating.
What Items Should Never Be Stored in a Pantry, Even Temporarily?
You’ll want to avoid storing hazardous items like cleaning supplies, pesticides, or chemicals in your pantry to prevent food contamination. Don’t keep fresh produce that releases ethylene gas, such as bananas, apples, and onions, as they’ll speed up spoilage of other foods. Never store pet food, which can attract pests, or appliances that generate heat. Keep medications elsewhere, as pantry temperature fluctuations can affect their efficacy.