This website contains affiliate links. Some products are gifted by the brand to test. As an Amazon Associate, I earn from qualifying purchases. The content on this website was created with the help of AI.
Start your raised bed garden by selecting a spot with 6-8 hours of daily sunlight and good drainage. You’ll want to build beds 3-4 feet wide and at least 6 inches deep using rot-resistant materials like cedar or redwood. Fill your beds with a mixture of equal parts topsoil, compost, and organic matter. Position taller plants on the north side to prevent shading, and maintain proper spacing between plants. Keep soil consistently moist but not waterlogged, and monitor weekly for weeds and pests. With careful planning and regular maintenance, you’ll discover the countless rewards of productive raised bed gardening.
Key Takeaways
- Choose a location with 6-8 hours of sunlight daily and plan bed dimensions of 3-4 feet wide and 8-12 feet long.
- Build raised beds using rot-resistant wood, making them at least 6 inches deep with proper corner reinforcement.
- Fill beds with equal parts topsoil, compost, and organic matter, ensuring proper drainage and nutrient content.
- Plant according to your USDA zone, positioning tall plants northward and implementing companion planting strategies.
- Maintain beds with regular watering, weeding, and fertilization while monitoring for pests and harvesting at peak ripeness.
Planning Your Raised Bed Layout
Success in raised bed gardening begins with thoughtful layout planning. You’ll need to take into account your garden’s location, sun exposure, and accessibility to water sources. Choose a spot that receives 6-8 hours of direct sunlight daily and allows easy access from all sides of your beds for maintenance.
When determining bed sizes, stick to widths of 3-4 feet to guarantee you can reach the center without stepping into the bed. Length can vary based on your space, but 8-12 feet is ideal for most home gardens. Space multiple beds 2-3 feet apart to allow comfortable passage with tools and wheelbarrows.
Orient your beds north to south to maximize sunlight distribution and prevent taller plants from shading shorter ones. Think about creating a grid system within each bed using square foot gardening principles – this helps enhance plant spacing and succession planting. Map out irrigation systems before construction, planning for soaker hoses or drip lines that’ll reach all areas efficiently.
Document your layout plan on paper, including measurements, plant placement intentions, and seasonal rotation schemes. This blueprint will serve as your guide during construction and planting phases.
Selecting the Perfect Location
Location selection stands as the cornerstone of a thriving raised bed garden. You’ll need to find a spot that receives 6-8 hours of direct sunlight daily, as most vegetables and herbs require full sun exposure to produce excellent yields. Consider the path of the sun throughout different seasons, and avoid areas shaded by buildings, trees, or other structures.
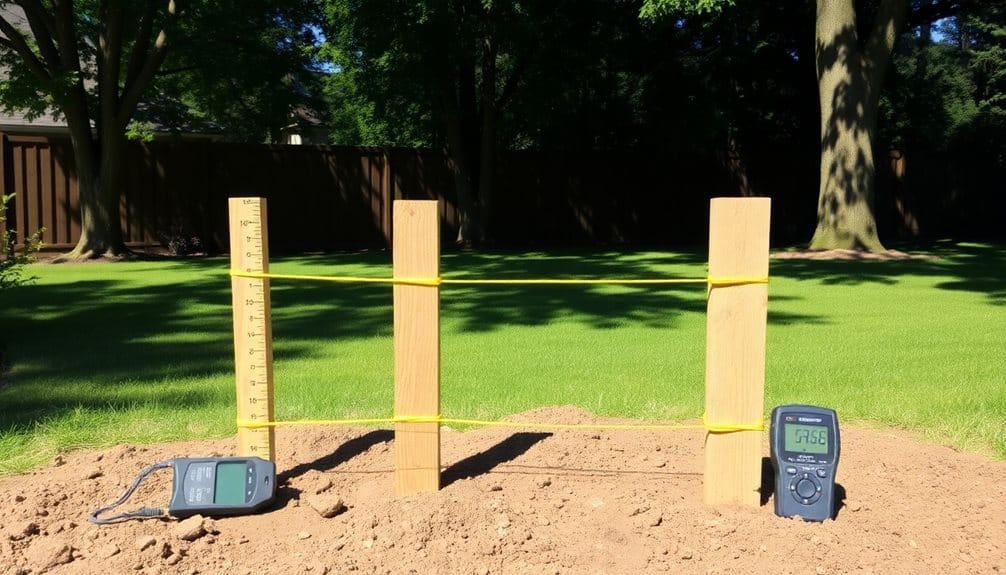
Ensure your chosen location has proper drainage and isn’t in a low-lying area where water tends to pool. You’ll want to position your beds away from large trees, as their roots can compete with your plants for nutrients and water. If you’re placing multiple beds, leave enough space between them (at least 2-3 feet) for comfortable access and maintenance.
Consider proximity to your water source – you don’t want to struggle with lengthy hoses or multiple trips with watering cans. Additionally, evaluate the site’s exposure to wind, as strong gusts can damage plants and increase water evaporation. If possible, select a relatively level area, though slight slopes can be accommodated during construction. Remember, you’ll be visiting your garden daily, so convenience of access should factor into your decision. For enhanced temperature control and plant protection, consider installing a polycarbonate greenhouse over your raised beds to extend your growing season.
Building Your Raised Beds
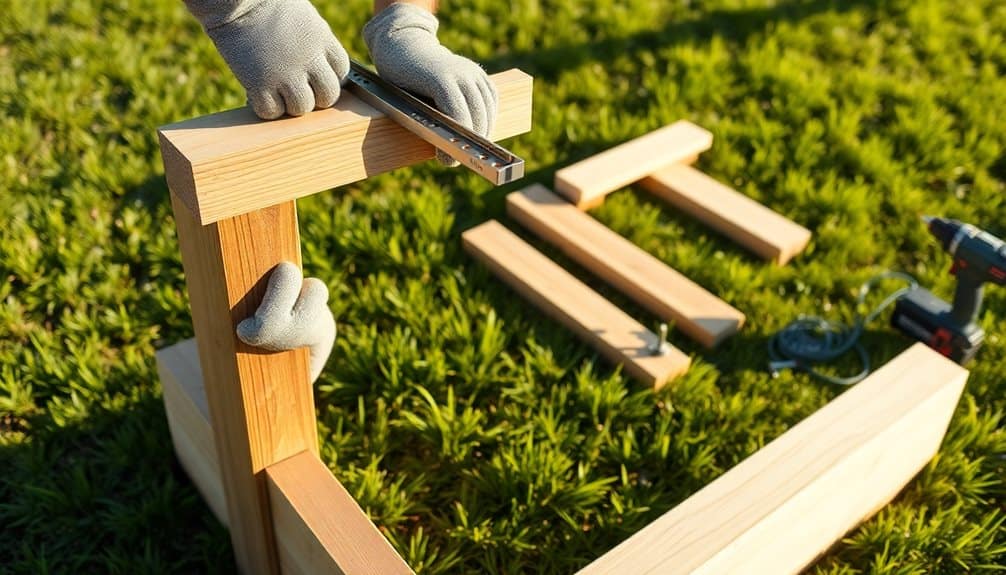
A raised bed’s construction begins with choosing the right materials and dimensions for your garden’s needs. Cedar and redwood are naturally rot-resistant choices, while composite lumber offers longevity. Your beds should be 3-4 feet wide to guarantee you can reach the center from either side, with lengths varying based on your space.
- Use 2×6 or 2×8 lumber to create beds at least 6 inches deep for most vegetables
- Install corner posts first, making sure they’re level and square
- Pre-drill holes to prevent wood splitting when securing boards
Once you’ve assembled your frame, reinforce the corners with metal brackets and line the inside with landscape fabric to prevent weed growth. Position your bed in its final location before filling, as it’ll become too heavy to move once soil is added. If you’re building multiple beds, space them 2-3 feet apart to allow comfortable access for maintenance and harvesting.
Don’t forget to check local building codes, as some areas require permits for permanent structures. You’ll also want to make sure your bed sits level on the ground, using a spirit level to make adjustments before securing everything in place. For deep-rooting vegetables like carrots, ensure your bed has a minimum soil depth of 12-16 inches for optimal growth.
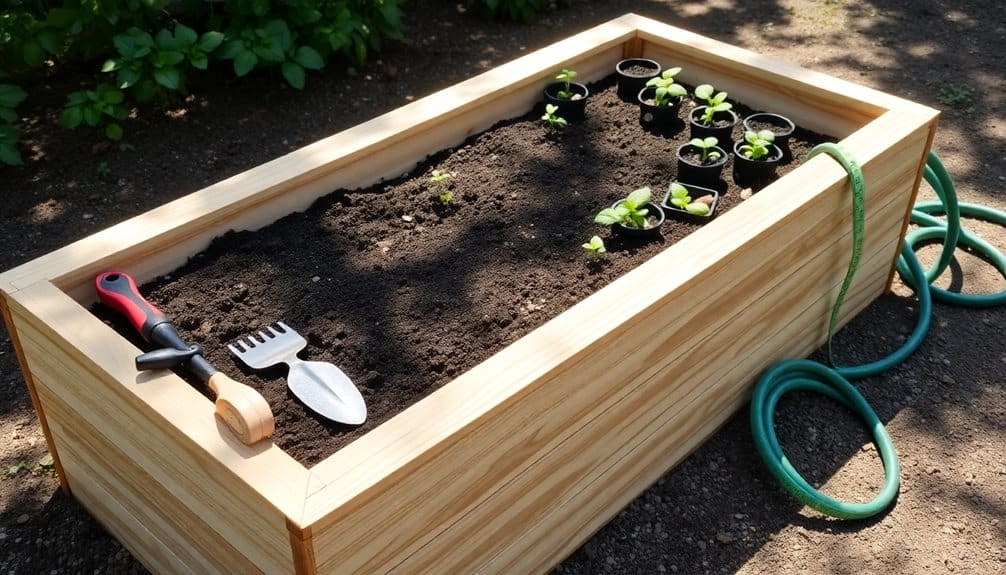
Soil Preparation and Filling
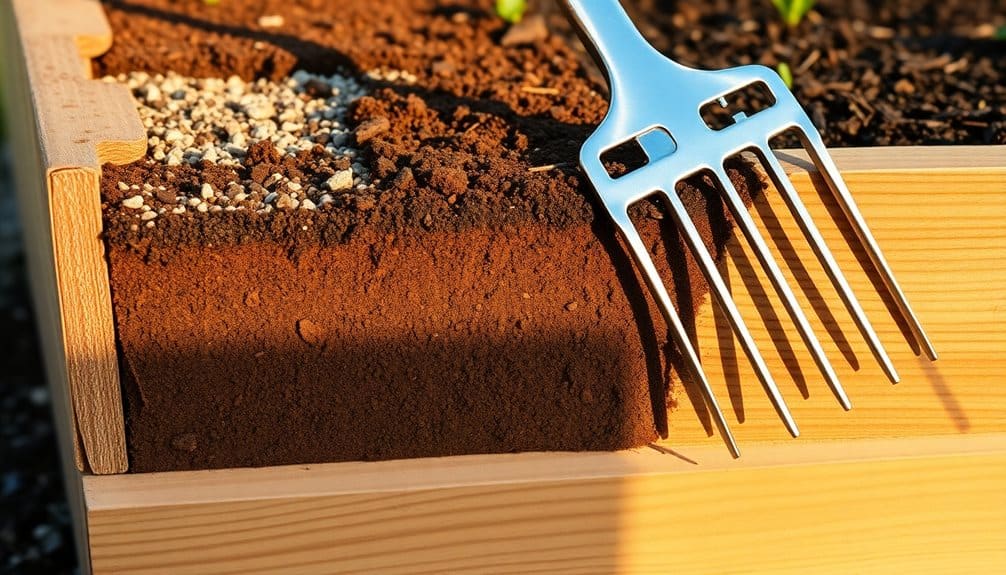
Proper soil preparation stands at the heart of your raised bed’s success. You’ll want to create a rich, well-draining mixture that combines topsoil, compost, and organic matter in roughly equal parts. Start by mixing these components on a tarp before filling your bed, ensuring even distribution of nutrients and minerals throughout the soil.
Fill your raised bed in layers, gently tamping down each 6-inch section to eliminate air pockets while avoiding over-compaction. You’ll need to calculate your soil volume beforehand – multiply your bed’s length by width by depth (in cubic feet) to determine the amount needed. Add organic fertilizers like bone meal or blood meal during the filling process to enrich the soil further.
Once you’ve filled the bed to within 2 inches of the top, water it thoroughly and let it settle for a few days. You’ll likely notice some settling, so keep extra soil mix on hand to top off as needed. Test your soil’s pH, and adjust if necessary using lime to raise pH or sulfur to lower it. Your goal is a slightly acidic soil with a pH between 6.0 and 6.8 for most vegetables. Consider incorporating soil amendments throughout the season to maintain optimal growing conditions and replenish nutrients as plants grow.
Choosing What to Plant
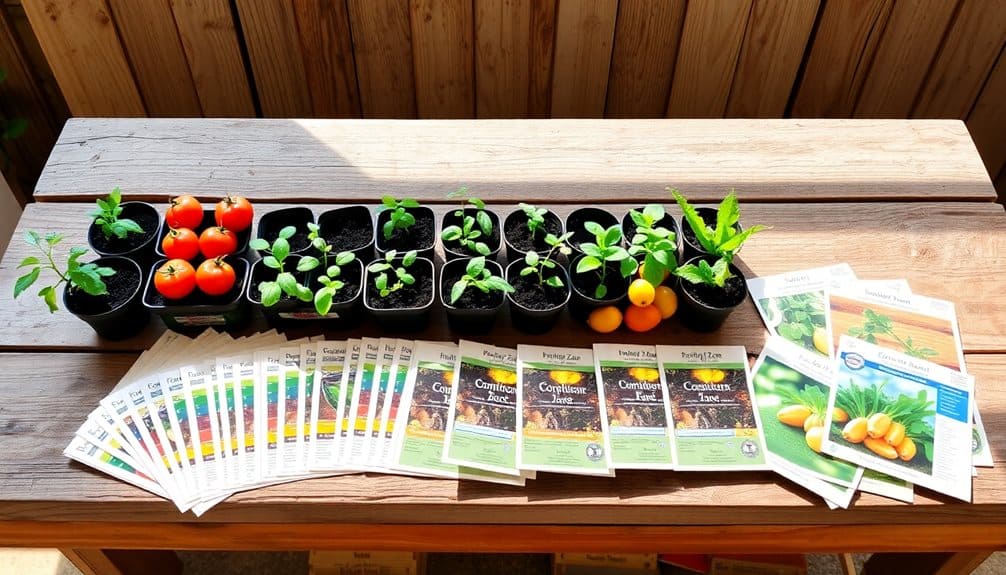
Selecting suitable plants for your raised bed requires careful consideration of several key factors: your growing zone, available sunlight, bed dimensions, and seasonal timing. Start by consulting your area’s USDA hardiness zone map and local planting calendar to determine which crops will thrive in your climate.
When watering your plants, use a kink-resistant garden hose to ensure consistent water flow and prevent damage to delicate seedlings.
- Root vegetables like carrots and beets need at least 12 inches of soil depth, while shallow-rooted lettuce and herbs can flourish in 6 inches
- Tall plants such as tomatoes and pole beans should be placed on the north side to prevent shading shorter plants
- Companion planting pairs like basil with tomatoes, or marigolds with vegetables, can maximize space and improve crop health
Consider your bed’s dimensions when planning plant spacing. Most vegetables need 6-12 inches between plants, though specifics vary by variety. If you’re new to gardening, start with easy-to-grow options like lettuce, radishes, and bush beans. For maximum yield, incorporate both early-season crops like peas and spinach, and long-season vegetables such as tomatoes and peppers. Don’t forget to account for mature plant size and growth habits when making your final selections.
Maintenance and Watering Tips
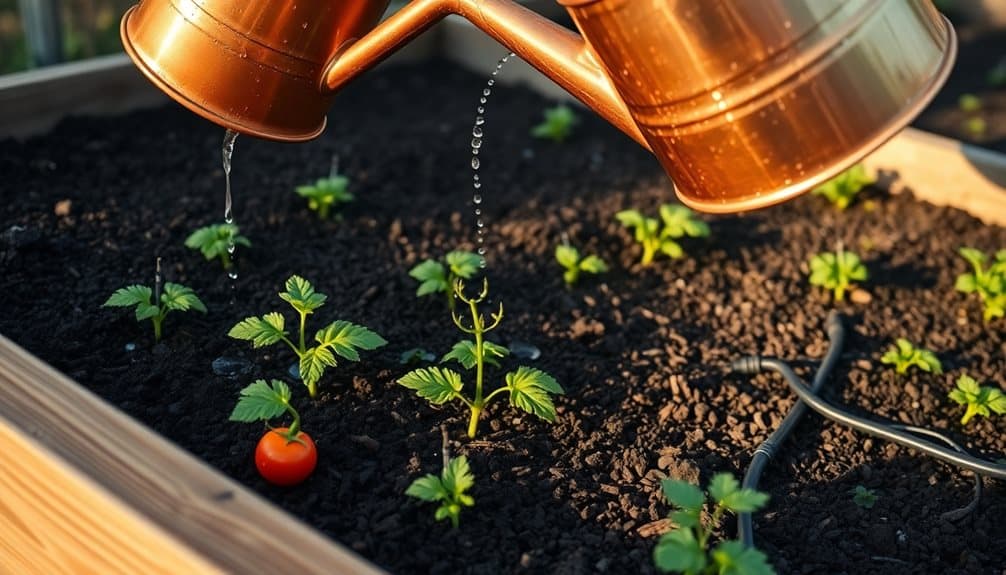
Regular maintenance and consistent watering form the foundation of a thriving raised bed garden. You’ll need to monitor soil moisture daily, as raised beds tend to drain faster than ground-level gardens. Insert your finger about 2 inches into the soil – if it’s dry at that depth, it’s time to water. Water deeply at the base of plants, aiming for 1-2 inches per week depending on your climate and rainfall.
Keep an eye out for weeds and remove them promptly before they establish deep roots. Mulch your beds with 2-3 inches of organic material like straw or wood chips to retain moisture and suppress weed growth. You’ll want to check plant health weekly, removing any yellowed or diseased leaves to prevent spread.
Fertilize every 4-6 weeks during the growing season using balanced organic fertilizers. Don’t forget to stake tall plants early and prune when necessary. In fall, clean out dead plant material and add compost to replenish nutrients. During winter, cover your beds with row covers or mulch to protect the soil structure and beneficial organisms. Consider applying compost tea to boost soil microorganisms and provide nutrients throughout the growing season.
Season Extension Methods
The beauty of raised bed gardening lies in its potential for extending your growing season well beyond traditional limits. By implementing season extension methods, you’ll create microclimates that protect your plants from frost, harsh winds, and temperature fluctuations. Start by selecting appropriate tools and materials that’ll help you shield your garden from environmental challenges.
- Row covers and floating fabric provide lightweight protection while allowing sunlight, water, and air to reach your plants, perfect for shoulder seasons
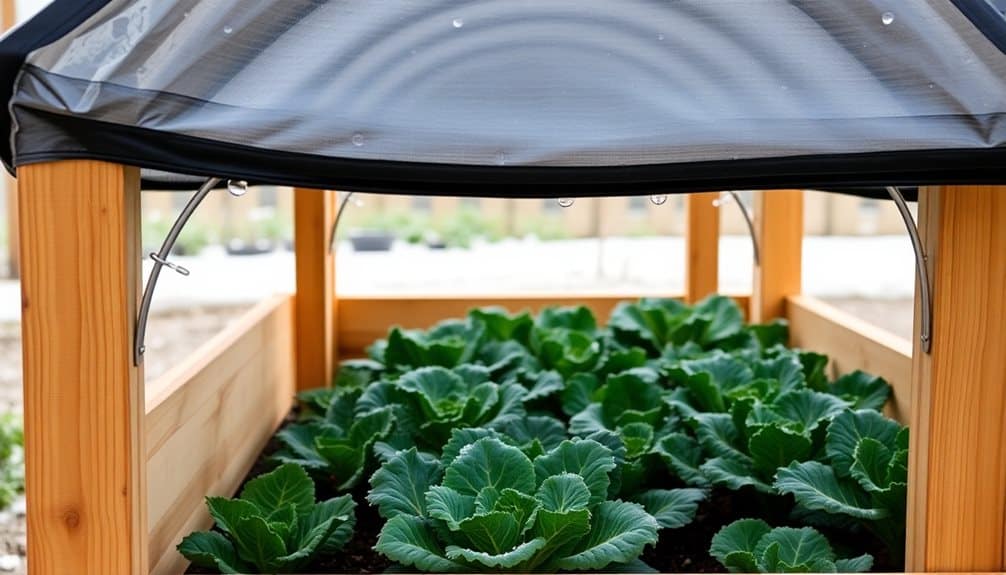
- Cold frames and hoop houses create mini-greenhouses over your raised beds, offering substantial temperature control and frost protection
- Thermal mass elements like water-filled containers or dark-colored stones absorb heat during the day and release it at night, stabilizing temperatures
You’ll need to monitor temperatures carefully under these protection systems, especially on sunny days when heat can build up quickly. Open vents or remove covers during peak warmth to prevent overheating. For ideal results, combine multiple extension methods and adjust them according to your specific climate and crop needs. Remember to secure all materials firmly to prevent wind damage, and maintain proper airflow to discourage fungal diseases.
Frequently Asked Questions
How Long Does a Typical Wooden Raised Bed Last Before Needing Replacement?
Like a trusty Nokia 3310, your wooden raised bed can last quite a while with proper care. You’ll typically get 7-10 years from cedar or redwood beds, while untreated pine might only give you 3-5 years. If you’ve sealed the wood and installed a protective barrier between soil and boards, you can extend your bed’s life by several years. Regular maintenance and good drainage are key to longevity.
Can I Use Pressure-Treated Lumber for Vegetable Garden Raised Beds?
While modern pressure-treated lumber isn’t as toxic as older versions, you’ll want to avoid it for vegetable gardens. The chemicals used to treat the wood can leach into your soil over time, potentially affecting your food crops. Instead, opt for naturally rot-resistant woods like cedar, redwood, or cypress. If you’re concerned about cost, you can line standard untreated lumber with heavy-duty plastic to extend its life.
Should I Line the Bottom of Raised Beds With Hardware Cloth?
You’d think those cute garden moles would be your friends, but they’re secretly plotting to destroy your garden from below! That’s why hardware cloth is absolutely worth installing under your raised beds. It prevents burrowing pests from decimating your plants while still allowing proper drainage. For best results, use 1/4 or 1/2-inch galvanized hardware cloth, extending it slightly up the sides to create an effective underground barrier.
What’s the Ideal Height for Raised Beds if I Have Back Problems?
If you have back problems, you’ll want your raised beds to be 28-30 inches tall, which minimizes bending and strain. This height lets you garden while standing or sitting on a stool comfortably. You can also consider beds up to 36 inches high if you’re taller or have more severe mobility issues. Don’t go lower than 24 inches, as you’ll lose the ergonomic benefits for your back.
Can I Install Automatic Irrigation Systems in Raised Garden Beds?
You’re in luck when it comes to irrigating raised beds! You can easily install drip lines, soaker hoses, or micro-sprinkler systems. Drip irrigation works best as it delivers water directly to plant roots, reducing water waste and preventing leaf diseases. You’ll need to connect your system to a water source, install a timer for automation, and position the lines to guarantee even coverage across your bed’s soil surface.