This website contains affiliate links. Some products are gifted by the brand to test. As an Amazon Associate, I earn from qualifying purchases. The content on this website was created with the help of AI.
Transform your balcony into a cozy retreat with these weekend-friendly DIY projects. You’ll maximize vertical space with a herb garden using cedar planks and waterproof fabric, or create instant ambiance with a string light canopy mounted on guide wires. Install a fold-down murphy bar for entertaining, or build custom corner seating with hidden storage. Paint concrete floors with mandala designs, hang bamboo privacy screens, or construct a pallet coffee table for functionality. Add rain chain planters for greenery and rolling storage benches for versatility. These practical solutions will help you craft your perfect outdoor oasis, with each project offering unique ways to enhance your space.
Key Takeaways
- Install a vertical herb garden with fabric pockets on cedar planks to maximize space and grow fresh herbs year-round.
- Create a fold-down murphy bar using weather-resistant wood and mounting brackets for an instant entertaining space.
- Transform a wooden pallet into a mobile coffee table by adding casters and a smooth top surface.
- Set up string lights with guide wire between eye hooks to create an ambient evening atmosphere.
- Build rolling storage benches with weather-resistant wood and locking casters for dual-purpose seating and organization.
Build a Fold-Down Murphy Bar

On a small balcony, a fold-down Murphy bar provides the perfect space-saving solution for entertaining while maximizing your limited square footage. This wall-mounted design folds flat when not in use and drops down to create an instant serving surface for drinks and snacks.
To build your Murphy bar, you’ll need a piece of weather-resistant wood for the tabletop (24″ x 18″ recommended), two sturdy hinges, mounting brackets, wood screws, wall anchors, and basic tools. Start by determining the ideal height for your bar – typically 42 inches from the floor. Install wall anchors at the marked locations, then attach your mounting brackets securely.
Connect the hinges to your wooden top piece, ensuring they’re properly aligned for smooth operation. Mount the hinged top to your brackets, adding a chain or cable on each side to support the bar when lowered. Consider adding a simple locking mechanism to keep it secure when folded up.
For added functionality, install a small shelf underneath to store glasses or bottles when the bar is lowered. Apply several coats of exterior-grade sealant to protect your bar from weather damage and extend its lifespan.
Similar to garage tool racks, ensure your mounting brackets can handle a weight capacity of at least 150 pounds for safety and stability.
Create a Vertical Herb Garden
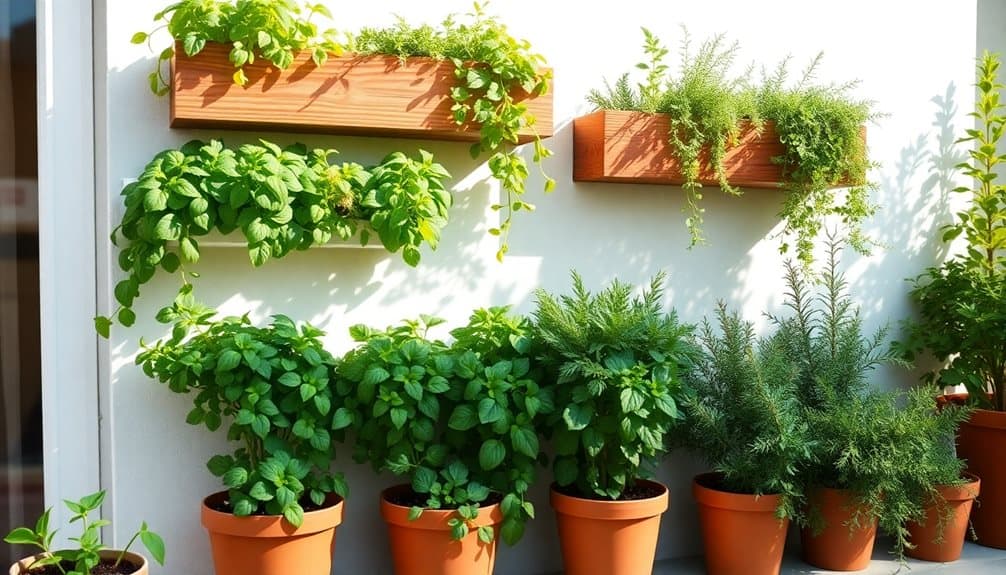
Transforming your balcony’s vertical space into a fresh herb garden offers both practical and aesthetic benefits while preserving valuable floor area. You’ll need sturdy mounting brackets, cedar planks, waterproof fabric, potting soil, and your choice of herb seedlings to get started.
Begin by securing mounting brackets to your balcony wall, making certain they’re anchored into studs for proper support. Create planting pockets by stapling waterproof fabric to cedar planks, folding and stitching to form individual compartments. Space these pockets 8 inches apart to allow room for growth. Attach the completed panels to your mounting brackets, making sure they’re level.
Fill each pocket with well-draining potting soil, and plant your herbs according to their sunlight needs. Basil, mint, and parsley work well in upper pockets that receive full sun, while shade-tolerant herbs like thyme and oregano can thrive in lower positions. Install a simple drip irrigation system using plastic tubing and adjustable drippers to guarantee consistent watering. Add a timer to automate the process.
Remember to harvest regularly to promote bushier growth and pinch off any flower buds to maintain flavor. Fertilize monthly with diluted liquid fertilizer to sustain healthy production. A hydroponic setup can increase your herb growth rate by up to 300% compared to traditional soil methods.
Install String Light Canopy
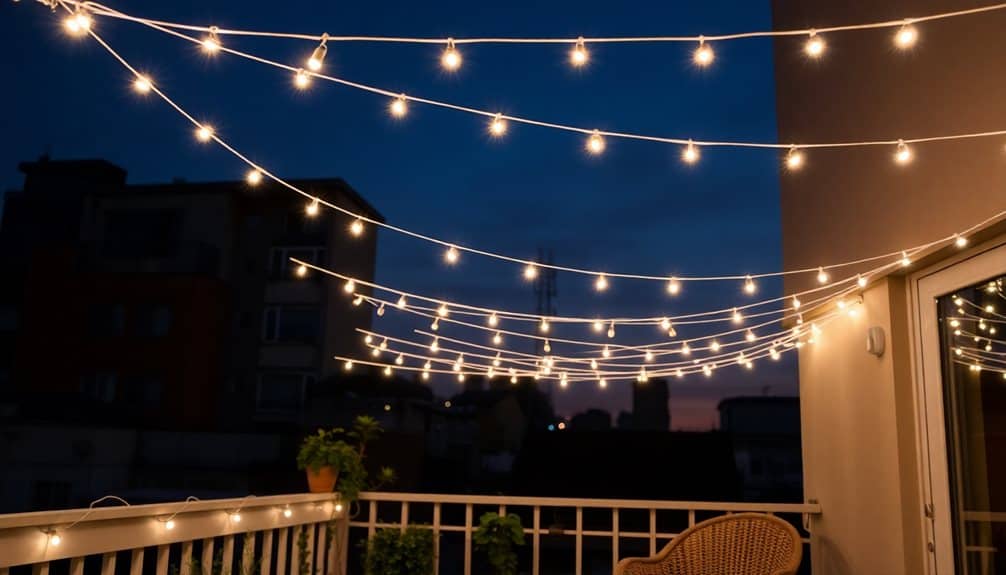
A string light canopy creates an enchanting overhead display while providing gentle illumination for evening relaxation. You’ll need outdoor-rated LED string lights, eye hooks, a guide wire or strong cord, and basic tools to transform your balcony’s ceiling space into a cozy retreat.
Start by measuring your balcony and planning the light pattern you want. Install eye hooks into your building’s exterior wall or ceiling, spacing them about 2-3 feet apart. If you’re renting, use heavy-duty adhesive hooks rated for outdoor use. String your guide wire through the hooks, pulling it taut and securing each end.
Attach your LED lights to the guide wire using zip ties or light clips, creating even swoops between attachment points. Don’t pull the lights too tight – leave some slack for wind movement and temperature changes. If you’re covering a large area, weave multiple strands in a parallel pattern. Secure any loose cords along walls with cord clips.
For power, run your lights to a weatherproof outdoor outlet or use battery-operated lights. Add a timer or smart plug to automate your lighting schedule and conserve energy. Similar to installing a wall-mounted towel rack, this DIY project typically takes around 10 minutes to complete once you have all your materials ready.
Paint a Floor Mandala
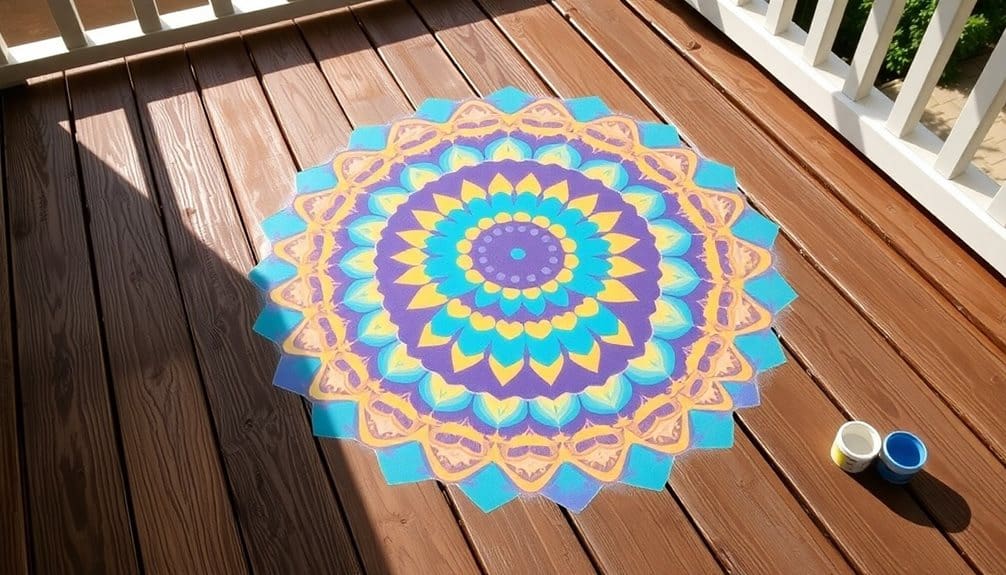
While string lights beautify your balcony from above, your floor space offers another canvas for artistic expression. A painted mandala can transform a dull concrete or wooden floor into a stunning focal point that adds personality to your outdoor space.
Start by thoroughly cleaning your balcony floor and letting it dry completely. Use chalk to sketch your mandala design, starting from the center point and working outward in concentric circles. You’ll need exterior-grade paint that’s suitable for your floor’s material, along with various brush sizes for different details.
Begin painting from the center, using your largest elements first. Work with one color at a time to maintain consistency and prevent smudging. For precise lines, use painter’s tape to create clean edges and geometric shapes. Consider using complementary colors that match your existing outdoor decor.
Apply a clear, weather-resistant sealant once the paint has fully dried to protect your artwork from foot traffic and weather exposure. This protective layer will help your mandala last through multiple seasons while maintaining its vibrancy. Reapply the sealant annually to preserve the design’s longevity. Just like powder-coated steel provides lasting protection against moisture and UV damage in greenhouse settings, proper sealing will ensure your mandala withstands outdoor elements.
Construct Wooden Privacy Screens
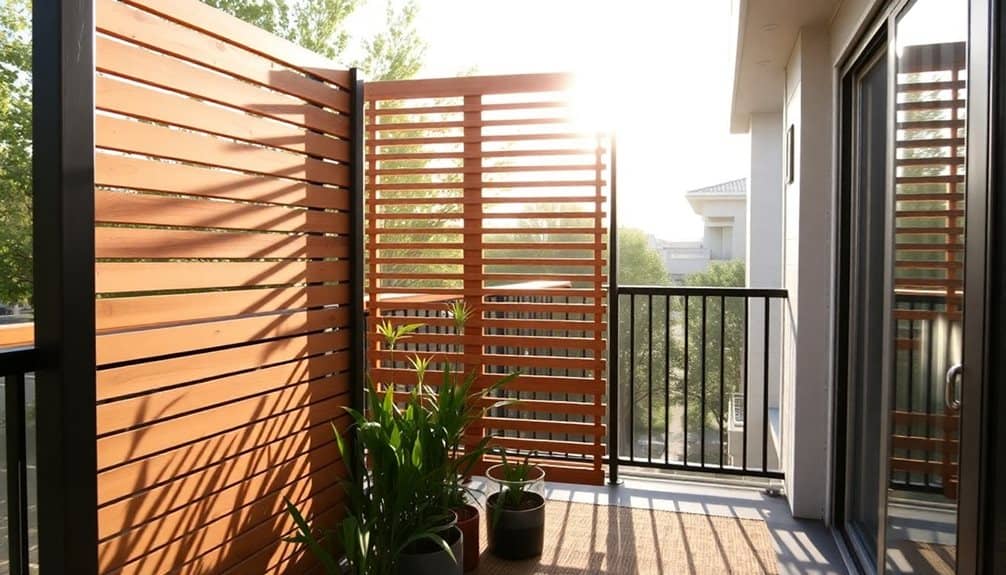
Creating your own wooden privacy screens offers an elegant solution for shielded outdoor living on your balcony. You’ll need pressure-treated lumber, weather-resistant screws, and appropriate tools to construct screens that’ll withstand outdoor conditions. Start by measuring your balcony’s dimensions and planning your screen’s height to guarantee proper coverage without violating building codes.
To build your privacy screens effectively, follow these key steps:
- Cut your vertical posts and horizontal supports to size, then sand all edges smooth. Space the horizontal supports 24 inches apart to create a sturdy frame that’ll support your screening material.
- Assemble the frame using galvanized corner brackets and weather-resistant screws, confirming everything’s level and square. Pre-drill holes to prevent wood splitting.
- Attach your chosen screening material – whether it’s cedar planks, lattice panels, or bamboo – to the frame using appropriate fasteners. Space elements consistently for a professional look.
Once assembled, seal all wood surfaces with exterior-grade protectant. You can mount your screens using heavy-duty brackets attached to your balcony railing or floor, confirming they’re secure against wind loads and weather conditions. For optimal durability in outdoor conditions, ensure your privacy screen can withstand 50 mph winds like professional greenhouse structures.
Make Hanging Planter Boxes
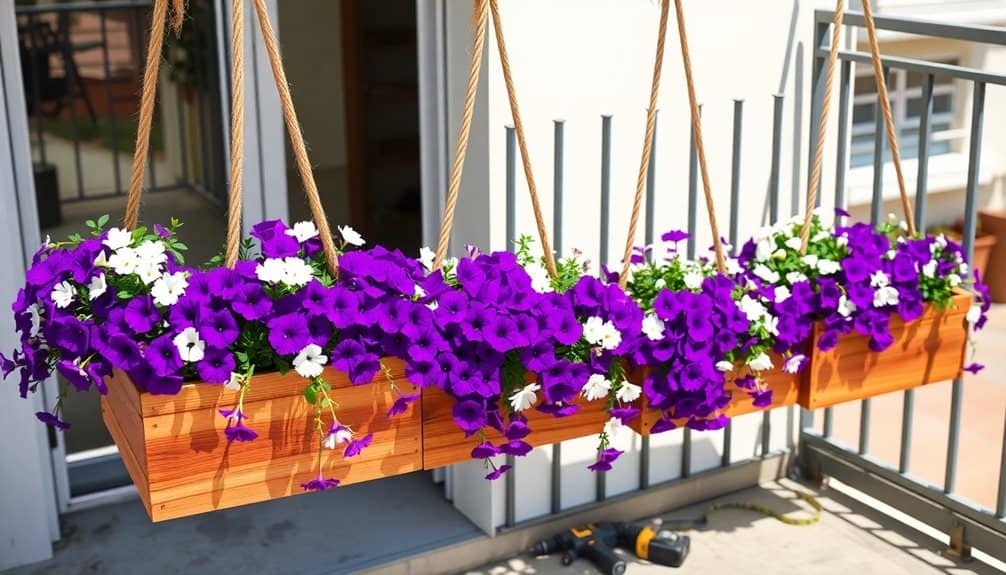
Beyond privacy screens, hanging planter boxes offer a smart way to maximize your balcony’s growing space without sacrificing floor area. You’ll need pressure-treated lumber, galvanized screws, mounting brackets, and a drill to create sturdy boxes that withstand outdoor conditions. Start by cutting the wood to size: 24 inches for the front and back pieces, 8 inches for the sides, and 22 inches for the base boards.
Assemble the box by pre-drilling holes and connecting the sides first, then attach the front and back panels. Add drainage holes every 6 inches along the base boards before securing them. Line the completed box with landscape fabric to prevent soil erosion while allowing water drainage. Install mounting brackets on your railing or wall, verifying they’re properly anchored and level.
For peak plant growth, fill your boxes with lightweight potting mix and choose plants based on your balcony’s sun exposure. Install a drip irrigation system by running thin tubing along the railing to each box, connecting to a timer-controlled spigot. This setup guarantees consistent watering while saving you time and effort in maintaining your vertical garden.
Design Built-In Corner Seating

A custom corner bench transforms your balcony into a cozy outdoor living space while maximizing every square inch. By building L-shaped seating that fits snugly against your balcony rails, you’ll create a permanent fixture that doesn’t take up precious floor space like standalone furniture.
Start by measuring your corner space and sketching a simple design. You’ll need weather-resistant lumber, deck screws, a saw, drill, and weatherproof cushions. Build the frame using 2x4s anchored securely to your balcony floor, ensuring proper drainage underneath. Add support brackets every 16 inches and construct the seat platform with 1×6 deck boards, leaving ¼-inch gaps between boards.
- Frame dimensions: 18 inches deep for seat depth, 18 inches high for seat height, and 12 inches high for backrest angle
- Materials needed: Pressure-treated lumber, galvanized screws, corner brackets, wood sealer, and weather-resistant fabric for cushions
- Safety features: Anti-slip rubber feet, proper drainage holes, and secure attachment points to balcony structure
Consider adding hinged seat tops to create hidden storage space underneath for outdoor essentials. Apply multiple coats of exterior-grade sealer to protect your bench from weather damage.
Craft Macramé Plant Holders
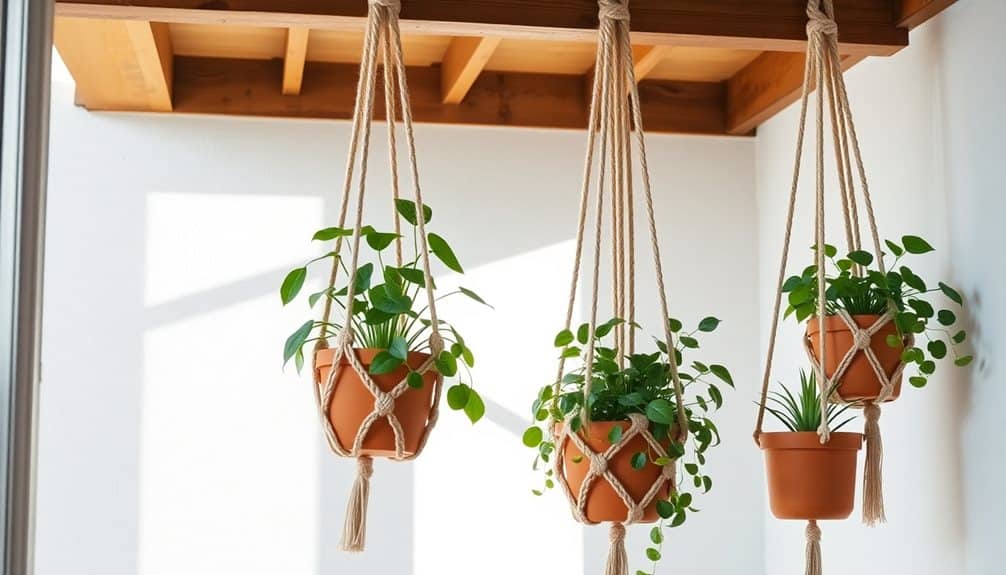
While your corner seating provides the perfect spot to relax, hanging plants can add natural beauty above it. Macramé plant holders offer an affordable, customizable solution for displaying your greenery without drilling holes in your balcony ceiling. You’ll need cotton rope, scissors, measuring tape, and a metal ring to get started.
Begin by cutting eight pieces of rope, each measuring 8 feet long. Fold these pieces in half and attach them to your metal ring using larks head knots. Create square knots in alternating rows, working your way down to form a diamond pattern. As you progress, maintain even tension to guarantee your holder hangs symmetrically. Leave about 12 inches of space between knots to accommodate your plant pot.
For the basket portion, separate your ropes into four sections and create square knots to form a net-like structure. Finish with a gathering knot about 6 inches below where your pot will sit. Test the holder’s strength with an empty pot before adding your plant. Once secure, you can adjust the length by trimming excess rope and adding decorative beads or tassels at the bottom.
Build Rolling Storage Benches
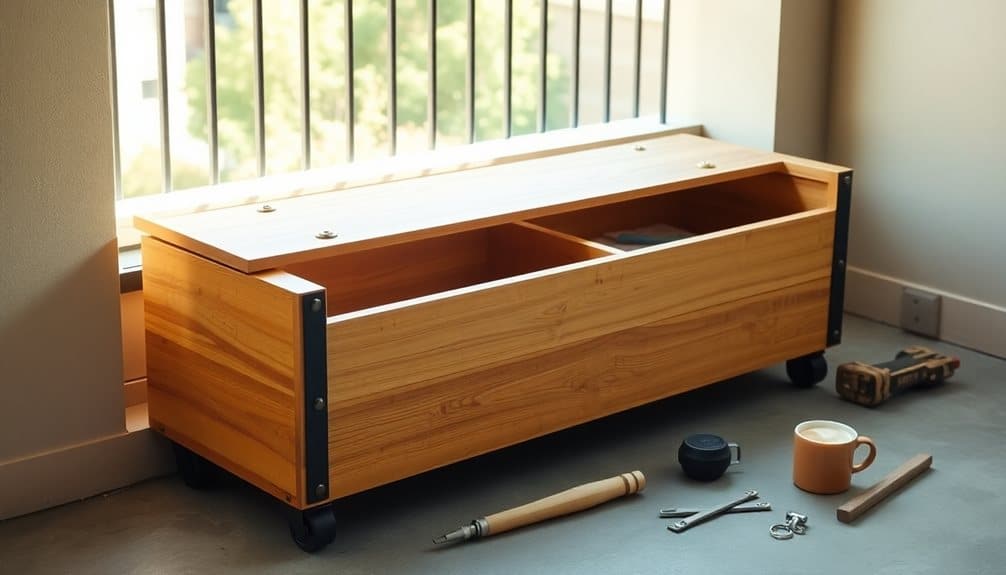
Inside your balcony’s limited space, rolling storage benches serve double duty as seating and smart storage solutions. You’ll need weather-resistant wood, heavy-duty casters, waterproof hinges, and exterior screws to create these versatile pieces. Start by building a basic rectangular frame using 2x4s, then attach plywood panels to form the box structure. Install the hinged lid, ensuring it opens smoothly and stays level when closed.
- Choose 3-inch locking casters to prevent unwanted movement, mounting them securely at each corner using reinforced metal plates
- Line the interior with cedar planks or moisture-resistant material to protect stored items from humidity and weather damage
- Add weather stripping around the lid’s edges to create a waterproof seal that keeps your belongings dry
For lasting durability, seal all wood surfaces with exterior-grade polyurethane. Make the bench comfortable by topping it with outdoor cushions that you can easily remove during rain. Standard dimensions of 18 inches high, 16 inches deep, and 36 inches wide work well for most balconies, but you can adjust these measurements to fit your specific space requirements.
Install Bamboo Reed Fencing
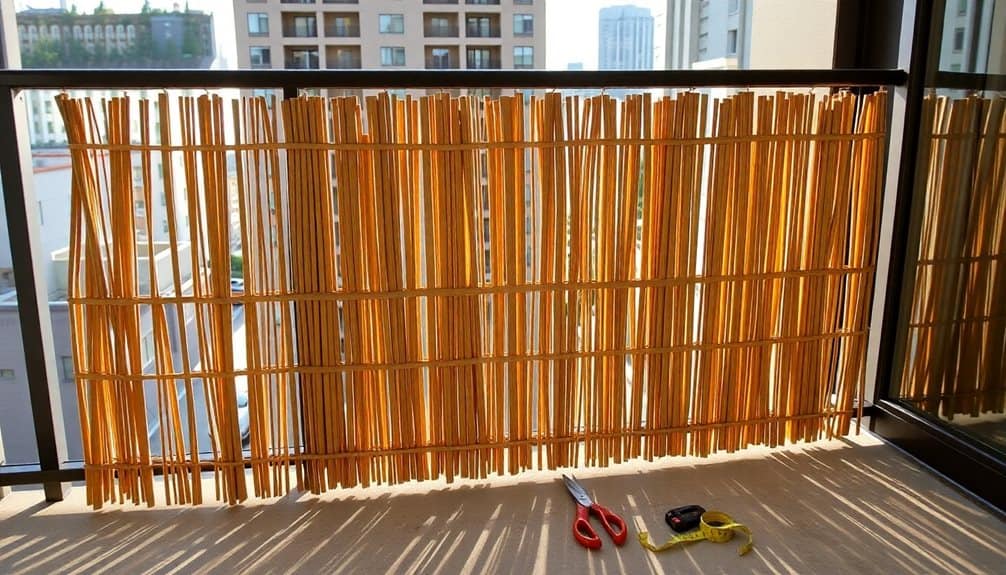
Creating privacy on your balcony becomes effortless with bamboo reed fencing, which offers both natural beauty and effective screening. This lightweight, natural material installs quickly and won’t overload your balcony’s weight restrictions. You’ll need bamboo reed rolls, UV-resistant zip ties, scissors, and a measuring tape to complete this project.
Start by measuring your balcony’s railing length and height to determine how much fencing you’ll need. Remember to account for overlap at connection points. Unroll the bamboo fencing and trim it to size, leaving an extra inch on each end. Secure the top of the fencing to your railing with zip ties every 6-8 inches, pulling them snug but not too tight to avoid damaging the reeds.
Work your way down, attaching ties at the middle and bottom sections. For extra stability in windy conditions, weave thin gauge wire horizontally through the reeds at key points. Don’t forget to trim excess zip tie lengths once you’re finished. This natural screen will last 3-5 years with proper maintenance, which includes spraying it yearly with a UV-protective sealant and checking tie points regularly.
Create Terracotta Pot Tower
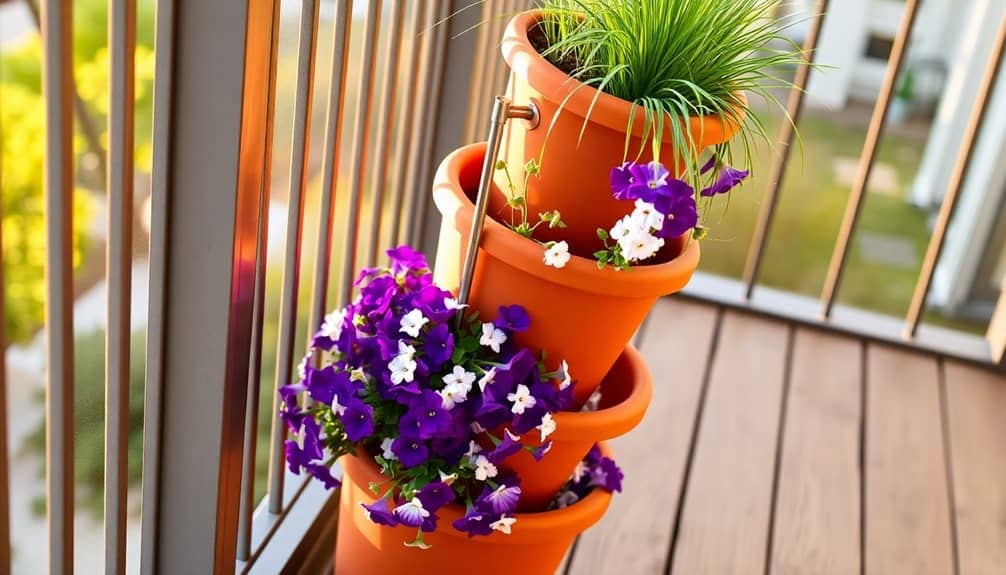
After beautifying your balcony’s perimeter, you can maximize vertical growing space with a striking terracotta pot tower. This space-saving solution lets you grow multiple plants while creating an eye-catching focal point. You’ll need a selection of graduated terracotta pots (each smaller than the last), a sturdy metal rod, and potting soil.
Start by selecting a stable location for your tower. Thread your largest pot onto the metal rod through its drainage hole, securing it firmly at the base. Fill this pot one-third full with soil, then angle the next smaller pot at 45 degrees, threading it onto the rod. Continue this pattern with progressively smaller pots, each tilted to create a spiral effect.
- Choose plants that cascade for the tilted pots (like trailing petunias or ivy)
- Plant drought-resistant succulents in the top pot for low maintenance
- Position herbs in middle sections for easy harvesting
Once assembled, water each pot thoroughly and check the tower’s stability. Add mulch to help retain moisture, as terracotta naturally wicks water away. Monitor the soil moisture daily during the first week, adjusting your watering schedule based on your climate and plant needs.
Paint Concrete Floor Tiles

Your bland concrete balcony floor can transform into a stunning visual feature with painted tile designs. This project requires thorough preparation, proper paint selection, and careful execution to guarantee lasting results.
Start by cleaning the concrete surface thoroughly with a pressure washer or scrub brush to remove dirt, debris, and loose material. Once dry, repair any cracks or damage with concrete filler. Apply a concrete primer and let it cure completely. Choose exterior-grade concrete floor paint that’s specifically formulated for outdoor use and UV resistance.
Create your tile pattern using painter’s tape to mark out clean lines and geometric shapes. You’ll need a base coat color and 1-2 accent colors for the design. Apply thin, even coats using a roller for large areas and detail brushes for edges. Let each coat dry completely before adding the next layer. Remove the tape while the final coat is still slightly wet to prevent peeling.
Finish with two coats of clear, weather-resistant sealer to protect your design from foot traffic and elements. Allow 48 hours of dry time before placing furniture back on the surface.
Build Pallet Coffee Table

Looking for an eco-friendly and budget-conscious way to add seating to your balcony? A pallet coffee table offers the perfect solution, combining rustic charm with practical functionality. You’ll need a wooden pallet, sandpaper, wood stain or paint, screws, and basic tools to complete this project in just a few hours.
Start by thoroughly cleaning your pallet and removing any loose nails or splinters. Sand all surfaces until smooth, paying special attention to the edges where you’ll rest drinks or lean on the table. If you’re planning to use it outdoors, apply a weather-resistant wood stain or exterior paint to protect it from the elements.
- To create a stable base, reinforce the bottom of your pallet by adding support blocks at each corner
- Install casters on the bottom for easy mobility, ensuring they’re rated for outdoor use and can handle the weight
- Add a piece of tempered glass or weather-resistant plywood on top to create a smooth surface for drinks and decor
For added functionality, consider incorporating storage space between the pallet slats for magazines or outdoor cushions. Seal all wood surfaces with a clear waterproof coating for lasting protection against rain and humidity.
Hang Canvas Shade Sails

Balcony comfort extends beyond furniture to the importance of shade coverage. Canvas shade sails offer a stylish, adaptable solution that you can install in just a few hours. These triangular or rectangular fabric panels create instant protection from harsh sunlight while adding architectural interest to your outdoor space.
Start by measuring your balcony’s dimensions and identifying strong anchor points. You’ll need at least three secure mounting points for triangular sails or four for rectangular ones. Install heavy-duty mounting brackets into solid surfaces like concrete walls or sturdy posts, using appropriate anchors rated for outdoor use. Space the mounting points so your sail will maintain proper tension when installed.
Choose a weather-resistant canvas sail with reinforced corners and UV protection. You’ll want to position it at a slight angle to allow rainwater runoff. Install turnbuckles at each mounting point to adjust tension easily. Thread steel cables through the sail’s edge loops and secure them to the turnbuckles. Adjust the tension until the sail is taut but not overstretched, checking that water won’t pool in any areas. During severe weather, you can quickly remove the sail by loosening the turnbuckles.
Design Rain Chain Planters
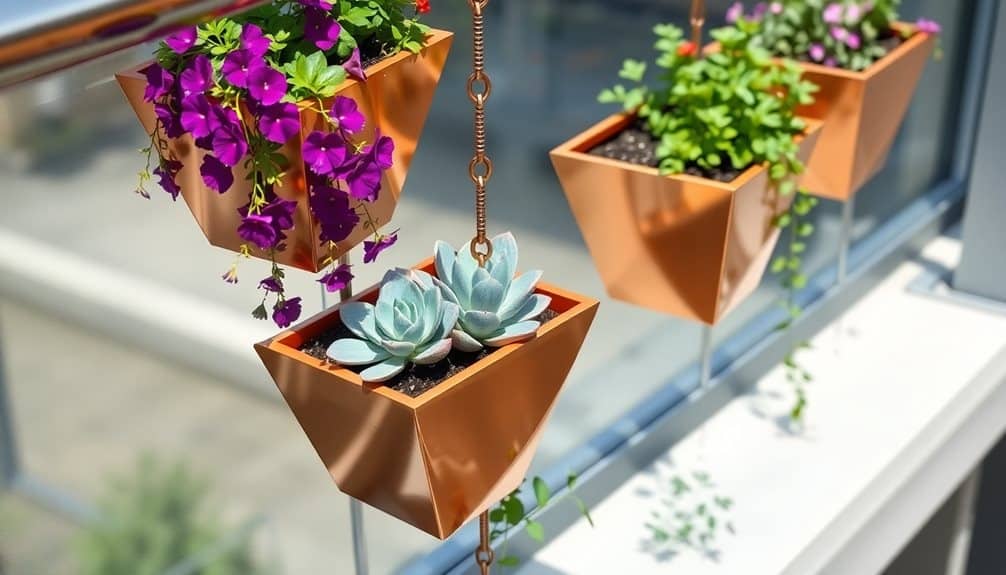
Transforming ordinary rain gutters into cascading vertical gardens, rain chain planters offer an elegant solution for managing water runoff while maximizing growing space. You’ll need copper chains, small metal planters, and basic hardware to create this eye-catching feature. The planters connect directly to your balcony’s drainage system, allowing excess water to flow from one container to the next.
Start by measuring your balcony’s height and determining how many planters you’ll need. Each planter should have drainage holes drilled in specific spots to guarantee proper water flow. Connect the planters to the chain using sturdy S-hooks or carabiners, spacing them about 12 inches apart for ideal plant growth.
- Select plants that thrive in varying moisture levels – place drought-tolerant varieties at the top and water-loving plants at the bottom
- Install anchors in your balcony’s ceiling and floor that can support at least 50 pounds of weight when fully planted and watered
- Add small river rocks at the bottom of each planter to improve drainage and prevent soil from washing away during heavy rains
You’ll find this project not only manages water effectively but also creates a stunning vertical garden that maximizes your limited balcony space.
Frequently Asked Questions
Do I Need Permission From My Landlord for Balcony DIY Projects?
Like walking on thin ice, making changes to a rental property requires careful steps. You’ll need to check your lease agreement and get written permission from your landlord before starting any balcony DIY projects. Even small modifications like hanging planters or installing temporary flooring can affect the building’s structure and safety. If you proceed without approval, you risk losing your security deposit or facing eviction.
What Weight Can My Balcony Safely Support for DIY Installations?
You’ll need to confirm your balcony’s specific load capacity with your building manager or a structural engineer, as limits vary considerably between structures. Most residential balconies can support 40-60 pounds per square foot, but older buildings may have lower limits. When planning installations, factor in both the dead load (permanent fixtures) and live load (people, furniture). Never exceed 75% of the stated maximum capacity for safety.
How Do I Protect Balcony DIY Projects From Extreme Weather Conditions?
Did you know that outdoor furniture can experience up to 73% more wear from UV exposure compared to indoor pieces? To protect your balcony projects, you’ll need to apply weather-resistant sealants or varnishes specific to your materials. Use rust-resistant hardware, choose weather-resistant fabrics, and install proper drainage solutions. During extreme weather, secure loose items and consider removable covers or temporary storage for sensitive installations.
Which Tools Should Beginners Have for Basic Balcony DIY Projects?
You’ll need a basic set of tools including a cordless drill with various bits, hammer, tape measure, level, screwdrivers (flathead and Phillips), pliers, and a utility knife. Don’t forget safety gear like work gloves and protective eyewear. Add a putty knife, paintbrushes, and sandpaper for surface preparation. Keep a pencil and square ruler handy for marking measurements and making clean cuts.
Are There Specific Building Codes or Regulations for Balcony Modifications?
Better safe than sorry when it comes to balcony modifications. You’ll need to check your local building codes, as regulations vary by location. Most areas require permits for structural changes, have specific load-bearing requirements, and mandate railing heights (typically 42 inches). Contact your building department, HOA, or landlord before starting any work. They’ll guide you through permitted modifications and safety standards.


